Posted on

Ready to Inoculate Supplies for Better Grows

Ready to Inoculate Supplies for Better Grows

A great grow can be decided before the first culture ever touches a jar. Fresh, clean, correctly stored ready to inoculate supplies remove much of the prep work that slows down home cultivators, leaving more time to focus on species selection, fruiting conditions, and harvest timing.

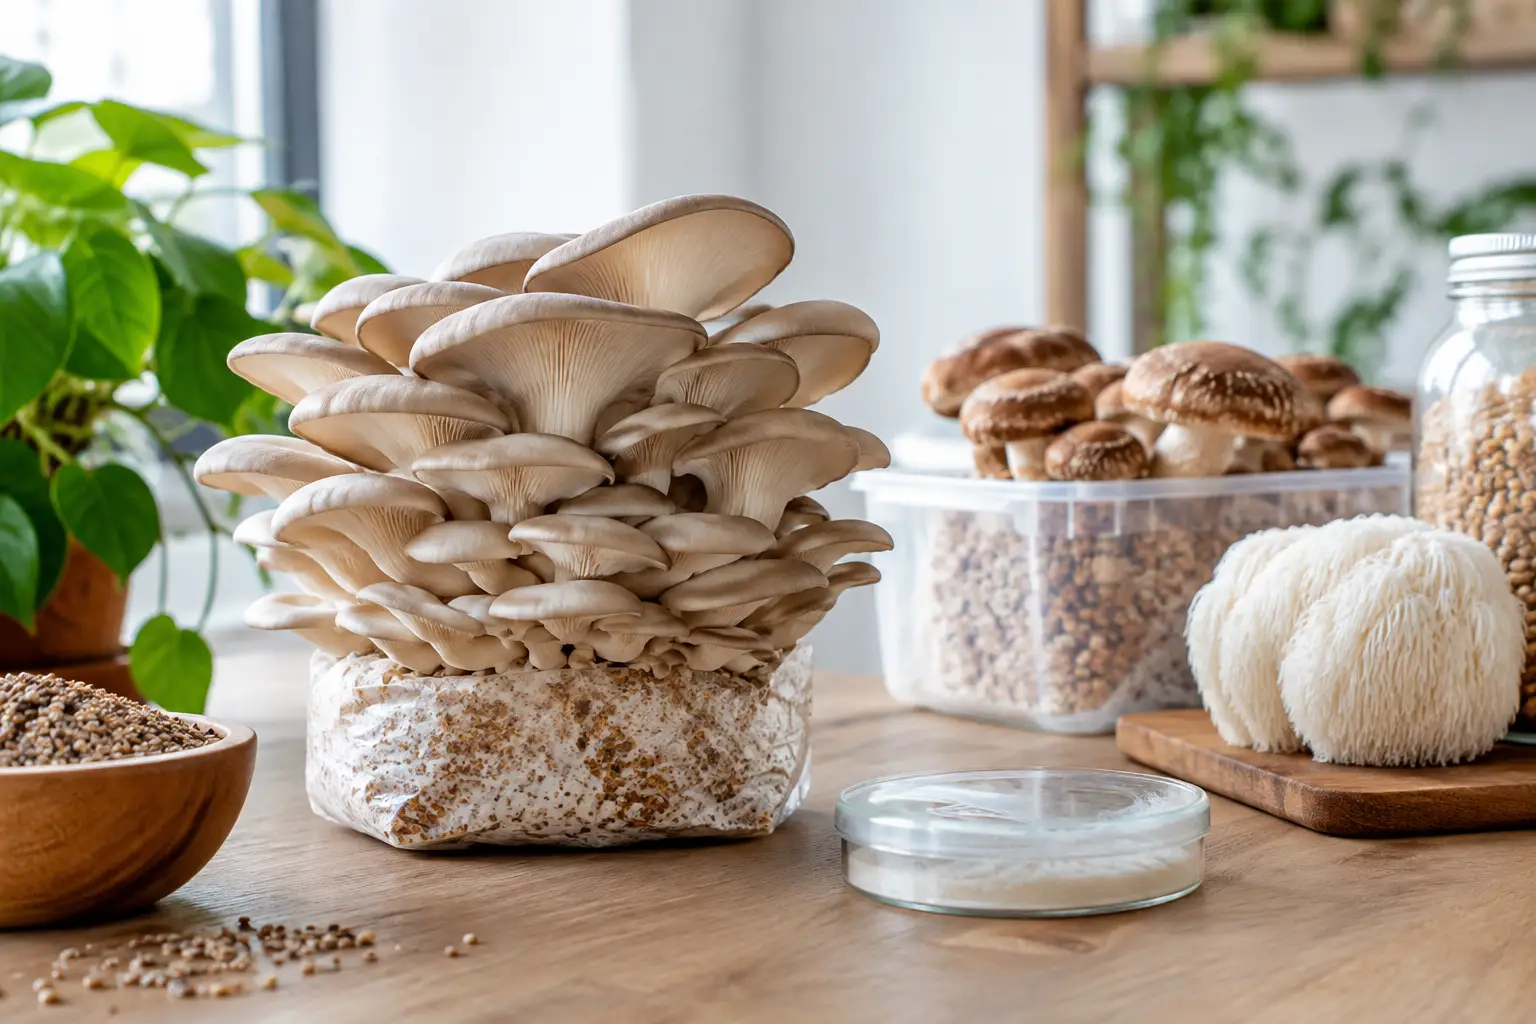
For gourmet growers, that convenience matters. Whether you are working with oyster, lion’s mane, shiitake, chestnut, or another edible favorite, the right pre-prepared format can make a small project feel manageable instead of turning it into a full lab day. The key is choosing a supply that matches your experience level, available space, and actual cultivation goal.

What Ready to Inoculate Supplies Actually Include

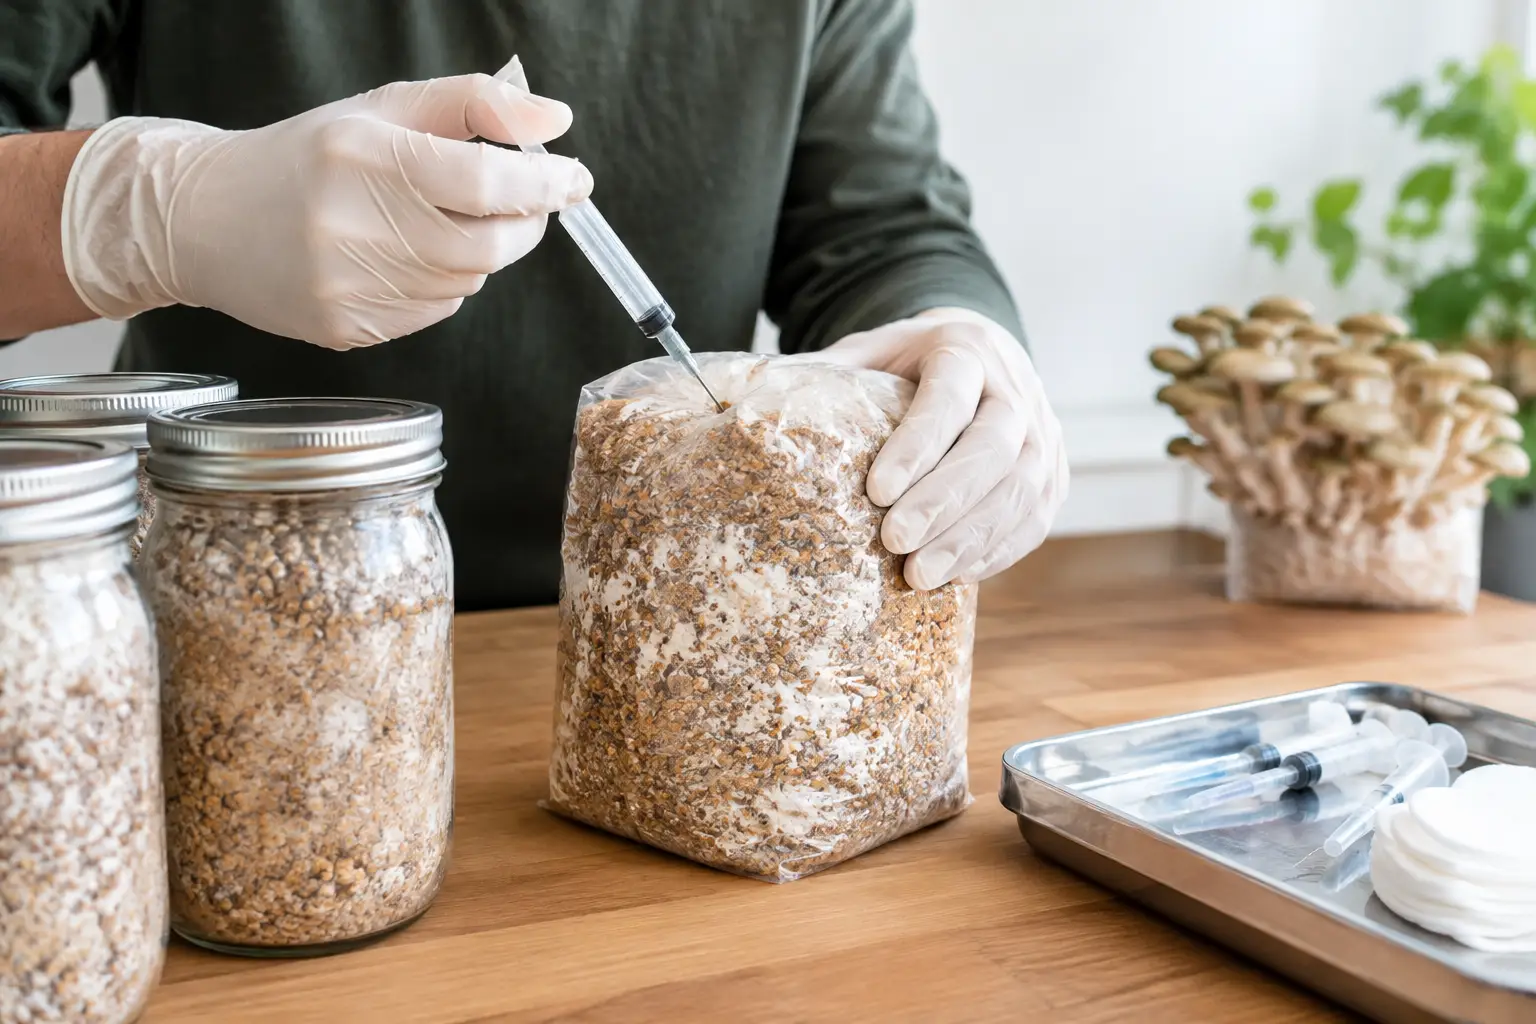
Ready-to-inoculate products are prepared growing media or containers designed to receive a compatible culture without requiring you to mix, hydrate, sterilize, and package every ingredient yourself. Depending on the product, that may mean a sterilized grain bag, an all-in-one bag, a supplemented hardwood block, or a jar filled with prepared grain.

The shared benefit is controlled preparation. The substrate has been hydrated and processed for cultivation, then sealed with an inoculation port or filter patch that supports gas exchange while helping keep outside contaminants out. Instead of building the foundation from scratch, you begin at the point where clean technique and culture selection matter most.

This does not mean every format is interchangeable. Grain is primarily used to expand mycelium before it is moved into a bulk substrate. A hardwood block is often a more direct match for wood-loving gourmet species. An all-in-one bag combines grain and bulk material in one container, which can reduce handling for growers who want a simpler route from inoculation to fruiting.

Choose the Format That Fits Your Grow

The best ready-to-inoculate option depends less on what looks easiest and more on what you want to grow, how much you want to handle the material, and how much room you have for incubation and fruiting.

Sterilized Grain Bags and Jars

Grain bags and jars are a strong choice when you want flexibility. They let a culture expand through a nutritious grain base before you use that colonized grain to inoculate a larger fruiting substrate. This workflow gives growers more volume and more control over what comes next.

That flexibility comes with an extra transfer step. You will need clean conditions when moving colonized grain into a bulk substrate, and you need to plan for separate incubation and fruiting containers. For growers who enjoy dialing in each stage, grain is often worth the added involvement.

All-in-One Grow Bags

All-in-one bags are built for simplicity. They contain both a nutrient-rich grain portion and a bulk substrate portion, allowing the culture to establish itself in one sealed unit. Once colonization is established, the material can be mixed within the bag and left to continue developing.

This format is especially useful for limited-space growers and anyone who wants fewer open-air transfers. The trade-off is that you have less control over the substrate recipe and fewer opportunities to expand the culture into multiple projects. It is convenience first, not necessarily maximum output.

Hardwood and Specialty Fruiting Blocks

Prepared hardwood blocks are a natural fit for species that thrive on wood-based materials. They offer a focused path for growers who already know their culture and want a substrate that aligns with its preferred food source.

These blocks can be highly productive when the species and conditions match, but they are not a one-size-fits-all option. Before choosing one, check that the culture is compatible with the substrate and that you can provide the humidity, fresh air, and temperature the species needs once it reaches the fruiting stage.

Match Your Culture to the Substrate

A ready-to-inoculate bag only performs as well as the match between its contents and the culture you introduce. Oyster mushrooms are famously adaptable, but even adaptable species respond differently to grain, hardwood, straw-based blends, and supplemented sawdust. Lion’s mane and shiitake, for example, are commonly associated with hardwood-forward substrates.

Start with the culture’s preferred nutrition source, then choose the format that supports your goal. If you want to build spawn for several bags or tubs, prepared grain makes sense. If you want to inoculate one contained project with minimal handling, an all-in-one bag may be the better call. If your goal is a clean, species-specific fruiting project, a prepared block can keep the process direct.

It also pays to think about timing. Some cultures colonize aggressively, while others take a more patient pace. A faster species may be forgiving in a beginner setup, but it still needs appropriate temperatures and clean handling. Convenience products reduce preparation work. They do not replace the biological needs of the culture.

Freshness, Storage, and Shipping Matter

Ready to inoculate supplies are not products to leave on a hot porch for a weekend. Heat swings, direct sunlight, punctures, and damaged filter patches can all affect the condition of the material before you even begin.

When your supplies arrive, inspect the package promptly. The bag should be sealed, the filter patch should be intact, and the contents should look consistent with the product description. Keep unopened supplies in a clean, cool, dry location away from direct light. Avoid crushing bags under heavier items or storing them where temperatures fluctuate sharply.

Use supplies within the seller’s recommended window whenever possible. A prepared substrate is not improved by sitting around indefinitely. Ordering when you are ready to work is usually smarter than stocking up months ahead, especially if your cultivation space is still being set up.

Clean Handling Still Makes the Difference

Pre-sterilized supplies lower the barrier to entry, but they do not create a sterile environment around you. Your preparation area, hands, tools, and technique still influence the outcome.

Set up on a wiped-down surface in a calm indoor space. Turn off fans, avoid open windows, and keep pets and unnecessary movement out of the area while you work. Clean the self-healing injection port before use, use fresh and appropriate equipment, and reseal or close the bag exactly as its design requires.

The goal is not to turn a home setup into a commercial laboratory. It is to reduce avoidable exposure at the most vulnerable moment. Small habits such as working methodically, handling bags gently, and not repeatedly checking or moving them during incubation can save a project from preventable setbacks.

Common Buying Mistakes to Avoid

The most common mistake is buying a ready-to-inoculate product because it is popular rather than because it suits the culture. The second is overlooking bag size. A larger bag can offer more potential yield, but it also takes longer to colonize and demands more stable conditions. Bigger is not automatically better for a first grow.

Another issue is treating all products as fruiting-ready. Grain spawn, bulk substrate, and all-in-one bags serve different roles. Read the product description closely so you know whether you are buying a medium for expansion, direct fruiting, or a hybrid option.

Finally, do not ignore your grow space. Before you order, know where the supply will incubate, where it will fruit, and how you will manage moisture and fresh air. A quality bag needs a quality plan around it.

Build a More Reliable Grow Routine

For many cultivators, ready-to-inoculate supplies are the bridge between curiosity and consistency. They make it easier to learn how a culture behaves without first troubleshooting pressure cooking, substrate hydration, and container prep all at once. Once you have repeatable results, you can decide whether you want to stay with convenient prepared formats or take on more of the process yourself.

Myceli Nation is built for that kind of progression: finding the format that fits your current setup, then expanding your options as your confidence grows. Start with a compatible culture, choose a prepared supply with a clear purpose, and give the project the calm, clean attention it deserves. The best next grow is usually the one you are fully prepared to begin.
Posted on

Filter Bag Comparison for Mushroom Growers

Filter Bag Comparison for Mushroom Growers

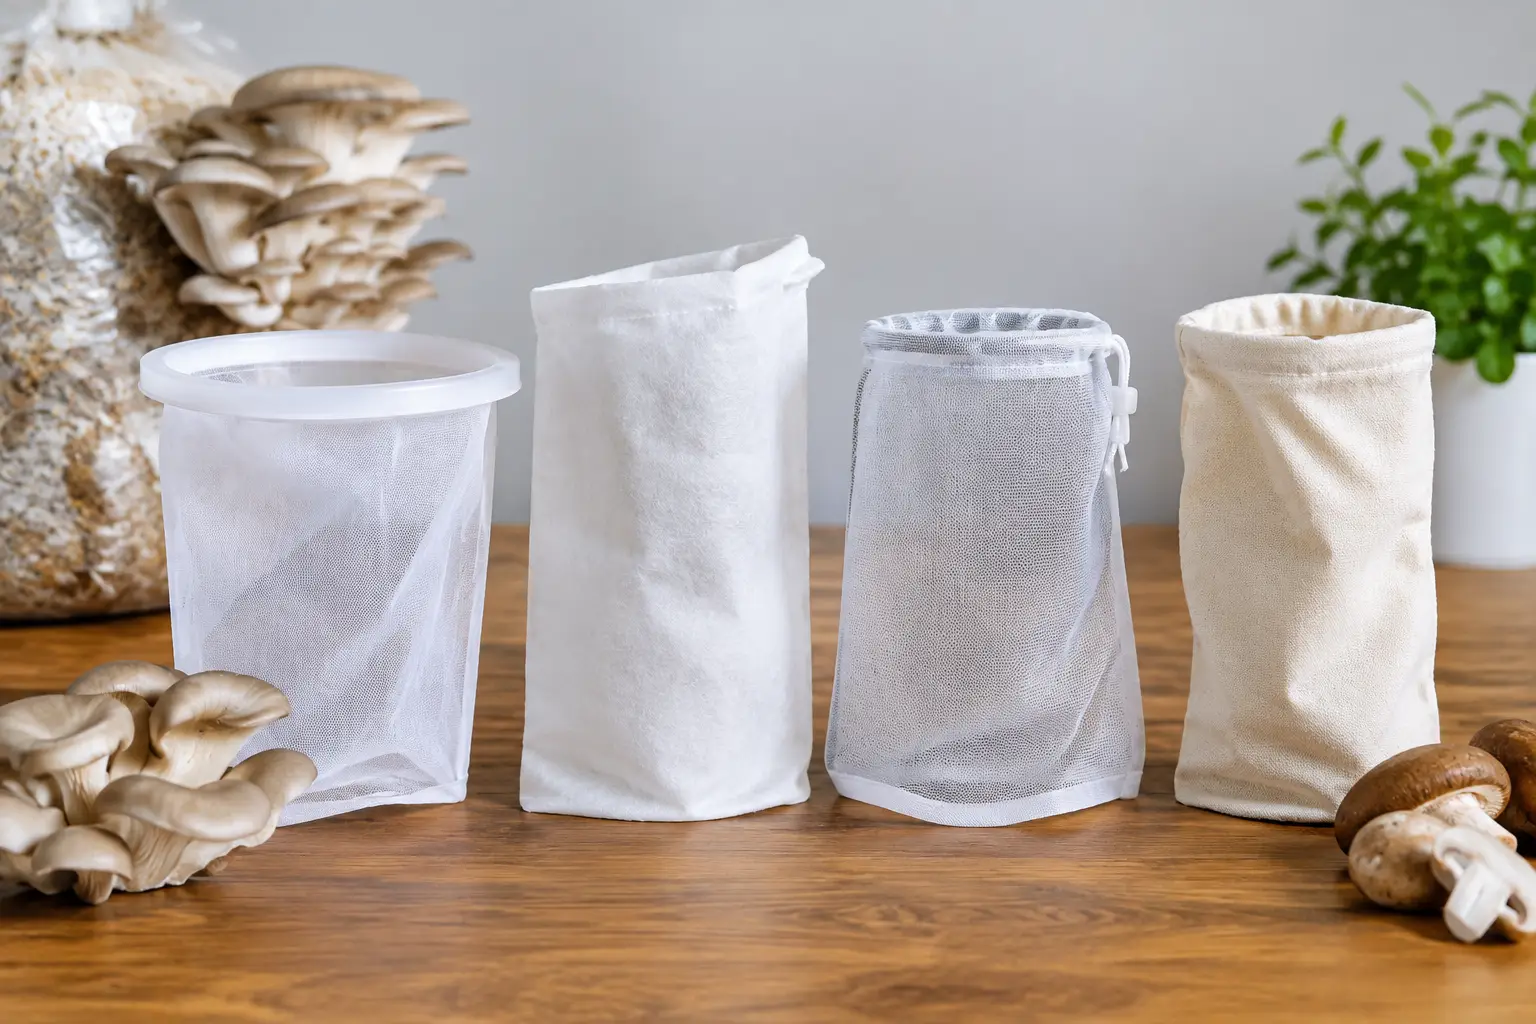
A filter bag can look like a minor supply choice until a seal fails, a block dries too fast, or your workspace becomes crowded with bags that do not fit your process. This filter bag comparison focuses on the details that actually affect mushroom cultivation: bag size, polypropylene thickness, gusset shape, filter patch rating, and how each style works with your preferred substrate.

The best bag is not automatically the biggest or the one with the finest filter. It is the bag that gives your culture enough room, holds up through sterilization, and fits the way you inoculate, incubate, and fruit your blocks. For growers building a repeatable workflow, that distinction saves substrate, shelf space, and frustration.

Filter Bag Comparison: Start With Your Substrate

Before choosing a filter patch or ordering a case of bags, decide what the bag needs to hold. A grain-based bag, a supplemented hardwood block, and a bulk straw mix place very different demands on plastic and airflow.

Smaller bags are often a practical choice for grain spawn. They are easier to shake, colonize more evenly, and fit neatly inside a pressure sterilizer. A compact bag also limits the amount of material at risk if one bag does not perform as expected. For hobby growers testing a new edible culture or dialing in a recipe, this can be a smarter move than committing every run to large blocks.

Larger bags make more sense for sawdust-based fruiting blocks and high-volume substrate mixes. They offer room for a substantial block, give you a broader surface area for fruiting, and reduce the number of individual units you need to prepare. The trade-off is physical: large bags are heavier, take longer to cool after sterilization, and require more headspace in both the sterilizer and incubation area.

Bag dimensions matter as much as stated capacity. A tall, narrow bag may fit a sterilizer well but produce an awkward block that tips on a shelf. A wide bag with side gussets can create a stable, squared-off block, though it needs more horizontal room. Measure your equipment and shelving before buying in bulk. A bag that is technically large enough for your substrate is not necessarily the best fit for your setup.

Understanding Filter Patch Ratings

The filter patch is the working part of the bag. It allows gas exchange while helping keep unwanted particles out. Filter ratings are commonly expressed in microns, and the number should be selected for the substrate and stage of cultivation rather than treated as a universal quality score.

A finer 0.2-micron filter patch is commonly favored for grain spawn and other nutrient-dense substrates where careful contamination control is a priority. It offers restricted airflow compared with a more open patch, which is often appropriate when the bag is being used mainly for colonization. For growers preparing clean, shakeable grain bags, this is usually the logical starting point.

A 0.5-micron patch allows more gas exchange and is often used for sawdust-based blocks or other bulk substrates that benefit from greater airflow during colonization and fruiting. That added exchange can support vigorous development in a dense block, especially when the bag will remain in use through the fruiting stage. It is not automatically better, however. More airflow also means the bag can lose moisture faster when environmental conditions are not managed well.

Patch size deserves attention too. A larger patch can improve exchange in bigger blocks, while a smaller patch may be fully adequate for a modest grain bag. Think of filter area as part of the total system. A large substrate block packed tightly into a bag with minimal filter area may not behave like the same formula in a bag designed for more exchange.

Bag Material and Thickness Affect Reliability

Most cultivation filter bags are made from heat-resistant polypropylene because it can tolerate high-temperature sterilization when used correctly. Still, not all bags feel or perform the same. Material thickness influences puncture resistance, seal quality, and how confidently the bag handles dense substrate.

Thinner bags can be easier to fold, load, and seal. They may work well for lighter runs and growers who want to keep supply costs down. Their downside is a lower margin for rough handling. Sharp grain, hardwood chips, rack edges, and hurried mixing can all create weak spots.

Heavier bags are better suited to dense sawdust blocks, larger fills, and frequent handling. They are less likely to puncture during loading or transport, and they tend to hold their shape more effectively once filled. The trade-off is that thicker plastic can be less forgiving if your impulse sealer is not properly adjusted. Always test your seal settings with an empty bag before trusting a full sterilized run.

Look closely at the seams as well. Side seals should be even and firmly bonded, with no thin spots or wrinkles. A cleanly manufactured bag helps, but your own handling matters just as much. Avoid overstuffing, leave enough material above the substrate for a dependable seal, and do not let a hot bag rest against sharp metal surfaces.

Gusseted vs. Flat Filter Bags

Flat bags are straightforward and useful for smaller substrate volumes. They are easy to store, simple to fill, and can be a good fit for grain bags that will be shaken and later expanded into bulk substrate. If your priority is clean organization and consistent small batches, flat bags are hard to beat.

Gusseted bags have folded sides that expand as the bag fills. This creates a wider base and lets the substrate form a more stable block. For fruiting blocks, that shape is useful because it keeps the bag upright and creates a predictable profile for shelf placement, side fruiting, or top fruiting.

The decision is mostly practical. Choose flat bags when mobility and smaller volumes matter most. Choose gusseted bags when you want a stable block and are working with larger substrate loads. Neither style fixes a poor substrate formula or inconsistent sterilization, but the right shape makes the rest of the workflow easier.

Match the Bag to Your Cultivation Stage

One reason growers get mixed results is that they expect one bag format to serve every purpose equally well. A better approach is to choose bags around the job they will perform.

For grain spawn, a smaller polypropylene bag with a fine filter patch is usually efficient. Leave enough room for shaking and breaking up the grain after colonization. A bag filled to the very top may seem economical, but it is harder to mix and easier to damage.

For masters mix, hardwood pellets, or supplemented sawdust, a gusseted bag with enough volume and a more breathable patch is often the better choice. These blocks are dense, retain substantial moisture, and may stay in the bag from inoculation through harvest. Stability and gas exchange become more relevant than easy shaking.

For low-supplementation bulk material, your choice depends on whether the bag is a temporary processing container or the final fruiting vessel. If it is only used for pasteurization or holding substrate, a specialized filter patch may not be necessary. If it will incubate a nutrient-rich mix, choose a true cultivation bag designed for the heat and airflow demands of the job.

Buying Bags Without Creating New Problems

A low per-bag price is attractive, especially when you are scaling up, but the cheapest option can become expensive if seals split or sizing is inconsistent. Buy a small quantity first when trying a new bag style. Run it through your actual sterilization cycle, use your normal substrate fill, and test it with the same sealer and shelving you use every week.

Keep a simple record of bag dimensions, patch rating, substrate weight, and results. After a few runs, patterns become obvious. You may find that a smaller bag gives faster, more manageable colonization, or that a larger gusseted format reduces labor enough to justify its added cost.

At Myceli Nation, the goal is to help growers keep their supply choices practical, whether they are building their first edible culture setup or refining a full shelf of blocks. Your home for mycology supplies should make it easier to match the right format to the work ahead.

The right filter bag should disappear into the process. It should seal cleanly, hold its shape, provide the exchange your substrate needs, and let you focus on dialing in the parts of cultivation that make each run better.

Posted on

Best Ready to Inoculate Kits for Home Growers

Best Ready to Inoculate Kits for Home Growers

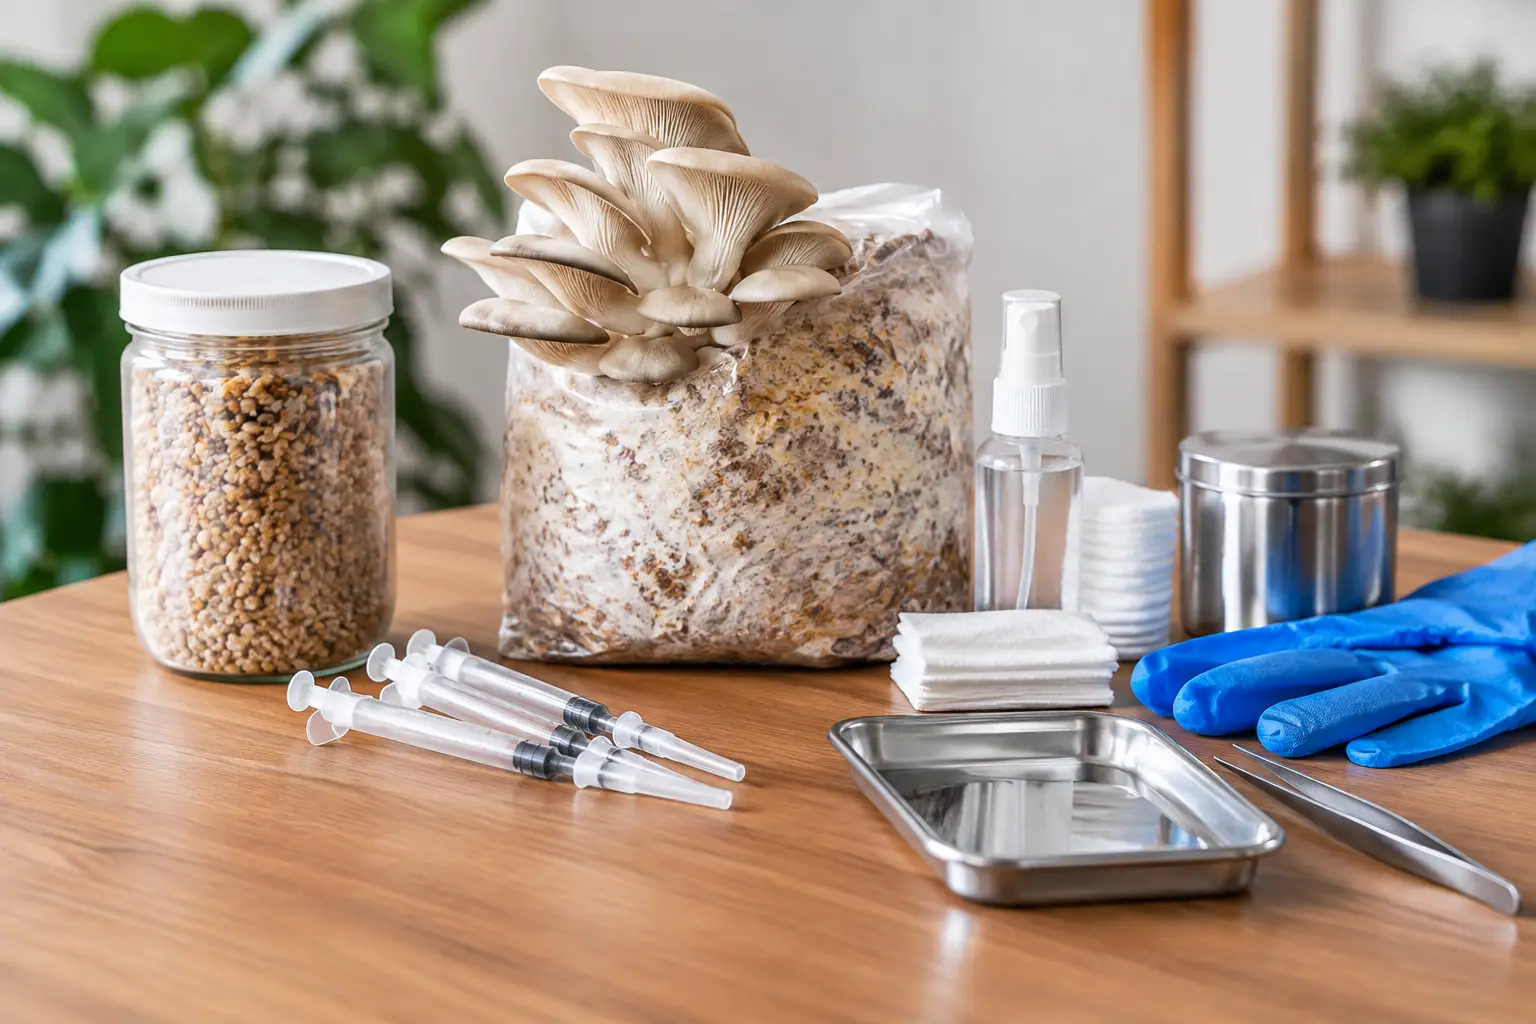
A ready-to-inoculate kit can remove the most frustrating part of a mushroom project: assembling clean materials from multiple sources and hoping they work together. The best ready to inoculate kits give growers a dependable starting point, whether the goal is a small gourmet grow, culture expansion, or a clean microscopy-focused project. The right choice is less about flashy packaging and more about fresh materials, clear specifications, and a format that matches how you prefer to work.

For growers who already know their way around a syringe, culture, or agar plate, these kits save time without taking control away. For newer hobbyists, they offer a more approachable path into cultivation supplies without needing to build a full lab setup on day one.

What Makes the Best Ready to Inoculate Kits?

Ready-to-inoculate does not describe one single product. It can mean sterilized grain, a combined grain-and-substrate bag, prepared agar plates, or bulk substrate that is ready for colonized grain. Each format serves a different point in the process, so the best kit depends on what you are introducing and what you want to do next.

A quality kit starts with clean, properly hydrated material. Grain should have enough moisture to support healthy growth without becoming wet, compacted, or overly starchy. Substrate should arrive properly prepared and sealed. Agar plates should be poured evenly, free of visible condensation issues, and packaged to prevent damage in transit.

Freshness matters just as much as the ingredient list. Sterile materials are not meant to sit indefinitely in a warm closet. Check the seller’s storage guidance, inspect packages on arrival, and use them within the recommended window. A well-made kit still needs sensible handling once it reaches your door.

Clear product details are another strong sign. Look for the bag or container size, material type, filter information where applicable, and whether the product is sterilized or pasteurized. Vague listings make comparison difficult. A useful product page tells you what you are buying without forcing you to guess.

Choose the Format That Fits Your Project

Sterilized grain bags for flexible setups

Sterilized grain bags are a go-to choice for growers who want flexibility. Grain provides a nutrient-rich foundation for expanding a legal edible culture before moving it to a fruiting substrate. Common options can vary by availability and grower preference, but the real decision is usually bag size and how much material you intend to run at once.

Smaller bags make sense when you are testing a new edible culture, keeping projects separated, or working with limited space. Larger bags can be more efficient for experienced growers, but they also put more material behind a single inoculation point. If something goes wrong, the loss is bigger. That trade-off is worth considering before automatically choosing the largest option.

When comparing grain bags, examine the filter patch and seal quality. The filter allows gas exchange while maintaining a protected environment. A durable bag with a properly placed filter is not a cosmetic detail. It supports a healthier, more manageable project from the start.

All-in-one bags for simplicity

All-in-one bags combine nutritious grain with a prepared substrate layer in a single bag. They are popular with home growers who want fewer transfers, fewer containers, and a more compact workflow. For a straightforward edible mushroom project, that convenience can be a real advantage.

The trade-off is flexibility. Because the ingredients are already combined in one system, you have less control over ratios and fewer opportunities to adjust the process later. These kits are often best for growers who value simplicity and a cleaner workspace over custom setup options.

A good all-in-one bag should have enough room to work the contents after healthy growth has spread, while still maintaining a solid seal and functional filter. Look for a bag designed for its actual fill volume, not one packed so tightly that it becomes difficult to handle.

Prepared agar plates for clean culture work

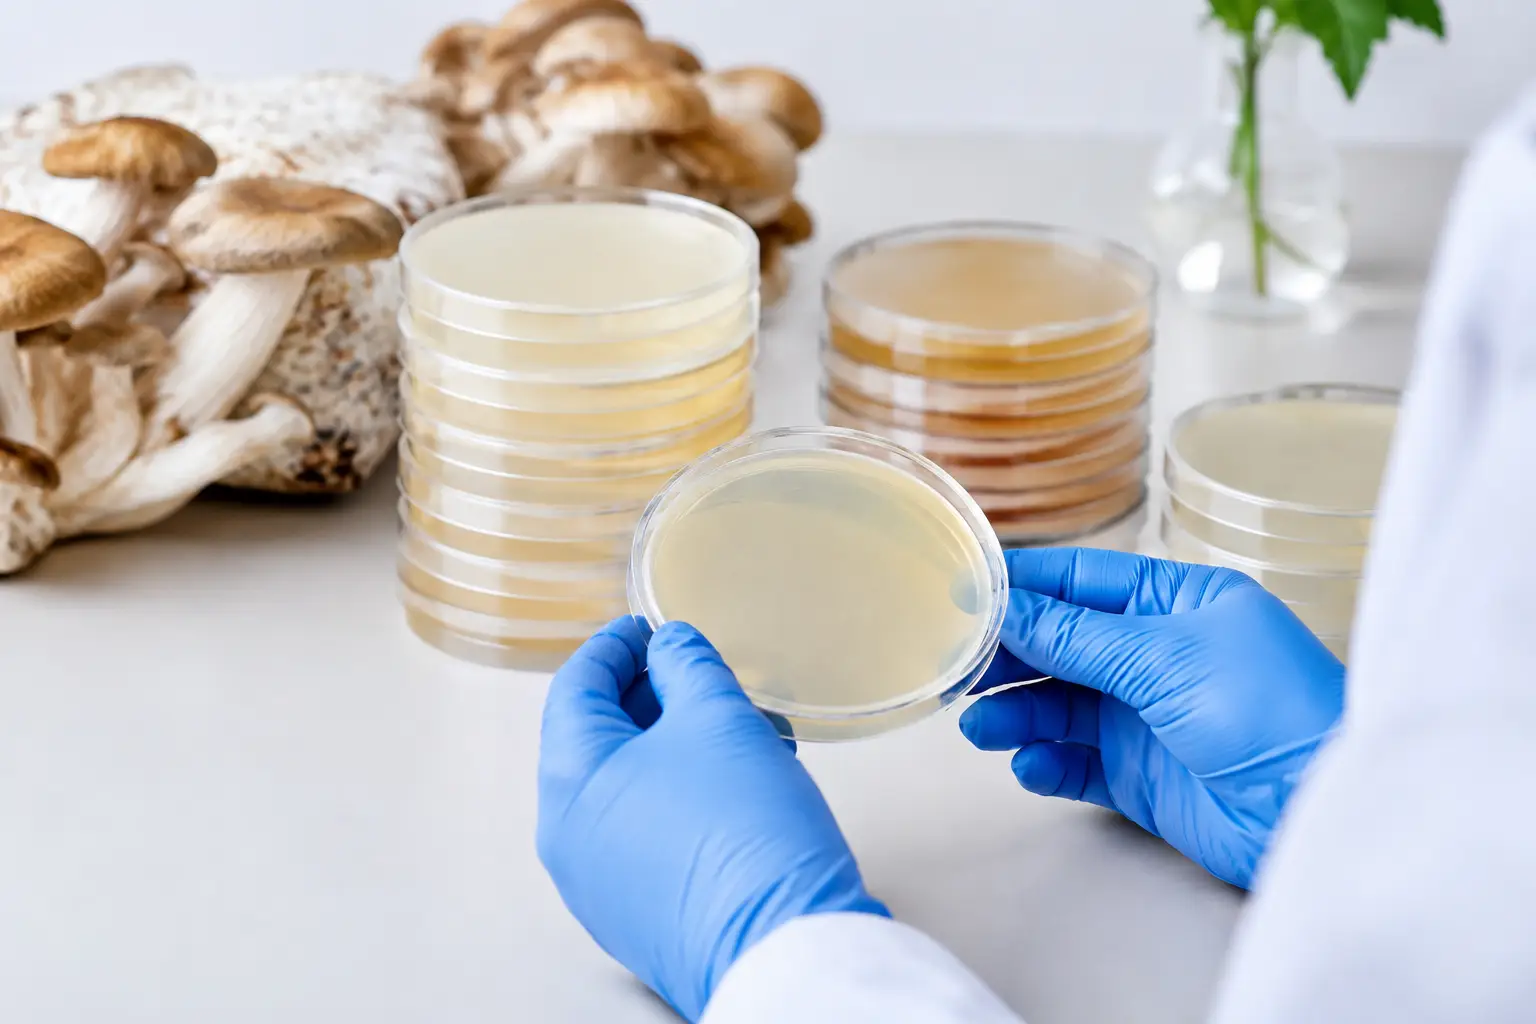
Agar plates are ideal when the project calls for observation and selection. They let growers examine culture growth closely before transferring clean material to grain. For hobbyists who enjoy the detail-oriented side of mycology, prepared plates can be one of the most useful ready-to-inoculate products available.

The best prepared plates are consistent, clearly labeled, and securely packed. Plate color is less important than cleanliness and the intended use of the media. Some media formulas are designed for general culture work, while others are chosen for specific observation or isolation goals.

Agar requires more careful technique than simply working with a sealed bag. It is not necessarily the easiest place to begin, but it can be the smartest upgrade for growers who want to understand what is happening in their cultures rather than relying on guesswork.

Bulk substrate for the next stage

Prepared bulk substrate is not usually the first material to inoculate directly. Instead, it is used after grain has been fully colonized with a suitable legal edible culture. It is still an important part of a ready-to-go supply lineup because it saves time and helps keep a grower’s materials consistent.

Substrate blends vary in texture, nutrient level, and moisture retention. There is no universal winner. A dense, nutrient-rich blend may suit one species well, while another may perform better with a lighter, more moisture-balanced option. Match the substrate to your culture and your environment rather than buying solely on price.

How to Choose the Best Ready to Inoculate Kits

Start by deciding how much control you want. If you want a compact, low-fuss project, an all-in-one bag may be the better fit. If you enjoy working in stages and want to expand cultures across several projects, grain bags and prepared substrate offer more flexibility. If clean culture selection is the priority, agar plates belong in the cart.

Next, buy an amount that matches your experience and available space. More material is not always better. A smaller, manageable setup helps you learn the rhythm of your environment, including temperature swings, workspace habits, and how quickly you can inspect your materials. Once you have a process you trust, scaling up becomes much less wasteful.

Packaging deserves a close look. A ready-to-inoculate product should arrive intact, with no torn bags, leaking moisture, broken seals, or obvious damage. Inspect everything before beginning. If a package looks compromised, do not assume it is fine because the contents appear normal from the outside.

Finally, consider the seller’s catalog as a whole. A supplier that carries cultures, sterile materials, and cultivation essentials makes it easier to keep your projects organized without chasing compatible products across several shops. Myceli Nation brings that convenience into one mycology-focused storefront, with options suited to collectors and gourmet growers who prefer to shop by format instead of sorting through unrelated supplies.

Small Habits That Protect a Good Kit

Even premium materials cannot make up for rushed handling. Set up your workspace before opening anything, clean the work surface, and avoid working around fans, open windows, pets, or unnecessary movement. Keep supplies within reach so you are not searching for tools halfway through the process.

Use clean handling practices every time, not just on the first project. It is tempting to cut corners when a task feels familiar, but consistency is what separates a repeatable routine from a lucky result. Label each bag, plate, or container with the date and culture information as soon as you begin. Future you will appreciate it.

Patience also matters. Do not keep opening or moving materials simply to check progress. Observe through the container when possible, follow the product’s storage guidance, and give the project time to develop. Healthy work is often quiet and uneventful, which is exactly what you want.

The best kit is the one that supports your actual workflow, not the one with the biggest promise on the label. Start with clean materials, choose a format you can manage confidently, and let each project teach you what to try next.

Posted on

What Makes a Lizard King Spore Print Stand Out

What Makes a Lizard King Spore Print Stand Out

A Lizard King spore print is one of those recognizable additions that earns attention well before it reaches a microscope slide. The name has a strong presence in mycology circles, but a worthwhile print is not about hype alone. It comes down to clean presentation, careful handling, traceable labeling, and whether the format fits the kind of observation or collection you actually have in mind.

For collectors and microscopy-focused buyers, a print offers a compact, classic way to explore a well-known variety. It also has a different appeal than a ready-to-use format: you can see the material itself, assess how it was prepared, and store it as part of a broader strain library. As with any specialty mycology item, responsible purchasing begins with knowing local rules and choosing products only for lawful uses.

Why the Lizard King Spore Print Gets Attention

Lizard King is a familiar market name among enthusiasts, often sought alongside long-standing fan favorites such as Golden Teacher, B+, and Blue Meanie. That recognition matters because it helps collectors build a reference set of names they have encountered through communities, catalogs, and microscopy discussions.

Still, a name is not a lab report. Specialty mushroom names can be useful shorthand, but they are not a substitute for close observation or accurate documentation. A thoughtful buyer treats the label as the beginning of the conversation, then looks at the print format, supplier standards, storage condition, and intended use.

The appeal of a Lizard King print is partly practical and partly collectible. Prints are flat, easy to organize, and satisfying to compare side by side. For someone building a microscopy archive, they provide a physical record that feels more deliberate than an impulse purchase. For someone new to prints, they are also a straightforward introduction to how spores are collected and presented.

What a Quality Print Should Look Like

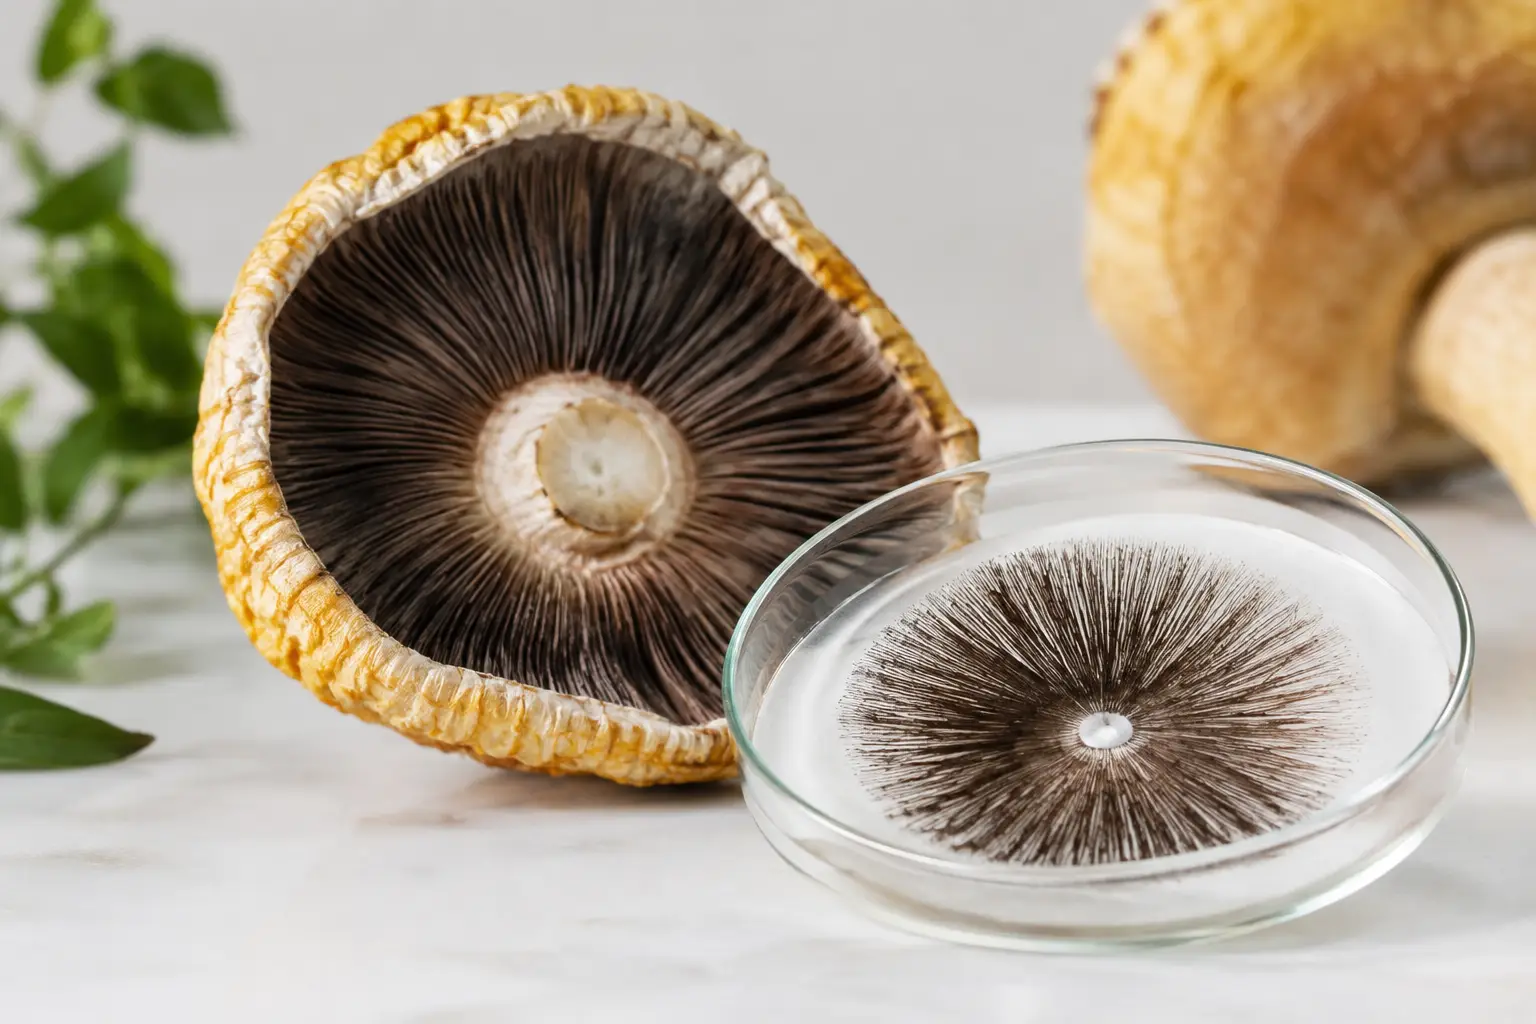
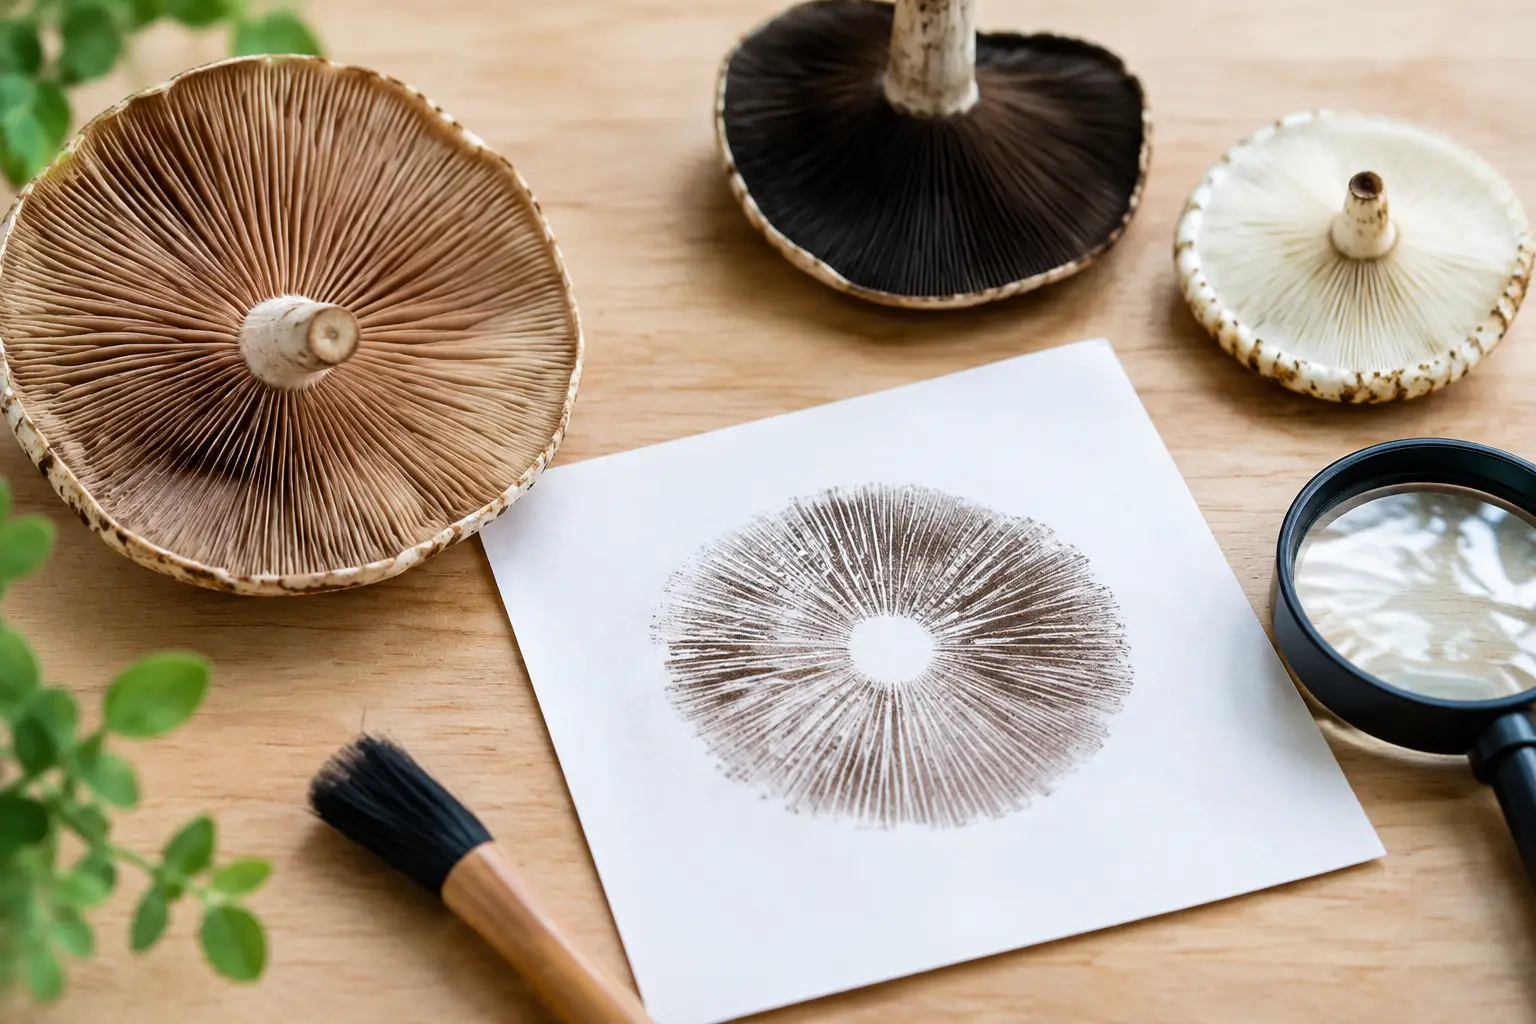
A spore print is typically deposited on a small foil or paper surface, then protected for storage and handling. The visible deposit may range from dense and dark to lighter at the edges, depending on the individual specimen and the way the print was made. Variation is normal. What matters most is whether the product appears clean, properly contained, and professionally identified.

Packaging deserves real attention. A print should arrive protected from unnecessary moisture, friction, and exposure. Loose, damaged, or poorly sealed packaging creates questions about condition before you have even begun your observations. Clear labeling also matters, especially if you keep multiple varieties in rotation. You should be able to identify what you have without relying on memory or an unlabeled bag tucked into a drawer.

A strong supplier presentation generally includes the variety name, the format, and handling information appropriate to lawful microscopy or collection. It should not make exaggerated claims or imply that every print will look identical. Biological material varies, and honest product information leaves room for that reality.

Print Format Versus Other Spore Formats

Choosing a Lizard King spore print instead of another format is mostly a question of preference. A print has a tactile, archival quality that many collectors enjoy. It is also convenient for buyers who prefer to maintain a compact collection with minimal packaging.

Other formats can feel more convenient for certain forms of microscopy preparation, while prints may appeal to people who value a traditional presentation. Neither option is automatically better. The right choice depends on how you organize your supplies, how often you study specimens, and whether your priority is collection, observation, or convenience.

If you are comparing formats across several varieties, keep the comparison simple. Look at product clarity, package condition, reputation for careful fulfillment, and the information provided at checkout. A low price can be appealing, but unclear labeling or weak packaging can make a bargain less useful over time.

A Note on Appearance and Expectations

Collectors sometimes expect a named variety to reveal a distinctive visual signature in every print. That expectation can lead to disappointment. Spore deposits are not trading cards with perfectly standardized artwork. Density, shape, and edge patterns can differ from print to print.

For microscopy, the value is in observing the material with care rather than trying to judge a product solely by how dramatic it looks in the packet. For collecting, the value is often in the label, provenance, condition, and how it fits into your own catalog. A neatly stored, clearly documented print can be more meaningful than a visually heavy deposit with no reliable context.

Handling and Storage for Collectors

The best handling habits are simple: keep prints dry, clean, labeled, and protected from direct light and extreme heat. Avoid repeatedly opening packaging just to inspect it. Every unnecessary handling session increases the chance of damage, misplaced labels, or environmental exposure.

For an organized collection, store each item separately and record the purchase date, format, and supplier details in a notebook or digital inventory. This does not need to become a laboratory-grade tracking system. A consistent naming convention and a few basic notes can prevent confusion when your collection grows from a handful of favorites into a full reference library.

If you plan to use a print for lawful microscopy, set up a clean workspace and use appropriate observation tools. The goal is to preserve the usefulness of the material while keeping your collection orderly. Careful handling is not complicated, but it is one of the clearest signs that someone takes their mycology hobby seriously.

Questions to Ask Before You Buy

Before choosing a Lizard King spore print, consider what you want from it. Are you adding a recognizable name to a collection? Comparing spore characteristics under microscopy? Looking for a compact format rather than a liquid product? Your answer should guide the purchase more than a flashy product name or a temporary promotion.

It is also reasonable to ask whether the seller makes it easy to understand what is being offered. A good specialty shop keeps categories clear, uses consistent product naming, and provides enough detail for buyers to distinguish between prints, syringes, cultures, and related supplies. That clarity is especially helpful when you are purchasing several items at once.

At Myceli Nation, the goal is to make that selection process feel less fragmented. The Mycelium Network is built for enthusiasts who want familiar names, useful formats, and room to keep exploring the wider world of mycology without bouncing between unrelated storefronts.

Build a Collection With Intention

A Lizard King spore print can be a smart addition when it suits your lawful microscopy interests or collection goals. Treat it as one part of a larger picture: a named specimen, a physical format, and a record worth keeping organized. The more intentional you are about condition, labeling, and sourcing, the more useful every new print becomes when you return to your collection months later.

Posted on

Mycology Trends Reshaping Home Cultivation

Mycology Trends Reshaping Home Cultivation

A few years ago, most home growers started with a basic kit, a curiosity about fungi, and a lot of trial and error. Current mycology trends point to a more informed scene: cultivators are choosing formats with intention, building cleaner workspaces, comparing genetics more carefully, and treating fungi as a long-term hobby rather than a one-off experiment.

For The Mycelium Network, that shift matters. The modern mycology buyer is not looking for a random listing buried in a crowded marketplace. They want clear categories, dependable supply options, recognizable varieties, and enough information to choose the right format for their goals.

Mycology Trends Are Moving Beyond the Starter Kit

Starter kits still have a place, especially for someone learning the basic life cycle of fungi. But the biggest change is that hobbyists are quickly graduating from all-in-one purchases to modular setups. They want to select individual components based on their space, experience level, and the species they want to study or grow.

That means more attention on spores, spore prints, ready-to-inoculate products, edible cultures, substrate options, and sterile workflow supplies. A buyer with a small apartment setup may value simplicity and compact storage. Someone with a dedicated hobby area may prefer the flexibility of choosing cultures, containers, and materials separately.

Neither route is automatically better. Convenience reduces decision fatigue, while a modular setup gives growers more control over process and repeatability. The key trend is intentional buying. People are asking what a product is for before adding it to the cart.

Format Choice Is Becoming a Real Skill

Spore syringes, prints, liquid cultures, and ready-to-inoculate options each serve different purposes. More shoppers now understand that the best choice depends on whether they are collecting for microscopy, preserving a favorite variety, working with edible species, or seeking a streamlined cultivation project.

Spore prints remain popular with collectors who appreciate their compact format and storage potential. Syringes are favored for their accessibility and familiar handling. Edible cultures appeal to growers focused on culinary species and consistent home harvests. Ready-to-inoculate products shorten the number of steps between planning and action.

The trend is not that one format is replacing another. It is that buyers increasingly expect a storefront to let them shop by format without forcing them to decode vague product labels.

Clean Technique Is Becoming Part of the Hobby Identity

The most durable mycology trends are not flashy. They are practical. Clean technique, organized tools, and careful observation have become markers of a serious home lab, even for beginners.

Hobbyists are paying closer attention to work surfaces, storage, labeling, and timing. They are learning that success often comes from repeatable habits rather than expensive equipment. A tidy setup with clearly marked cultures and supplies can be more useful than a crowded shelf full of products chosen without a plan.

This also changes what shoppers look for. They want supplies that make organization easier: dependable containers, appropriate inoculation products, culture options, and materials that fit their preferred workflow. Education matters here, but so does availability. If growers have to hunt across several unrelated suppliers for basic items, they are less likely to build a consistent process.

There is a trade-off. A more careful workflow takes time. Labeling every item, tracking dates, and keeping a dedicated work area may feel excessive at first. Over time, though, those small habits make it easier to identify what worked, what failed, and what to adjust next.

Edible Cultures Are Driving Everyday Interest

Culinary mushrooms continue to bring new people into mycology. Oyster mushrooms, lion’s mane, shiitake, chestnut mushrooms, and other gourmet species make the hobby tangible because the results can move from a grow space to the kitchen.

This interest is expanding beyond novelty countertop projects. Many growers are learning about seasonal conditions, substrate preferences, fruiting environments, and the differences between species. They are also discovering that edible cultivation rewards patience. The culture may be only one part of the equation; temperature, humidity, airflow, cleanliness, and timing all influence the final result.

For experienced enthusiasts, edible cultures offer a useful way to keep experimenting. One species may be chosen for speed and forgiving behavior, while another may be selected for flavor, texture, or a more demanding project. That variety keeps the hobby interesting without requiring every grower to pursue the same outcome.

Collectors Want Better Organization, Not Just More Variety

Variety remains a major draw in the spore and print market. Familiar names such as Golden Teacher, B+, Blue Meanie, and Lizard King hold attention because collectors recognize them and can compare them with other offerings. At the same time, collectors are becoming more selective.

Instead of buying every new name that appears, many are building a more considered library. They may focus on a few fan favorites, compare visual characteristics under microscopy, or keep prints organized by source, date, and collection notes. The appeal is part science, part cataloging, and part connection to a community that understands why a carefully maintained collection matters.

A broad inventory still helps, but clarity matters just as much. Strong category navigation lets shoppers find standard options, exotic selections, edible cultures, and bundle packs without scrolling through an unstructured catalog. The best retail experience respects both the collector who knows exactly what they want and the enthusiast who is still narrowing down their interests.

Bundles Are Getting Smarter

Bundles are no longer just a discount strategy. When designed well, they solve a real planning problem. A themed set can help a microscopy collector explore several varieties, while a cultivation-focused bundle can reduce the chances of forgetting a needed component.

The useful bundle is not simply bigger. It is coherent. Products should fit together around a purpose, such as building an edible mushroom project, restocking common supplies, or comparing several popular selections. Buyers appreciate value, but they also notice when a bundle contains filler they would not have chosen on its own.

This is where specialty stores have an advantage over general marketplaces. A shop that understands mycology can organize products around the way enthusiasts actually browse: by culture type, format, experience level, popularity, or project goal. That approach turns a large catalog into a more useful resource.

The Community Is Part of the Product

Mycology can be technical, but it is rarely a solitary interest for long. Enthusiasts trade notes, compare observations, share setup ideas, and keep an eye on what other growers and collectors are trying. Newsletter updates, educational content, affiliate communities, and specialized drop shipping programs all reflect the same reality: people want access to a network, not just a checkout page.

The strongest communities make room for different experience levels. A first-time buyer may need help choosing an approachable edible culture. A longtime collector may be looking for a fresh drop or a specific print format. Both should be able to find clear information without being talked down to.

That community layer also helps separate passing hype from useful developments. New tools and new varieties can be exciting, but growers tend to stick with what improves consistency, saves time, or makes the hobby more enjoyable. A recommendation carries more weight when it comes from people who actually understand the process.

What to Watch Next in Mycology Trends

Expect continued demand for convenient formats, better-organized product categories, and cultures suited to home-scale projects. More buyers will also look for products that support a cleaner, repeatable workflow rather than chasing the largest possible setup from day one.

The bigger shift is confidence. Today’s enthusiasts are more likely to compare options, read product details, and build collections or cultivation routines around their own interests. Whether your focus is edible species, microscopy, prints, or a carefully planned home project, the best next step is usually the one that fits your space, goals, and current skill level – then gives you something worthwhile to learn from.

Posted on

Affiliate Program Versus Dropshipping Compared

Affiliate Program Versus Dropshipping Compared

A clean product recommendation can earn a commission without packing a single order. A curated storefront can turn that same audience into repeat customers under your own brand. That is the real choice behind affiliate program versus dropshipping: are you building a referral channel, or are you building a store?

For mycology enthusiasts, the answer is rarely just about making the quickest sale. Your audience may come to you for strain familiarity, edible culture options, cultivation supplies, microscopy products, or bundles that make a new project easier to start. The business model you choose shapes how much control you have over that customer experience.

Affiliate Program Versus Dropshipping: The Core Difference

An affiliate program pays you for sending a customer to another retailer. You share a tracked link, a visitor buys, and you receive a commission based on the program terms. You do not set the retail price, hold inventory, process the payment, package the order, or handle post-purchase support.

Dropshipping puts you in the seller’s seat. You market products through your own storefront, collect the customer order and payment, then send order details to a supplier that fulfills the shipment. You set pricing, shape the shop experience, and own the customer relationship, even though you do not keep products on your own shelves.

Both models can work well in specialty mycology. The better fit depends on whether your strength is audience-building, retail merchandising, customer support, or a combination of all three.

When an Affiliate Program Makes More Sense

Affiliate marketing is the leaner starting point. If you run a cultivation-focused social account, email newsletter, community page, or educational blog, you can recommend products your audience already wants to compare. There is no product catalog to maintain, no supplier invoice to reconcile, and no shipping issue landing in your inbox on a Friday afternoon.

It also keeps the financial risk low. You generally do not pay for inventory upfront, and there is no need to fund refunds for products you did not sell directly. That makes affiliate programs useful for creators testing a niche, hobbyists with a small but engaged following, or publishers who prefer content over store operations.

The trade-off is control. A visitor who clicks your link enters someone else’s shop, sees someone else’s offers, and may sign up for someone else’s newsletter. You can influence the sale with a useful recommendation, but you cannot adjust a bundle, create a limited promotion, or improve the checkout flow.

Commission rates matter too, but the percentage alone does not tell the whole story. A smaller commission on products that fit your audience and convert consistently can outperform a larger rate on a catalog that feels disconnected from your content. Check tracking duration, payment timing, eligible product categories, and whether commissions apply to repeat orders.

Affiliate marketing works best when trust is your primary asset. If your followers value your cultivation notes, product comparisons, or honest recommendations, straightforward disclosure protects that trust. Say when a recommendation may earn you a commission. In a niche community, transparency is good business.

Where Dropshipping Creates More Opportunity

Dropshipping makes sense when you want customers to recognize your store, not only your recommendations. You can organize products around the way enthusiasts actually shop: edible cultures, spore prints, ready-to-inoculate options, essentials for a first setup, or fan-favorite bundles for returning buyers.

That merchandising control is a major advantage. Rather than sending someone to a broad catalog and hoping they find the right format, you can build clear collections and pair complementary products. A customer looking for a culture can also discover the supplies that support their next step. Done well, that raises average order value while making the shop easier to use.

You also control your retail margin. If a supplier gives you a wholesale rate, you decide how to price the product within a competitive range. Strong margins can give you room for promotions, bundle discounts, paid traffic, and customer retention efforts that would not be possible on a fixed affiliate commission.

But dropshipping is not hands-off. Your customer sees your store name on the order confirmation. If a package is delayed, a product arrives damaged, or an item is unavailable after purchase, they will contact you. A dependable supplier relationship, accurate inventory data, realistic shipping expectations, and clear policies are non-negotiable.

That is why product quality and fulfillment consistency should come before a huge catalog. Ten well-managed products with clear descriptions are more valuable than hundreds of listings you cannot verify. Specialty buyers notice inaccurate taxonomy, vague product details, and stock information that does not match reality.

Costs, Margins, and the Work Behind Each Model

Affiliate programs have lighter operating costs. Your main investment is in content, community building, and traffic. You may pay for a website, email platform, photography, or advertising, but you are not responsible for inventory purchasing or fulfillment systems.

Dropshipping shifts more responsibility to you. Even without warehousing, you may need an ecommerce platform, payment processing, customer service coverage, product-page copy, tax administration, and software to keep inventory and orders organized. You may also need to handle chargebacks and supplier disputes. The lower inventory burden does not eliminate the need for operating capital.

Margins deserve a practical look. An affiliate commission may be predictable, but it is usually limited to a set percentage. A dropshipping margin can be larger, yet it must cover the costs of acquiring a customer, payment fees, returns, customer service, promotional discounts, and occasional fulfillment problems. A higher selling price is not automatically a higher profit.

Run simple numbers before committing. Estimate your average order value, supplier cost, shipping charges, transaction fees, customer acquisition cost, and expected refund rate. Then compare that net result with the commissions you could earn by referring a similar number of buyers. The model with the better-looking headline revenue is not always the model with the healthier profit.

Choosing the Right Path for Your Mycology Audience

Choose an affiliate program if you want to focus on education, reviews, and referrals without operating a shop. It is a strong fit when your audience is still growing, your time is limited, or you would rather point people toward a trusted retailer than manage customer orders yourself.

Choose dropshipping if you have a clear point of view on product selection and are prepared to support buyers after checkout. It is especially useful when you see gaps in how products are grouped, explained, or bundled. A focused store can become a destination when it helps customers move from browsing to buying with less friction.

A hybrid approach can be sensible as well. You might sell the products you can confidently support through your storefront while using affiliate recommendations for adjacent categories outside your core catalog. The key is to keep the experience coherent. Customers should understand what you sell directly, what you recommend, and who handles each purchase.

For a brand built around The Mycelium Network, the decision should come back to the relationship you want to create. Affiliate marketing extends your reach through trusted voices. Dropshipping gives you more room to shape the shop, offers, and follow-up experience. Neither model is automatically better – the right one is the one you can run reliably while giving fellow enthusiasts a reason to return.

Posted on

Spore Viability: What Keeps Spores Ready to Grow

Spore Viability: What Keeps Spores Ready to Grow

A spore print can look flawless and still fail to produce growth. A syringe can appear perfectly suspended yet deliver disappointing results. That is the practical reality of spore viability: visible appearance is only one small clue, while age, handling, storage, hydration, and cleanliness all influence whether spores can germinate when conditions are right.

For collectors, microscopy hobbyists, and cultivators working with legal gourmet species, viability is not an abstract lab term. It determines how confidently you can plan a project, compare formats, and decide whether a product has been stored in a way that respects the material. The goal is not to expect every spore to behave identically. It is to recognize the factors that stack the odds in favor of healthy, predictable germination.

What Spore Viability Actually Means

Spore viability is a spore’s ability to germinate and begin developing when it receives appropriate moisture, temperature, oxygen, and a suitable nutrient source. A viable spore is alive, but it is dormant. It does not need to look dramatic under a microscope or show obvious physical changes before it begins its next stage of growth.

This definition matters because viable does not automatically mean fast. Even a healthy sample may need time to hydrate and respond to its environment. Different species and varieties can also have different germination windows. One sample may show early signs of growth quickly, while another requires patience before a fair judgment is possible.

Viability also differs from purity. A sample can contain viable spores while also carrying unwanted contaminants from poor handling. On the other hand, a clean-looking sample can have reduced viability after excessive heat exposure or long-term storage. Germination potential and cleanliness work together, but they are not the same measurement.

Why Spores Lose Viability

Spores are built to survive more than active tissue, but they are not indestructible. Their protective outer layers help them tolerate dry periods and environmental change, yet repeated stress gradually takes a toll. The largest threats are usually heat, moisture, light, and contamination introduced through careless handling.

Heat Is the Fastest Problem

High temperatures can damage spores far faster than most buyers expect. A package left in a hot mailbox, vehicle, or sunny delivery area may experience conditions very different from the outdoor temperature. Brief warmth does not guarantee failure, but repeated or extended heat exposure can lower germination rates.

This is why shipping speed and prompt retrieval matter. Once a package arrives, avoid leaving it near windows, appliances, or other warm spots while you decide what to do with it. A cool, stable location is a better starting point than a kitchen counter that changes temperature all day.

Moisture Creates a Different Kind of Risk

Spores are commonly stored dry because moisture can activate biological processes without providing the controlled conditions needed for successful development. Condensation is particularly unwelcome for prints and swabs. It can encourage contaminants, cause spores to clump, and make handling more difficult.

For syringes, moisture is part of the format by design. The concern shifts from keeping the spores dry to maintaining a clean, stable solution and avoiding temperature extremes. Do not assume a syringe must look crystal clear or perfectly uniform to be useful. Spores may settle over time, and gentle mixing can redistribute them without aggressive shaking.

Light and Oxygen Add Up Over Time

Ordinary room light is rarely the single reason a sample fails, but long periods of direct sunlight are a poor storage choice. Ultraviolet exposure can damage biological material, while sunlight often brings heat along with it. Store prints, swabs, and syringes in a dark place rather than displaying them on a shelf.

Oxygen is less of an immediate concern than heat or moisture, but sealed packaging still has a purpose. It protects samples from environmental fluctuations and accidental contact. Once packaging is opened, work deliberately and avoid exposing the material longer than necessary.

Storage Choices That Protect Spore Viability

Good storage is simple. The best approach is usually cool, dark, dry, and stable. The word stable is key. A location that cycles between cold and warm every day may be less helpful than one that remains consistently moderate.

For sealed prints and swabs, a clean, dry container in a cool area is often appropriate. Add an extra protective layer if the original packaging is thin or likely to be disturbed. Keep items flat when possible, label them clearly, and avoid repeatedly opening the storage container just to check on them.

Syringes are generally best kept cool and protected from light. Refrigeration can be useful when done carefully, especially for longer storage, but avoid freezing. Freezing introduces risks that vary by solution, container, and storage conditions. If using a refrigerator, place the syringe in a clean protective bag or container away from areas prone to spills, condensation, or temperature swings.

Do not store spores in a freezer unless the product and preservation method are specifically designed for it. Home freezers tend to cycle temperatures, and a freeze-thaw event can be harsh on delicate biological material. Refrigeration is not a magic reset button either. It slows decline, but it cannot restore viability that has already been lost.

A practical organization system prevents many avoidable mistakes. Label each item with the species or variety, format, and date received. If you maintain more than a few samples, track storage location as well. The Mycelium Network mindset is simple: know what you have, where it is, and how long it has been waiting.

Prints, Swabs, and Syringes: Different Viability Trade-Offs

Format affects handling, storage, and how much uncertainty you are willing to manage. No single format is always best. The right choice depends on your workflow and how soon you expect to use the material.

Spore prints are compact, often store efficiently, and can contain a substantial amount of material when prepared and protected properly. Their main vulnerability is handling. Every unnecessary opening creates another chance for moisture, airborne debris, or direct contact to compromise the sample.

Swabs are convenient for controlled sampling and take up almost no space. They can be a smart option for collectors who want a compact format, but the swab head must stay protected. Crushing, moisture exposure, or rough packaging can create problems that are not obvious at first glance.

Spore syringes offer immediate convenience because the spores are already suspended in sterile water. They are often favored by hobbyists who value a ready-to-use format. The trade-off is that syringes have more sensitivity to heat during transit and should be stored with greater attention to temperature. They also depend heavily on clean preparation at the source.

When comparing products, do not reduce the decision to “more spores equals better.” A smaller, freshly prepared and well-stored sample can outperform a larger sample that has been poorly handled. Freshness, packaging quality, seller practices, and your own storage habits are more meaningful than a dramatic-looking spore load.

How to Set Realistic Germination Expectations

The most common mistake is deciding too early that a sample is nonviable. Germination timing varies with species, sample age, medium, temperature, and the overall cleanliness of the work. A lack of immediate visible activity is not a reliable diagnosis.

Start by making sure the conditions are actually appropriate for the species you are working with. Temperature ranges, nutrient preferences, and growth pace differ. If conditions are too cool, too warm, too dry, or otherwise unsuitable, viable spores may remain inactive or develop slowly.

Work from the cleanest practical setup you can manage. This is especially important when assessing a sample because contamination can obscure the result. If unwanted growth appears first, it does not necessarily prove that the spores were nonviable. It may simply mean the sample or handling environment was not clean enough for an accurate read.

Patience has a limit, of course. If a sample has had an appropriate amount of time under appropriate conditions with no sign of activity, it may be time to test another portion or reconsider storage history. Keep notes instead of relying on memory. Date the test, record the conditions, and note what you observed. Over time, those records help you separate a one-off issue from a pattern.

Common Handling Errors to Avoid

Many viability losses occur after purchase, not before it. Avoid leaving a delivery outdoors, storing samples beside a heat source, opening packaging repeatedly, or handling materials with bare hands. Keep your workspace clean, prepare what you need before opening anything, and return unused material to storage promptly.

Another frequent error is overcorrecting. Refrigerating and then warming a sample repeatedly, shaking a syringe aggressively, or moving prints through several containers can create more stress than benefit. Calm, consistent handling wins over constant tinkering.

If you are building a collection, buy in formats that match your real schedule. A ready-to-use syringe makes sense when you have a project prepared. A well-protected print or swab may make more sense when you are collecting varieties for future study. Good sourcing is not only about selection. It is about choosing material you can store and use responsibly.

Spore viability is never a promise of identical results from every sample. It is a living-material variable shaped by preparation, transit, storage, and technique. Give your samples a cool, clean, stable home, keep clear records, and let sound handling habits do the quiet work that healthy growth depends on.

Posted on

How to Select Agar Plates for Mushroom Culture

How to Select Agar Plates for Mushroom Culture

A plate that looks clean can still be the wrong plate for the job. A fast-growing culture on a rich recipe may be perfect for building inoculum, yet too dense to reveal a weak sector or early contamination. Knowing how to select agar plates means choosing a medium that gives you useful information, not just visible growth.

For hobby cultivators, agar is where a culture becomes easier to read, isolate, and preserve. Whether you are starting from a print, cloning a strong fruiting body, cleaning up a transfer, or expanding an established edible culture, the plate formula affects what you see next. The best choice is not always the most nutrient-rich option. It depends on the material in front of you and the decision you need to make from it.

Start With the Job, Not the Plate Color

Before choosing a dish, define the purpose of the transfer. Agar plates generally serve four different jobs: germinating spores, cloning tissue, cleaning a culture, and expanding a clean culture. These jobs overlap, but they do not demand exactly the same media.

For germination, you want enough nutrition to encourage early growth without turning the entire plate into a dense, hard-to-read colony too quickly. For cloning, a nutritious medium helps healthy tissue recover and send out growth. For cleanup work, lower-nutrient agar can slow everything down enough for you to distinguish desirable mycelium from unwanted growth. For expansion, a dependable general-purpose recipe is usually all you need.

This is why a stack of identical plates is convenient but not always ideal. Keeping two or three agar types on hand gives you more control when a culture behaves differently than expected.

How to Select Agar Plates by Nutrient Level

Nutrient level is the first major variable. Rich media can support vigorous growth, but it can also allow contaminants to establish quickly and make crowded cultures harder to evaluate. Leaner media often produces slower growth, which is useful when you need a clearer picture of colony structure.

Malt Extract Agar for Everyday Culture Work

Malt extract agar, commonly called MEA, is a reliable default for many mushroom culture projects. It provides carbohydrates from malt extract and supports visible, consistent mycelial growth. If you are making routine transfers, recovering a clone, or expanding a culture that already looks clean, MEA is a practical choice.

Because it is broadly useful, MEA is often the plate many growers reach for first. That said, rich MEA can move fast. If the starting sample carries bacteria or mold, those organisms may also take advantage of the food source. Use it when your source material is reasonably clean or when fast recovery matters more than detailed isolation.

Potato Dextrose Agar for Vigorous Growth

Potato dextrose agar, or PDA, is another nutrient-rich option. It can encourage strong growth and is commonly used for cloning and general culture maintenance. Its potato base provides a slightly different nutritional profile from malt extract, and some cultivators prefer the growth pattern it produces with certain edible species.

PDA is not automatically better than MEA. Think of it as another dependable rich medium rather than a universal upgrade. If a culture performs well on MEA, there may be no reason to switch. If you are comparing growth characteristics or trying to recover tissue from a fresh clone, PDA can be worth testing alongside it.

Light Malt Extract Agar for Cleaner Reads

Light malt extract agar, often called LMEA, uses less nutrient than a standard rich plate. It is a smart option when you want mycelium to grow with more definition and less density. This can make it easier to spot sectors, compare leading edges, and take clean transfers from a mixed plate.

Lower nutrition does not sterilize a dirty sample or replace clean technique. It simply gives you a little more visual separation and a little more time to make good transfer decisions. For growers working from prints, environmental samples, or questionable tissue, that slower pace can be valuable.

Water Agar for Isolation Work

Water agar contains little more than agar and water. It is intentionally lean, and it is most useful when you are trying to separate viable mycelium from a messy starting point. The goal is not fast expansion. The goal is to encourage fine growth that can move away from some contaminants before being transferred onto a more nutritious plate.

Water agar is a specialized tool, not your primary culture medium. Once you isolate a clean leading edge, transfer it to MEA, PDA, or another nutrient-containing medium so the culture can develop normally.

Match the Agar to Your Starting Material

The condition of your source should influence your plate choice as much as the species does. Clean wedge transfers from an established plate are usually straightforward. A standard MEA or PDA plate is appropriate because you are mainly expanding known material.

Fresh inner tissue from a healthy mushroom is different. It benefits from a rich plate that helps it recover, but it still deserves close observation. Take tissue from the protected interior rather than the exterior surface, then place several small pieces on separate plates. Multiple plates improve your odds without forcing you to gamble the whole project on one dish.

Prints and other dry starting materials call for patience. Germination can be uneven, and the first growth is rarely a finished culture. A lighter plate can make early growth easier to separate, followed by transfers to a richer medium once you have a clean section.

If a plate already shows bacterial slime, sour-looking wet patches, or aggressive mold, do not expect a richer plate to solve the problem. Selective work on lower-nutrient or water agar may help isolate a clean edge, but sometimes the efficient call is to return to a cleaner source.

Choose Plate Size and Format With Your Workflow

Agar recipes matter, but so does the physical dish. Standard 90 mm petri dishes provide ample room to observe radial growth, isolate sectors, and take multiple transfers. They are the most versatile choice for routine home culture work.

Smaller plates use less media and take up less storage space. They can be useful for a simple tissue test or a single transfer, but they fill quickly. If you are screening germination or expecting mixed growth, a full-size plate gives you more room to work before colonies collide.

Pre-poured plates offer speed and convenience, especially if you want to focus on culture work rather than media preparation. They are also useful for new growers who are still building confidence with sterile procedures. Pouring your own plates costs less over time and lets you adjust nutrient levels, but it adds another process where cleanliness and consistency matter.

Look for plates that are clear enough to inspect from both sides, sealed appropriately, and free from excess condensation. A little moisture can happen, especially after shipping or temperature changes. Heavy pooling is less useful because it allows material to slide across the surface and can blur growth patterns.

Additives Have a Place, Not a Magic Fix

Some agar plates include additives such as activated charcoal, food coloring, yeast extract, or antibiotics. These can be useful, but they should match a real purpose.

Dark-colored agar can improve contrast with pale mycelium and make contamination easier to see. Yeast extract can add nutrients for cultures that respond well to a richer recipe. Activated charcoal is sometimes used in specialty media, though it can make visual assessment more difficult depending on the culture.

Antibiotic agar deserves extra restraint. It may suppress certain bacteria, but it does not address molds, poor sterile technique, or a contaminated workspace. It can also hide a problem long enough to create false confidence. For most hobby workflows, good handling practices, proper plate selection, and clean transfers deliver better results than treating every culture with additives.

Read the Plate Before You Make the Next Transfer

Selecting agar plates is only half the process. The plate must also tell you what to do next. Healthy mycelium often expands outward from the inoculation point in a consistent pattern, though texture and speed vary by culture. Look at the leading edge rather than judging the whole colony at once. That outer edge is usually the best place to take a clean transfer.

Watch for sudden color changes, wet or glossy areas, irregular growth that races ahead of the colony, and patches that do not match the expected texture. These signs do not always identify the exact issue, but they tell you the plate needs closer attention.

Label every dish with the culture name, medium, date, and transfer number. When you compare two agar formulas later, those details turn a vague impression into a useful record. A clean culture library is built one well-labeled transfer at a time.

For most growers, a practical starting lineup is simple: standard MEA for reliable expansion, a lighter agar for cleanup and isolation, and a few rich plates reserved for tissue clones. Build from there as you learn how your favorite cultures respond. The right plate is the one that makes your next choice clearer.

Posted on

Dropshipping Program Review for Mycology Sellers

Dropshipping Program Review for Mycology Sellers

A good dropshipping program review starts with the question that matters after the signup page: can you build a store customers trust without tying up cash in inventory? For mycology sellers, that answer depends less on flashy promises and more on catalog quality, product presentation, fulfillment consistency, and the room you have to build a real audience.

A mushroom-focused dropshipping program can make sense for operators who know their niche. Maybe you already run a cultivation content page, serve a collector community, sell related supplies, or want a focused storefront without managing shelves, packing materials, and daily order dispatch. The model is not automatic income. It is a retail partnership that rewards clear positioning, responsible merchandising, and steady customer service.

What a Mycology Dropshipping Program Should Offer

The strongest programs begin with a catalog people actually want to browse. A few generic products will not carry a store for long. Partners need recognizable spore syringe varieties, spore prints, edible cultures, ready-to-inoculate options, cultivation supplies, and bundles that give shoppers a reason to add more than one item to their cart.

Catalog depth also gives your store a useful shape. Some customers arrive knowing exactly what they want. Others compare formats, look for fan favorites, or want to build a mixed order around a promotion. When there are meaningful categories to shop, your store can serve both audiences without becoming confusing.

Availability matters just as much as variety. A massive-looking catalog loses value if popular items frequently disappear or product details change without notice. Before joining any program, ask how inventory updates are handled, whether discontinued items are removed promptly, and how substitutions are treated. Your customer sees your storefront, not the supplier’s warehouse.

Product information deserves the same attention. Names, formats, quantities, storage guidance, and any appropriate use information should be clear enough that you can merchandise confidently. You should not have to rewrite vague listings from scratch or answer basic questions because the product page leaves gaps.

Dropshipping Program Review: The Numbers Behind the Offer

Margins are where enthusiasm meets reality. The right program gives you enough room to cover your retail markup, payment processing, storefront costs, customer support time, refunds, and promotional efforts. A percentage that looks attractive in isolation may not leave much after those expenses.

Instead of asking only, “What is the discount?” ask what your actual per-order profit could be. Build a simple example using a typical basket rather than one high-priced item. Include the wholesale cost, customer-facing shipping charge, payment fees, any platform subscription, and a realistic allowance for discounts or replacements. That number is far more useful than a headline margin.

It also helps to understand whether pricing is flexible. Some programs set a minimum advertised price, while others allow broader control. Either approach can work. Pricing guidelines may protect the value of specialty products and reduce a race to the bottom, but they can limit how aggressively you run sales. Flexible pricing gives you more promotional options, yet it requires discipline so your store does not train customers to wait for constant discounts.

Shipping can quietly reshape margin calculations. Find out whether shipping is charged per item, per order, by destination, or through a flat structure. A customer buying a single syringe and a customer buying a larger bundle should not create surprises that your checkout cannot absorb. International demand can be valuable too, but it calls for especially clear expectations around delivery windows, tracking, and destination-specific restrictions.

Fulfillment Is Part of Your Brand

In dropshipping, fulfillment is not a back-office detail. It is a direct part of the customer experience your store is judged on. Packaging quality, order accuracy, dispatch speed, tracking communication, and how issues are resolved all affect whether a first-time buyer becomes a repeat customer.

Ask practical questions before you commit. Where do orders ship from? What is the usual processing window? Is tracking provided consistently? Are packages branded by the supplier, unbranded, or compatible with your store identity? What happens when an item is damaged, missing, or delayed? A reliable program should make these answers easy to understand before you sell your first item.

You should also know who handles customer-facing problems. Some suppliers support partners behind the scenes while the partner communicates with the buyer. Others may manage certain fulfillment inquiries directly. Neither model is automatically better, but unclear responsibility creates frustrated customers. Decide how you will handle support emails and set your store policies to match what the program can realistically deliver.

Your Store Still Needs a Point of View

The biggest mistake new dropshippers make is treating the supplier catalog as a finished business. Importing products is the beginning, not the strategy. If your store looks identical to every other reseller, shoppers will compare only price and shipping.

Build around a customer type or a useful shopping path. You might focus on beginners looking for clearly organized microscopy supplies, experienced collectors who value strain variety, or culinary growers sourcing edible cultures and supporting gear. The goal is not to exclude everyone else. It is to give your storefront a reason to feel curated instead of copied.

Your content can do much of that work. Category descriptions, format comparisons, stocking updates, bundle spotlights, and practical cultivation-adjacent education help customers make choices with more confidence. Keep claims accurate, avoid overstating outcomes, and use the terminology your audience already understands. Niche-savvy does not have to mean hard to navigate.

Programs connected to an established catalog, such as the Myceli Nation network, can give a new retailer a useful starting point. Still, your own storefront needs its own voice, merchandising choices, email strategy, and customer relationships. The supplier supports the operation. You build the destination.

Who Is a Good Fit for This Model?

A dropshipping program is often a strong fit for sellers who have audience access but limited inventory capacity. That could mean a creator with an engaged newsletter, a small specialty shop testing online demand, or a community operator who understands which categories their customers ask about most.

It is also useful for testing a focused product line before committing to bulk purchasing. You can learn whether your audience responds to prints, cultures, bundle formats, or cultivation accessories without guessing how much stock to buy months in advance. That flexibility is valuable, especially in a category where buyer preferences can be very specific.

The model is less suitable for anyone expecting zero involvement. You still need to create a store, maintain accurate listings, respond to customers, market consistently, and watch your numbers. It may also be a poor fit if you need total control over packaging, custom inserts, delivery speed, or exclusive product access from day one. Those goals may call for holding some inventory yourself once demand is proven.

Questions to Ask Before You Join

Before submitting an application or paying for store tools, review the operational details in writing. A worthwhile program should be transparent about product access, order placement, pricing structure, shipping regions, returns, and account requirements. If an answer is vague, treat it as an open risk rather than filling in the blanks with optimism.

Pay close attention to catalog synchronization and ordering workflow. Manual order entry may be manageable for a handful of weekly orders but becomes a bottleneck as sales increase. Automation can save time, but only if product availability, pricing, and tracking data stay accurate. Ask what updates are available and how often they happen.

Finally, assess the program from your customer’s perspective. Can you publish honest shipping expectations? Can you explain the formats you sell? Can you make support right when an order does not go as planned? If those answers are yes, you have the foundation for a store that feels credible rather than temporary.

A worthwhile dropshipping partnership gives you inventory access and operational support, but your long-term edge comes from what you add around it: a well-chosen catalog, helpful guidance, dependable communication, and a store built for the people you actually want to serve.

Posted on

How to Read a Spore Print by Color and Texture

How to Read a Spore Print by Color and Texture

A spore print can turn a mushroom cap into a useful field note. Learning how to read spore print color and pattern gives you a stronger starting point for sorting finds, comparing specimens, and building better microscopy records. It is not a shortcut to positive identification, though. A clean print is one feature in a larger picture that includes gills or pores, stem details, bruising, habitat, season, odor, and microscopic traits.

For collectors and cultivation-minded enthusiasts, the value is in the details. A print that looks simply brown under warm kitchen lighting may reveal a rusty brown, chocolate brown, or purple-brown deposit on white paper. Those distinctions can narrow a group quickly – provided the print was made carefully and read under the right conditions.

Start With a Clean, Full Spore Print

Before you can interpret a print, make sure it is worth interpreting. Choose a mature, fresh cap with intact gills, pores, or teeth. Very young mushrooms may not have released spores yet, while overmature specimens can be wet, decayed, contaminated, or already shedding spores unevenly.

Remove the stem with a clean blade and place the cap spore-bearing side down. Half white paper and half black paper is a classic setup because pale deposits show better on dark paper and dark deposits show better on white. A glass slide, foil, or clean nonporous card can also work, especially when you want to preserve a sample for microscopy.

Cover the cap with a cup or bowl to reduce drafts and keep the surface from drying too fast. Leave it for several hours or overnight. Humidity, cap maturity, and species all affect timing. A cap that produces almost nothing after a full night may be immature, too dry, or simply a low spore producer.

When you lift the cap, avoid smearing the deposit. The first look should tell you whether the print is dense and even, faint but usable, or compromised by moisture and debris.

How to Read a Spore Print Color

Color is the first trait most people notice, and it is genuinely useful when observed with care. Read the densest central portion of the print first. Thin outer edges often appear lighter than the true deposit, particularly when spores are sparse.

Use neutral daylight or a daylight-balanced lamp. Yellow indoor bulbs can push cream, pink, and brown prints toward the wrong family of colors. If possible, compare the print against both white and black backgrounds. A pale cream deposit may nearly disappear on white but stand out clearly on black, while a dark deposit can look more accurate against white.

Common color families include white to cream, pink to salmon, rusty orange to cinnamon, brown, purple-brown, black, and very dark gray. These are broad categories, not final answers. For example, brown and purple-brown can be difficult to separate without good lighting, and a heavy black print may hide subtle warm undertones.

Write down what you actually see rather than forcing a label. Notes such as pale cream, dusty salmon, rusty orange-brown, or deep purple-brown are more useful than calling every dark print black. Taking a photo beside a neutral white reference card can also make later comparison easier.

Why the Paper Color Matters

The surface beneath the spores changes your perception. White spores on white paper can look absent. Black spores on black paper can look faint or dull. This is why split-color paper is practical, but it still has limits: the seam can interrupt a small print, and glossy surfaces can create glare.

For especially light prints, use dark paper or a clear glass slide placed over a black backing. For darker prints, white index card stock offers a matte surface that makes color easier to judge. Avoid heavily textured paper, printed materials, and brightly colored cardstock, which can distort the result.

Read the Deposit Pattern, Not Just the Shade

A spore print is often more than a colored circle. Its pattern can reflect the structure under the cap. Gilled mushrooms commonly leave radiating lines, while pore-bearing mushrooms may leave a more even, powdery field. Species with teeth or ridges can create less familiar patterns that are still worth documenting.

The pattern does not identify a mushroom by itself. A blurred or incomplete print can result from a tilted cap, air movement, condensation, or a cap that dried out before depositing evenly. Still, a clear radial pattern confirms that spores were released from gills, and it can help you match the print to your observations of the specimen.

Look for density as well. A thick, opaque deposit suggests abundant spore release, while a very light trace may require longer exposure or a more mature cap. Do not mistake a wet stain for a dense print. Spores usually look dry and dust-like, whereas moisture can create translucent patches, bleeding color, and muddy edges.

Separate Real Color From Contamination

The cleanest print is made from a clean, dry specimen. Dirt, insect activity, decaying tissue, and cap moisture can all change the appearance of the deposit. If a print shows random dark flecks, fuzzy growth, or wet yellowish smears, treat it as a flawed record rather than reliable evidence.

Condensation is a common problem. When a cap is covered in a humid room, droplets may form inside the cover and fall onto the print. The result can look like unusually vivid color, but the spores have actually been dissolved or spread across the surface. Use a cover with enough space above the cap, and check that the mushroom is not dripping wet before setting it down.

Cross-contamination matters too. Do not make several prints on the same sheet without clear separation. Spores travel easily on air currents, fingers, and tools. Label each print immediately with the date, location or source, cap description, and any observations about the underside. A mystery print without a specimen note loses much of its value.

Use the Print to Narrow, Never Confirm Alone

Spore print color is best used as a filter. If your field notes suggest several possible groups, the print can rule out options that have a completely different spore color. It becomes even more useful when paired with a careful look at attachment of the gills, presence or absence of a ring, stem base features, cap surface, and where the mushroom was growing.

There are important exceptions. Color can vary with lighting, maturity, and print thickness. Closely related mushrooms may share the same general print color, and unrelated mushrooms can overlap as well. A white print, for instance, describes a broad range of mushrooms with very different characteristics.

For this reason, never use a spore print as the only basis for deciding whether a wild mushroom is edible. Identification should rely on multiple verified traits and, when needed, local expert confirmation. If there is uncertainty, keep the specimen for study rather than making a consumption decision.

Take the Next Step With Microscopy

Once you have a print, microscopy can reveal traits that color cannot. Spore shape, size, wall thickness, surface texture, and reaction to staining methods can help separate look-alikes that share similar caps and print colors. This is where a well-preserved print becomes more than a quick observation.

For a slide sample, transfer only a tiny amount of spores with a sterile needle or fine tool. A heavy pile is harder to view than a thin, even scatter. Keep notes on magnification, measurements, and what you observe. Over time, these records create a personal reference library that is far more useful than relying on memory or photos alone.

If you are working with prints for research, collecting, or microscopy practice, handle them gently and store them dry. Foil is a popular storage surface because it folds neatly and can be kept in a labeled bag or envelope. Paper works well for visual records, but loose spores can rub off during handling.

A Simple Record Makes Every Print More Useful

A good spore print record connects the deposit to the mushroom that produced it. Include the date, general location or growing medium, cap diameter, underside type, observed print color, and a photo of the fresh specimen if you have one. Add notes about weather and maturity when relevant.

This habit is especially helpful when you compare multiple specimens that seem similar at first glance. A collection of labeled prints quickly shows which traits stay consistent and which change with age or conditions. That is the kind of practical pattern recognition that makes mycology more rewarding.

Myceli Nation is built for enthusiasts who want to keep learning, comparing, and refining their technique across the wider mycelium network. Treat every print as one useful clue, make clean records, and let careful observation lead the next question.