Posted on

Mushroom Incubator Reviews That Help You Buy

Mushroom Incubator Reviews That Help You Buy

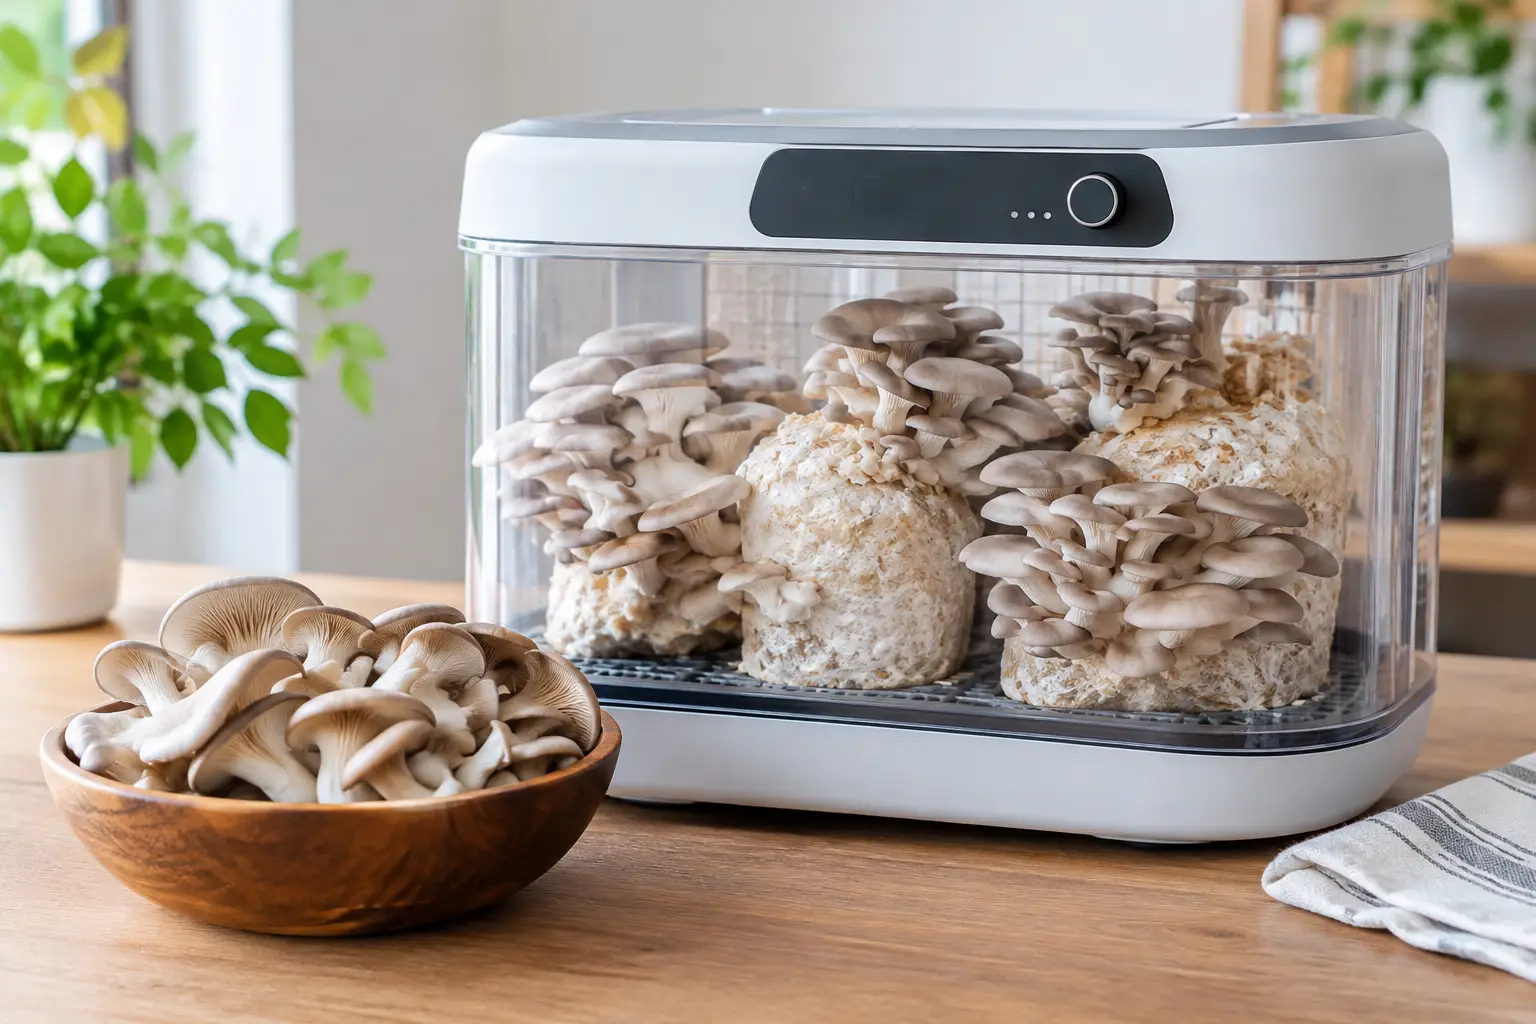
A heated cabinet can look impressive in a product photo, but mushroom incubator reviews are most useful when they answer one practical question: will this unit create stable, clean conditions for the way you actually grow? A compact setup for a few culture jars has very different needs than a steady rotation of grain, blocks, and edible cultures.

The right incubator is not always the biggest, warmest, or most automated option. It is the one that holds a dependable environment without adding unnecessary heat, moisture, cleaning headaches, or electrical clutter to your grow area. Here is how to read reviews like a cultivator instead of getting distracted by a feature list.

What Mushroom Incubator Reviews Should Tell You

A useful review goes beyond “works great” or “arrived fast.” Look for details on temperature stability, usable interior space, recovery time after the door opens, and whether the unit is easy to wipe down between runs. Those points reveal much more than a star rating.

Temperature accuracy is usually the first claim worth testing. Many units show a digital number on the display, but the air at the top shelf, bottom shelf, and back corner may not match it. Strong reviews mention checking the chamber with a separate thermometer or sensor. A small difference is normal. Large swings, especially during heating cycles, can turn a simple incubation space into a constant monitoring project.

Pay attention to where the reviewer lives and where the incubator sits. A unit operating in a climate-controlled room may appear very steady, while the same model in a cool garage, basement, or drafty utility room has to work harder. Ambient conditions are part of the review, even when they are not listed as a specification.

Start With Your Actual Incubation Goal

Incubation is primarily about controlled warmth and consistency. It is not automatically a humidity chamber. That distinction matters because new growers sometimes buy a large, humidified tent when a clean shelf, gentle heat source, and reliable controller would better serve their cultures.

For agar plates, liquid cultures, and jars, a smaller enclosed incubator can make sense when your room temperature runs cool or fluctuates widely. A compact unit is easier to stabilize, uses less power, and takes less time to clean. The trade-off is limited shelf height and capacity. Tall jars, filter bags, or a growing collection of culture work can quickly outgrow it.

For larger quantities of grain or several substrate bags, a converted cabinet, insulated tote, or purpose-built larger chamber may offer better value per item. These setups require more thought around heat distribution. An inexpensive heater placed too close to one shelf can create warm spots that a single display sensor never catches.

Before comparing models, measure what you intend to store. Count not only the number of jars or bags, but the shelf clearance, door opening, and room needed around containers for air to circulate. Published liters or cubic feet can be misleading when the shelves are shallow or fixed in awkward positions.

The Features That Earn Their Keep

Temperature control and sensor placement

A thermostat with a clearly adjustable set point is more useful than a heater that simply runs at one preset level. Ideally, the controller has a probe that can be positioned near the containers rather than buried against a heat source. Reviewers who report both the displayed temperature and an independent reading give you a much clearer picture of performance.

Look for stability over several hours, not just a unit that reaches the target temperature quickly. Fast heating sounds attractive, but gentle cycling is generally easier on cultures and less likely to create hot zones. If a review says the chamber overshoots every time it turns on, consider whether you are willing to add an external temperature controller.

Airflow without overcomplication

Incubation equipment does not need a strong fan blasting directly over plates, jars, or bags. Still air is not automatically bad, but trapped heat near the heater can be. Gentle circulation can help even out temperatures in a taller chamber, particularly when shelves are packed.

Read reviews for comments about condensation, stale odors, or noticeably warmer lower shelves. Those can point to poor internal circulation. On the other hand, a fan system that runs continuously may dry the chamber and add noise. The best choice depends on the chamber size and how tightly you load it.

Humidity and condensation management

Humidity controls are often marketed as a premium feature, but they are not essential for every incubation task. In fact, excess moisture inside a closed incubator can create condensation on lids, walls, and electrical components. That makes sanitation harder and can obscure what is happening inside your containers.

If you need elevated humidity for a particular workflow, choose equipment that separates the humidification source from sensitive electronics and allows straightforward cleaning. Reviews that mention puddling, dripping, or mold inside inaccessible vents deserve attention. A chamber that is difficult to sanitize will eventually cost more time than it saves.

Shelves, seals, and materials

Small construction details decide whether an incubator feels convenient after the first week. Removable shelves are easier to wash. Smooth interior walls are easier to disinfect. A door seal should close firmly without requiring a hard push that rattles jars and plates.

Clear doors are convenient because they reduce unnecessary opening, but they also reveal every streak and splash. Opaque cabinets offer a darker environment and may insulate slightly better, though you will open them more often to inspect your work. Neither design is universally better. Choose based on your placement, routine, and how frequently you need visual checks.

Review Red Flags Worth Taking Seriously

One negative review does not condemn a product, particularly when shipping damage or setup error is involved. A repeated pattern is different. If multiple buyers mention the same issue, assume it may affect your unit too.

Watch for recurring reports of inaccurate displays, burnt smells, weak door hinges, failed fans, cracked plastic near heating elements, or customer support that disappears when a controller fails. Also be cautious when reviews are vague but uniformly enthusiastic. Helpful feedback tends to include container types, room conditions, measured temperatures, and how long the user has operated the unit.

Photos can reveal issues the written review does not. Look at shelf spacing, cord routing, the location of vents, and whether the interior is realistically usable once jars or bags are loaded. A pristine photo with one small container tells you almost nothing about working capacity.

Compare the Total Setup, Not Just the Unit Price

The cheapest incubator may need a separate thermostat, additional thermometer, rack upgrade, and surge protection before it is ready for dependable use. A more expensive unit may include some of those features but have limited room to expand. The best value is the setup that supports your current routine without forcing you to replace it after two productive cycles.

Also consider power draw and placement. A unit that runs constantly in a warm room can quietly add expense while producing more heat than your cultures need. In some homes, a stable room-temperature shelf is already sufficient for much of the work. An incubator is a tool for solving a real environmental problem, not a mandatory badge of serious cultivation.

If you are building a supply list, prioritize clean culture materials, dependable containers, and accurate monitoring before chasing automation. Myceli Nation is built for growers who like having options, but the smartest purchase is still the one that fits your space and your process.

A Practical Way to Test a New Incubator

Once your chamber arrives, do not load it immediately. Run it empty for a day with an independent thermometer at shelf level. Check the temperature in more than one location, then repeat the test with representative jars or bags inside. Full shelves change airflow and heating behavior.

Open the door briefly and see how long the chamber takes to return to its setting. Listen for unusual clicking, grinding, or constant fan noise. Wipe down all surfaces, inspect the seal, and make sure cords and heating components remain dry. This short test gives you the information that many rushed reviews miss.

The most valuable mushroom incubator reviews are not the ones promising perfect results. They are the ones that show how equipment behaves under ordinary conditions, with real containers, real room temperatures, and honest trade-offs. Buy for steady control, easy cleaning, and the amount of culture work you plan to keep moving next month, not just the setup that looks best on day one.

Posted on

5 Dropshipping Setup Examples That Scale

5 Dropshipping Setup Examples That Scale

A storefront can look fully stocked on day one without a warehouse, but the best dropshipping setup examples do more than move products from one address to another. They make a specialized catalog feel intentional. In mycology, that means clear formats, accurate inventory, sensible bundles, and fulfillment standards that protect the customer experience from checkout to delivery.

For sellers building in a focused category, dropshipping is not a shortcut around operations. It is an operating model. The supplier, store, product data, packaging expectations, shipping rules, and customer support process all need to work as one network.

What a Strong Dropshipping Setup Looks Like

A general store can sometimes get away with a huge, loosely connected catalog. A specialty mushroom store cannot. Buyers know the difference between a spore print, a syringe, an edible culture, and a cultivation supply. They expect product pages that answer the practical questions before they have to ask them.

That is why a good setup starts with product logic rather than a theme or an ad campaign. Organize the store around how customers shop: by product format, collection, cultivation goal, or fan-favorite variety. Keep titles consistent, use straightforward category labels, and make stock status visible. If a supplier cannot provide dependable inventory updates, that product is not ready for a serious storefront.

The examples below show different ways to structure a dropshipping operation. The right fit depends on catalog depth, customer expectations, margins, and how much control you need over the unboxing experience.

5 Dropshipping Setup Examples for Specialty Stores

1. The Lean, Single-Supplier Launch

This is the cleanest place to start. Your store carries a tightly selected range from one supplier, such as a focused assortment of spore prints, syringes, edible cultures, and basic cultivation accessories. Orders flow to one fulfillment partner, which keeps shipping rules, inventory syncing, and support decisions simple.

The strength of this model is control through simplicity. You can build useful product descriptions, set realistic delivery expectations, and learn which formats customers actually want before expanding. It also reduces the chance that one customer order arrives in three separate packages.

The trade-off is dependence. If the supplier runs low on a best seller, changes packaging, or has a fulfillment delay, your store feels it immediately. Before launch, agree on stock reporting, processing windows, order cutoffs, replacement procedures, and who handles packages lost in transit. A low-friction setup is only valuable if the back end is reliable.

2. The Category-Led Multi-Supplier Store

A broader store may use one supplier for cultures, another for prints, and a third for cultivation supplies. This setup makes sense when no single partner offers the depth needed to serve a community that wants both familiar favorites and harder-to-find options.

On the customer-facing side, the store should still feel like one destination. Build clean category pages, standardize naming conventions, and avoid mixing product details that vary by supplier. A customer should not have to decode three different descriptions to understand what is included, how an item is packaged, or when it is expected to ship.

The challenge is split fulfillment. Be transparent when an order may arrive in separate shipments. It is better to state that plainly before checkout than to create uncertainty afterward. This model also needs more careful margin planning, since shipping costs and processing times can differ across partners.

3. The Bundle-First Storefront

Bundles are one of the most useful dropshipping setups for a niche catalog because they help customers make a decision without forcing them to piece together every item individually. A starter-focused bundle might pair a selected format with compatible supplies. A collector-oriented set might group several distinct varieties into one clearly labeled pack.

The key is that every bundle must be operationally real. If its components ship from different locations, make sure the product page and confirmation emails set the right expectation. If a supplier assembles the bundle before shipping, confirm that the bundle SKU updates correctly when one component goes out of stock.

Avoid bundles created only to inflate the item count. Good bundles solve a shopping problem: they simplify first purchases, introduce complementary products, or give returning customers a practical way to explore more of the catalog. Clear savings and clear contents matter more than flashy bundle names.

4. The Content-Supported Dropshipping Shop

This model uses education to make a specialized catalog easier to shop. Product pages remain conversion-focused, while supporting content answers recurring questions about formats, storage guidance, basic supply selection, and what buyers can expect from different categories.

For a mycology audience, this approach works especially well when it respects the customer’s baseline knowledge. Do not bury shoppers in beginner material they did not ask for. Instead, use clear category language and helpful comparisons where a choice genuinely needs context. A shopper deciding between a print and a syringe should be able to understand the distinction quickly, then continue browsing.

Content also gives your support team a stronger foundation. When descriptions, post-purchase guidance, and customer service replies all use the same terms, the business feels informed and dependable. The downside is upkeep. Old product details create more confusion than no educational content at all, so review materials whenever suppliers change formats, availability, or handling guidance.

5. The Branded Partner Program

The most mature model turns dropshipping into a partner channel. Instead of simply listing another supplier’s goods, the store establishes standards for product presentation, approved images, descriptions, packaging expectations, customer communication, and shipping performance. Partners gain access to a focused audience; the storefront retains a consistent brand experience.

This setup is ideal when a business has built trust around curation and wants to add variety without becoming a warehouse. It can also support affiliate and reseller relationships, provided the responsibilities are explicit. Partners should know what claims they can make, how they represent the catalog, and where customer issues are routed.

The risk is reputational. A partner’s late shipment or inaccurate stock count is not seen as a partner problem by the customer. It is seen as your store’s problem. Track fulfillment performance, audit listings regularly, and remove products that create repeated friction. A smaller catalog with dependable service will outperform a sprawling one full of uncertainty.

Build the Operations Before You Promote

The storefront is the visible layer, but operations decide whether customers return. Before turning on paid traffic or announcing a launch, place test orders to multiple regions. Review every customer touchpoint: confirmation emails, tracking updates, package presentation, delivery timing, and the process for an item that arrives damaged or missing.

Set policies that match your suppliers’ actual capabilities. Do not promise same-day processing if orders are transferred manually once per day. Do not advertise worldwide shipping without confirming restricted destinations, carrier availability, and the documentation required for each market. Specialty products deserve careful attention to applicable laws, platform rules, and destination-specific requirements.

Inventory is another common weak point. Use inventory buffers for fast-moving products rather than displaying the supplier’s last available unit as immediately purchasable. A small buffer can prevent awkward cancellations, especially during promotions or newsletter drops. For limited runs, label them clearly and offer a simple alternative category when they sell out.

Choose the Setup That Supports Your Store

There is no universal winner among these dropshipping setup examples. A new shop may benefit most from a single reliable supplier and a narrow assortment. A developed brand with strong product knowledge may be ready for multiple partners, curated bundles, and a more ambitious catalog.

Start with the model you can explain clearly to a customer and manage consistently behind the scenes. Then expand only when your inventory data, supplier communication, and support workflow can carry the added complexity. At Myceli Nation, the goal is the same across every category: make specialty mycology products easier to find, easier to understand, and easier to order with confidence.

Posted on

Liquid Culture vs Grain Spawn: What to Use?

Liquid Culture vs Grain Spawn: What to Use?

A jar can look fully colonized and still leave you with a bad decision: do you expand it through liquid culture, or put it straight to grain? The liquid culture vs grain spawn question is less about which option is universally better and more about what stage your culture is in, how much you need to expand, and how confidently you can keep your work clean.

For edible mushroom growers, both are valuable tools. Liquid culture is a fast, scalable way to move clean mycelium into multiple containers. Grain spawn is the solid, nutrient-rich expansion step that prepares that culture for a bulk substrate or other fruiting media. They are related, but they do different jobs in a cultivation workflow.

Liquid Culture vs Grain Spawn: The Core Difference

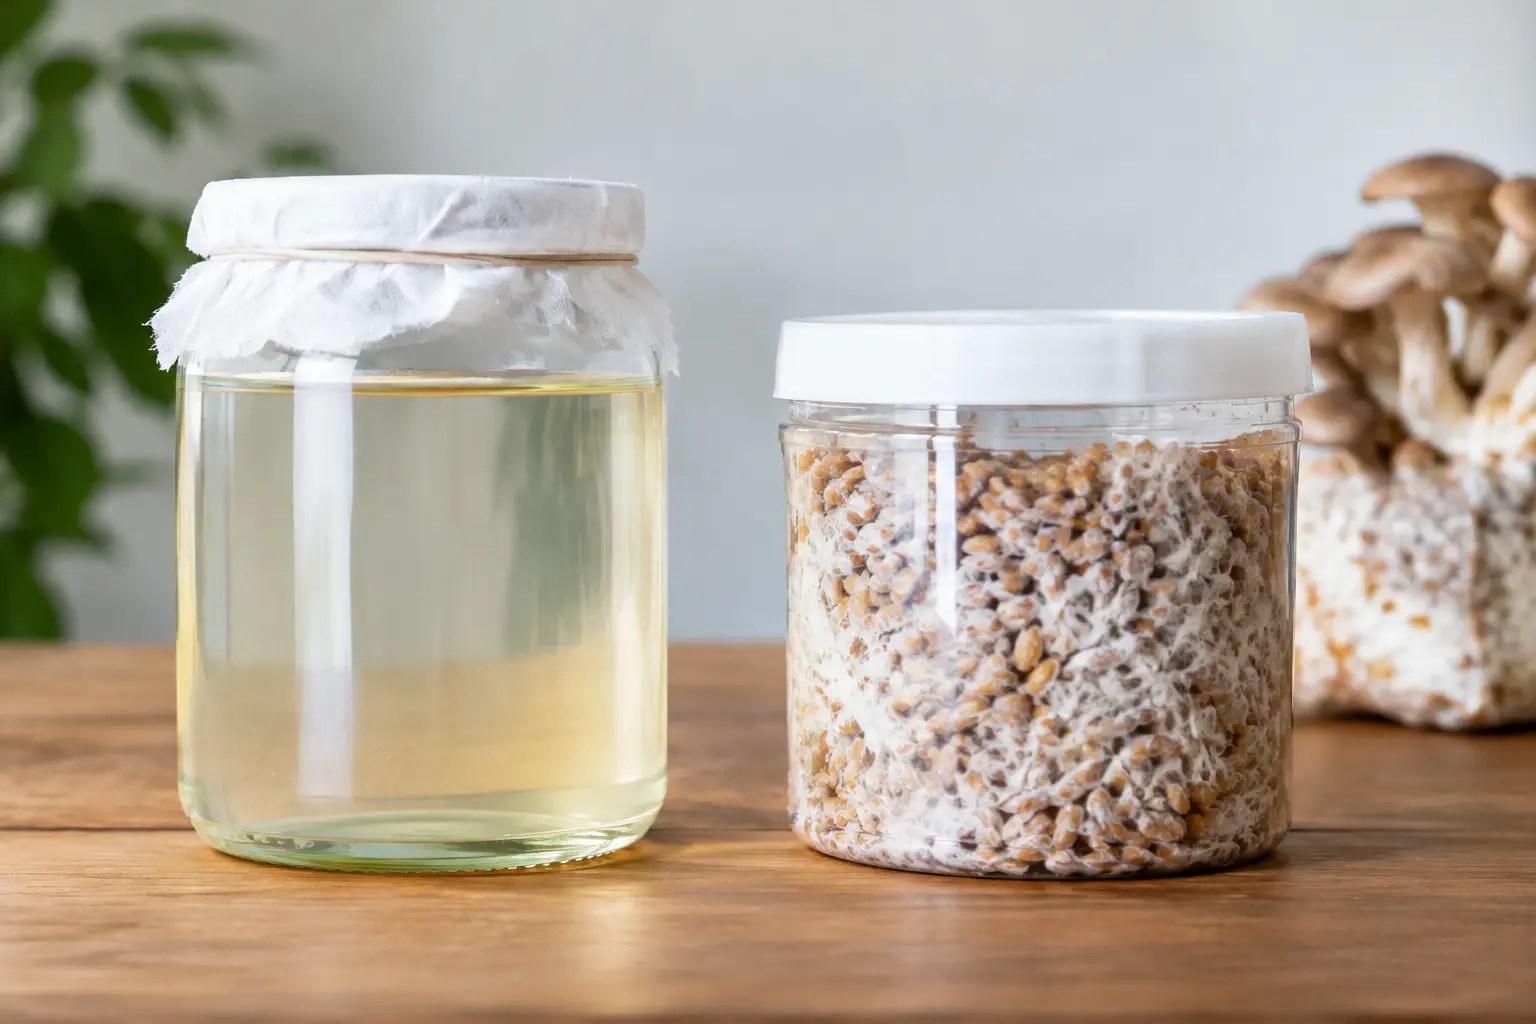
Liquid culture is mycelium grown in a sterilized nutrient solution, usually water with a simple sugar source. Healthy growth appears as white, cloud-like strands or suspended clusters moving through a mostly clear liquid. The culture can be drawn into a sterile syringe and used to inoculate grain, more liquid culture, or appropriate sterile media.

Grain spawn is mycelium grown on hydrated, sterilized grain. Millet, rye, oats, and sorghum are common choices because each grain provides moisture, nutrition, and many inoculation points. Once a jar or bag is thoroughly colonized, the grain is typically broken apart and mixed with a suitable bulk substrate for species such as oyster, lion’s mane, chestnut, or shiitake.

Think of liquid culture as an expansion and distribution format. Think of grain spawn as the bridge between a clean culture and a productive substrate. A liquid culture can make several grain jars quickly; grain spawn gives the mycelium the physical food source and structure it needs before the next stage.

Why Growers Choose Liquid Culture

The biggest advantage of liquid culture is speed at scale. A small amount of verified-clean culture can inoculate many grain jars or bags, and the liquid disperses through the grain more evenly than a small wedge of agar. That head start can reduce colonization time, especially when you are preparing several projects from the same edible culture.

It is also convenient. A syringe lets you add measured amounts through a self-healing injection port without opening a grain container. For growers running repeatable batches, this keeps the workflow tidy and makes expansion easier to track. One healthy master culture can support a practical rotation of grain inoculations without constantly returning to a plate.

Liquid culture does require discipline, though. Clear broth is not proof of cleanliness. Some contaminants are difficult to spot in liquid, and a culture can look normal until it reaches grain. The smart move is to test a small sample on agar before using a liquid culture for a larger run. Agar reveals growth patterns in a way liquid simply cannot.

Storage is another consideration. Liquid culture is useful for short- to medium-term working stock when refrigerated properly, but it is not the best answer for every long-term preservation plan. A culture collection is more reliable when you maintain clean master cultures on agar and make liquid culture only as needed.

When liquid culture makes the most sense

Liquid culture is a strong choice when you have a clean, proven culture and want to inoculate multiple grain containers efficiently. It is especially useful for repeat grows of a favorite gourmet strain, for preparing several bags at once, or for building a consistent supply of grain spawn for a small mushroom operation.

If you are still evaluating a new culture, avoid treating liquid culture as a shortcut around verification. Put cleanliness first, then scale. Fast expansion only helps when the culture being expanded is worth multiplying.

Why Grain Spawn Still Does the Heavy Lifting

Grain spawn is where mycelium gains momentum. Each colonized grain becomes an inoculation point after you break up and distribute the spawn through a substrate. That broad distribution gives the mycelium a better chance to colonize evenly before competitors find an opening.

For many cultivators, grain spawn is also easier to read than liquid culture. Healthy colonization is visible across the grains, and you can assess texture, coverage, moisture, and suspicious colors before moving forward. A sweet, sour, or otherwise off smell is a clear signal to stop rather than mix questionable spawn into more material.

The trade-off is that grain spawn takes more space and more prep. Grain must be hydrated correctly, loaded into jars or filter bags, and sterilized thoroughly. Overly wet grain can clump and encourage bacterial problems; underhydrated grain can slow growth. It is a hands-on step, but it is also one of the most useful quality checkpoints in the whole process.

Grain spawn is not usually the ideal format for long storage. Even under refrigeration, it continues to age, dry out, or lose vigor over time. It performs best when used while it is fresh, fully colonized, and at peak health.

When grain spawn is the better choice

Choose grain spawn when you are ready to inoculate bulk substrate or when you want a visible, practical checkpoint before that move. It is the standard expansion stage for growers producing bags, buckets, trays, or blocks of substrate.

It can also be the better first step for someone learning sterile technique. Working from a clean agar culture to a small number of grain jars keeps the process easier to observe. If one jar develops an issue, you can isolate the loss without risking a larger liquid culture batch.

Speed, Risk, and Cost in a Real Workflow

Liquid culture often wins the speed contest, but only after a clean culture is established. Inoculating grain with a syringe of active mycelium is generally faster than beginning from spores because the mycelium is already growing. Grain spawn then takes over by turning that small amount of culture into enough inoculation points for a larger substrate run.

Risk works differently at each stage. A contaminated liquid culture can spread a problem into every jar it touches. A contaminated grain jar is usually contained to that jar or bag, assuming you do not use it. That does not make grain spawn risk-free, but it gives you a more obvious inspection point before you expand further.

Cost depends on your scale. For one or two projects, purchasing or preparing a modest amount of grain spawn may be simpler than maintaining liquid culture equipment and a testing routine. For recurring grows, liquid culture can reduce per-container costs because a single clean culture can inoculate many jars. The savings disappear quickly if sanitation slips, so do not scale faster than your sterile technique allows.

A Practical Decision Framework

Start with the question behind the purchase or prep. Are you trying to evaluate a culture, expand a proven one, or inoculate a fruiting substrate? If you are evaluating, use agar as your reference point and keep the batch small. If you are expanding a culture you already trust, liquid culture can save time and create a more repeatable workflow. If you are ready for the next production step, fresh grain spawn is the workhorse.

For home growers, a sensible path is often simple: maintain a clean culture, make a small liquid culture only when you need expansion, inoculate grain, then use that grain spawn promptly. This approach avoids holding too much material in any one format and gives you multiple chances to spot trouble early.

The right choice may change from one run to the next. A single jar of grain spawn can be perfect for a weekend oyster mushroom project, while liquid culture makes more sense when you are preparing several bags of the same strain. Build the workflow around clean culture, realistic scale, and the species you want to grow. At Myceli Nation, that is the kind of practical mycology thinking that keeps a grow organized from the first culture to the final harvest.

Posted on

How to Disinfect Microscopy Tools Safely

How to Disinfect Microscopy Tools Safely

A clear field of view starts long before you put a slide under the objective. Knowing how to disinfect microscopy tools helps protect your samples from cross-contamination while keeping delicate optics, metal tools, and your workspace in good shape. The goal is not to soak everything in one harsh chemical. It is to use the right method for the right surface, every time.

For microscopy-focused growers and collectors, that difference matters. A contaminated pair of forceps can transfer debris from one print or sample to the next. A cleaner sprayed directly onto an objective can leave residue, damage coatings, or work its way into the microscope body. Good bench habits are simple, but they need to be specific.

Disinfecting vs. Sterilizing: Know the Difference

Disinfection reduces the number of microorganisms on a surface to a safer level. Sterilization is a higher standard that eliminates all viable microorganisms, including resistant forms. Your microscope, eyepieces, bench tools, and work surface usually need careful cleaning and disinfection. Items that will directly contact sensitive culture work may require sterilization instead, depending on the material and your process.

Do not treat these words as interchangeable. Wiping a metal spatula with 70% isopropyl alcohol is useful disinfection. Running a heat-safe tool through an appropriate sterilization process is another level entirely. The correct choice depends on whether you are handling a dry print, preparing a basic slide, transferring material, or working with a more contamination-sensitive setup.

Set Up a Clean Microscopy Zone First

Start by clearing the bench. Paper scraps, old tape, specimen packaging, and loose fibers all create places for debris to collect. Remove anything you do not need before bringing out slides, forceps, scalpels, swabs, or sample containers.

Wash your hands thoroughly, then put on fresh disposable gloves if you will be handling samples. Gloves are not magic – they can carry contamination from a phone, doorknob, or keyboard just as easily as bare hands. If you touch something outside the work zone, change gloves or disinfect them according to the product instructions before returning to the bench.

Wipe the work surface with a suitable surface disinfectant and let it remain wet for its stated contact time. This step gets skipped constantly. A disinfectant needs time on the surface to do its job, so wiping it off immediately may reduce its effectiveness. Let the bench air-dry when possible, then place down a fresh, clean work mat or disposable bench liner.

How to Disinfect Microscopy Tools by Material

One cleaning method does not fit every piece of gear. Identify what the item is made of and whether it will touch a sample before you reach for alcohol, bleach, heat, or a general-purpose cleaner.

Metal forceps, scalpels, and inoculation tools

For stainless steel forceps, spatulas, and similar hand tools, remove visible residue first. Use a clean lint-free wipe dampened with water or a mild detergent solution if needed, then dry the tool before disinfecting it. Dirt and organic material can block disinfectants from reaching the surface underneath.

A 70% isopropyl alcohol wipe is a practical choice for routine tool disinfection. Wipe all working surfaces, including the inside tips of forceps, and allow them to air-dry. Avoid wiping a freshly disinfected tool on a towel or setting it on an unclean bench.

If a tool is rated for heat or sterilization, use the process recommended for that material and let it cool completely before use. Never heat tools near alcohol or other flammable cleaners. Keep a designated clean area for cooled tools so they do not pick up dust before they reach the slide or sample.

Glass slides, cover slips, and slide holders

New slides and cover slips are often clean enough for basic viewing, but they can still collect dust, fingerprints, and fibers once opened. Handle them by the edges. If a slide needs cleaning, use a lint-free lens tissue or clean wipe with a small amount of suitable cleaner, then let it dry fully.

For reusable glassware, wash away residue before disinfection. Alcohol can help with routine cleaning, but it will not remove dried mounting media, oils, or heavy debris on its own. Reusable slides must be free of streaks before microscopy, since residue can look like structures under magnification and make your read less reliable.

Plastic tools and sample containers

Plastic transfer tools, slide boxes, specimen containers, and disposable loops vary widely in chemical resistance. Alcohol is usually tolerated by many hard plastics, but repeated exposure can cloud, crack, or weaken certain materials. Test an inconspicuous area if you are unsure, and always check the manufacturer guidance for reusable equipment.

Disposable items are often best kept disposable. Trying to rescue a low-cost swab, pipette, or thin plastic loop can introduce more uncertainty than it saves. Keep clean items sealed until use, and discard used disposables promptly in accordance with local waste guidance.

The microscope body, stage, and controls

Your microscope is precision equipment, not a countertop. Never spray disinfectant directly onto the microscope. Instead, lightly dampen a soft lint-free cloth, then wipe high-touch areas such as the stage edges, focus knobs, arm, base, and external eyepiece surfaces.

Use only enough moisture to clean the surface. Liquid can creep into stage controls, illumination housings, and focusing assemblies. For the stage, remove any slide and brush away loose debris first. Then wipe gently, taking care around clips, mechanical stage openings, and moving parts.

If immersion oil, tape adhesive, or stubborn residue is present, clean it promptly with a product approved for your instrument. Letting residue sit is harder on the microscope than careful routine maintenance.

Treat Objectives and Eyepieces Differently

Optics are the one area where aggressive disinfection can do real damage. Objective lenses and eyepieces often have specialized coatings that should not be exposed to household disinfectants, bleach, abrasive paper, or excess alcohol. Do not use a standard paper towel, tissue, or shop rag on lens surfaces.

Use lens paper or a clean microfiber material made for optics. Apply a tiny amount of manufacturer-approved lens cleaner to the paper, not directly to the lens. Wipe with a light motion from the center outward, using a fresh section of material as you go. If you are removing immersion oil, follow the microscope manufacturer’s recommended cleaning procedure for that specific objective.

For shared scopes, wipe the outside of eyecups and surrounding surfaces with a lightly dampened disinfecting cloth, keeping liquid away from the glass itself. If you have a camera port, condenser, or other accessory, treat each component according to its material and instructions rather than assuming the same cleaner is safe everywhere.

Build a Repeatable Post-Session Routine

The easiest way to maintain a clean setup is to make the last five minutes of each session automatic. First, discard used disposables and move reusable tools to a designated cleaning area. Next, clean visible debris from slides, tools, and the stage before disinfecting the appropriate non-optical surfaces.

Then wipe down the bench, return clean tools to closed storage, and cover the microscope after it is dry. A dust cover is not just for appearance. It limits airborne debris settling on the stage, oculars, and lenses between sessions.

Keep cleaning supplies separate from sample supplies. Your alcohol wipes, lens paper, gloves, and surface disinfectant should have a dedicated place within reach. This prevents the classic problem of searching through drawers with contaminated gloves while a prepared slide sits exposed.

Avoid These Common Disinfection Mistakes

A few shortcuts cause most of the damage and cross-contamination seen at home microscopy benches:

  • Spraying liquids directly onto objectives, eyepieces, stage openings, or control knobs.
  • Using bleach or harsh household cleaners on metal components, coated optics, or unknown plastics.
  • Cleaning a tool without first removing visible residue.
  • Reusing wipes, gloves, or lens paper across multiple samples.
  • Returning damp tools or a damp microscope to closed storage.

Also, never mix cleaning chemicals. Combining products can create hazardous fumes and does not make the disinfection process better. Use one suitable product at a time, with ventilation appropriate to its label.

A clean microscopy routine is less about making your bench look clinical and more about protecting the details you are trying to see. Keep your optics gentle, your hand tools consistent, and your workspace reset between samples. That small discipline gives every session a cleaner starting point – exactly what a well-run Mycelium Network bench deserves.

Posted on

Can Spores Survive Freezing? Storage Facts

Can Spores Survive Freezing? Storage Facts

A spore print left in a freezing car, a syringe delivered during a winter cold snap, or a vial tucked into the back of a freezer can raise the same question: can spores survive freezing? Often, yes. But survival is not the same as ideal storage, and freezing can create problems that only show up later when viability is tested.

For collectors, microscopy hobbyists, and cultivators working with edible species, the practical answer depends on the format, water content, packaging, and whether the spores experience one brief freeze or repeated freeze-thaw cycles. Temperature matters, but moisture is usually the factor that turns cold storage into a gamble.

Can Spores Survive Freezing in Different Formats?

Fungal spores are built for persistence. Their outer walls provide protection against drying, environmental change, and periods that would be fatal to active mycelium. Many species encounter freezing conditions outdoors as part of their normal life cycle, so cold alone does not automatically make spores nonviable.

Dry spores generally have the best chance of tolerating a short freeze. A properly prepared spore print, kept dry and protected from condensation, is far less vulnerable than spores suspended in water. With very little free water inside or around the spores, there is less opportunity for damaging ice crystals to form.

Spore syringes are a different case. Freezing a water-based syringe can form ice throughout the solution, potentially stressing spores and creating pressure that affects the syringe or seal. Some spores may remain viable after freezing, but a household freezer should not be treated as a reliable long-term storage method for syringes.

Agar plates, liquid cultures, and other live mycelium products are more sensitive still. Mycelium is actively growing tissue, not a dormant spore. Freezing without controlled cryopreservation methods can rupture cells, alter the culture, or stop growth entirely. If you are storing an edible culture, refrigeration is typically the more sensible short-term option unless a species-specific preservation protocol says otherwise.

Why Moisture Changes the Outcome

The biggest risk is not simply that the sample gets cold. It is what water does as it freezes and thaws.

When water freezes, ice crystals can damage biological structures. In a spore syringe, this may affect individual spores, while expansion can place physical stress on the container. On a print, moisture can arrive from a less obvious source: condensation. A cold package brought into a warm room may collect water if it is opened too soon, leaving the print exposed to humidity exactly when it should stay dry.

This is why a dry print in a sealed bag may handle a brief accidental freeze reasonably well, while the same print can lose quality if it is repeatedly moved between a freezer, counter, and refrigerator. Each temperature swing adds another chance for condensation and moisture exposure.

Species also make a difference. Spore size, wall thickness, maturity, and natural habitat all influence cold tolerance. There is no universal promise that every spore sample will perform identically after freezing. Treat cold exposure as a condition to manage, not a guaranteed preservation technique.

A Freezer Is Not the Same as Cryopreservation

It is easy to assume that colder always means better preservation. In professional collections, ultra-low-temperature storage can preserve biological material for extended periods. But that process is controlled. Samples may be prepared with cryoprotective agents, cooled at specific rates, and held at stable temperatures in specialized equipment.

A kitchen freezer does none of that. It cycles temperatures as the compressor runs, warms slightly during defrost events, and is opened frequently. The door and front-facing areas experience the most fluctuation. Frost-free freezers are convenient for food, but their cycling can be especially unhelpful for biological samples that need stable conditions.

For most home mycology storage, the goal is simpler: keep the sample cool, dark, dry, clean, and stable. A freezer is not automatically the best way to reach that goal.

What to Do After a Sample Freezes Accidentally

If a package, print, or syringe was exposed to freezing temperatures during shipping or storage, avoid making the situation worse with rapid handling. Let the sealed item return gradually to room temperature before opening it. That reduces the chance that warm, humid air condenses directly on the sample.

Inspect the packaging after it has equilibrated. For prints, look for signs of moisture, smearing, damaged paper, or compromised wrapping. For syringes, check for cracks, leaks, separated components, or unusual cloudiness. Physical damage is often easier to identify than viability loss.

A sample that looks normal may still be viable, especially if the freezing event was brief. If it is intended for microscopy or legal edible cultivation, test a small portion using clean technique rather than assuming the entire sample has failed. Keeping a backup from a separate source or batch is a smart habit when a collection matters.

Better Storage for Prints, Syringes, and Cultures

Storage should match the product format. The following practices reduce avoidable losses without overcomplicating your setup:

  • Spore prints: Keep them dry, flat, light-protected, and sealed inside clean packaging. A cool drawer, cabinet, or dedicated storage box is usually preferable to a freezer for routine storage.
  • Spore syringes: Store them upright or secured where they will not leak, overheat, or freeze. A stable, cool location away from direct sunlight is generally safer than the freezer compartment.
  • Edible cultures: Follow the supplier’s storage guidance, especially for refrigerated live culture formats. Minimize unnecessary handling and avoid letting cultures sit in hot vehicles, near heaters, or in freezing conditions.
  • Long-term collections: Label every item with the species, format, source, and date received. Organization prevents old samples from being repeatedly opened, moved, and exposed while you search for the right one.

For dry materials, a moisture absorber stored nearby can help maintain a dry storage environment, but it should not directly touch the print itself. The point is to manage ambient humidity, not to press desiccant against delicate material.

Shipping in Winter: When to Worry

Cold-weather delivery is not automatically a loss. A well-packed dry print can often tolerate a short period in cold transit better than a warm, humid, or poorly sealed sample. The concern rises when a package sits outdoors for days, experiences extreme cold, or contains liquid-based products that may freeze solid.

Bring winter deliveries indoors as soon as possible. If the package feels very cold, allow it to warm unopened before inspecting the contents. Do not place it directly on a heater, radiator, or sunny windowsill to speed things up. Gentle, gradual warming is the safer approach.

When ordering specialty mycology supplies during severe weather, choose a delivery window when someone can receive the package. That small bit of planning can matter more than trying to rescue a sample after extended exposure on a porch or in a mailbox.

The Practical Takeaway for Home Storage

Spores can survive freezing, particularly when they are dry, mature, well-protected, and exposed only briefly. Still, freezing is not a universal storage upgrade. Water-based products, repeated thawing, condensation, and unstable freezer conditions all raise the risk of reduced viability.

Build your storage routine around stability rather than extreme cold. Keep each format in the conditions it is designed for, label it clearly, and handle it only when needed. A calm, dry, organized storage setup will do more for a healthy collection than a crowded freezer ever will.

Posted on

Best Mushroom Bundle Deals Worth Adding to Your Cart

Best Mushroom Bundle Deals Worth Adding to Your Cart

A bundle should do more than shave a few dollars off the cart. The best mushroom bundle deals make it easier to explore familiar genetics, stock up on the formats you actually use, or pair edible cultures with the supplies that keep a project moving. For collectors, microscopy-focused buyers, and gourmet growers, the right pack turns several separate decisions into one smart order.

At Myceli Nation, The Mycelium Network is built around variety. That makes bundles especially useful when you know what you want from your next order, whether that is a broader collection, dependable favorites, or a practical growing lineup.

What Makes a Mushroom Bundle a Real Deal?

The sticker price is only the first part of the equation. A strong bundle gives you a meaningful per-item savings while keeping every item relevant to your goals. Four products you will use are usually a better value than eight products chosen just because the word “bundle” is attached.

Start with the individual price of each included item. Add those prices, then compare the total to the bundle price. The difference shows the actual savings, not a vague promotional claim. This is particularly useful when comparing multi-pack spore syringes, print collections, and mixed culture packs, where item formats can vary.

Value also depends on selection. A bundle of closely related options may be ideal if you are narrowing a collection or looking for consistency. A mixed pack can be more exciting when you want a range of recognizable names, appearances, or study subjects. Neither approach wins every time. It depends on whether you are deepening one lane or expanding your shelf.

Best Mushroom Bundle Deals by Shopping Goal

Build a recognizable collection

Classic-name variety packs are a natural place to start for enthusiasts who want several fan favorites without placing multiple small orders. A well-built selection might bring together names such as Golden Teacher, B+, Blue Meanie, and Lizard King in one purchase. The appeal is not only price. It is having a clean, organized way to add range to a collection.

Look closely at the format before ordering. A print bundle and a syringe bundle may include similar names, but they suit different preferences. Buyers who already know their preferred format should not let a lower bundle price pull them into a format they will not use. The best deal is still the one that fits your routine.

Shop edible cultures with a plan

Edible culture bundles are often the most practical option for growers who want to try more than one culinary variety or keep a steady rotation of projects. Oyster varieties, lion’s mane, shiitake, and other gourmet cultures can each bring different characteristics to the table, from fruiting conditions to kitchen use.

Here, a thoughtful bundle is more useful than a random assortment. Choose varieties that match your available space, temperature range, and schedule. If you are working with limited room, a small set of cultures you can manage well has more value than a large pack that leaves you juggling too many timelines at once.

Restock the essentials

Supply bundles deserve a closer look when your cart already contains cultures or ready-to-inoculate products. The convenience comes from reducing missed items at checkout. Depending on the bundle, that may mean pairing materials, containers, substrates, or other cultivation basics in a combination that makes sense for the project ahead.

This category is where convenience can be as valuable as the discount. One coordinated order can mean fewer repeat shipments, fewer last-minute substitutions, and a more organized work area. Still, check sizes and quantities. A supply pack is only a deal if it aligns with the scale you are actually planning.

How to Compare Bundle Formats Without Guesswork

Bundles are not interchangeable, even when the number of items is the same. Before adding one to your cart, compare the product format, the amount included, and the purpose of each item.

Spore syringe bundles can make sense for buyers who prefer that format and want a selection of separate labeled options. Spore print packs are a better fit for collectors and microscopy enthusiasts who specifically want prints. Ready-to-inoculate products may be the convenient choice for shoppers prioritizing a more direct workflow. Edible cultures belong in their own category because their practical considerations are different from a collection-focused purchase.

A mixed-format bundle can be a great deal for someone intentionally exploring several product types. It can also create clutter for a shopper who only needs one. Read the full bundle contents rather than relying on the product image or headline alone.

Check for duplicates before you commit

Duplicates are not automatically bad. If a favorite is included twice because you want a backup or plan to use the same option across separate projects, that can be a smart buy. But if you are building variety, repeated items can quietly reduce the value of a multi-pack.

Take a minute to compare the bundle contents against your existing collection. This is especially worthwhile during a promotion, when the excitement of a marked-down price can make overlap easy to miss.

Consider shipping as part of the total value

A lower-priced pack is not always the lower-cost order once shipping is considered. Combining products into one bundle can be more efficient than placing several small orders over time, particularly for customers outside the continental US or those building a larger order.

That said, do not add unnecessary products simply to hit a perceived value threshold. If a smaller bundle contains exactly what you need, it may be the better purchase even if the advertised savings are more modest.

When a Bundle Is Not the Best Buy

Single items still have their place. If you are replacing one proven favorite, testing a very specific edible culture, or want to compare a single format before committing to a larger selection, buying individually can be the cleaner move.

Bundles can also be less appealing when they mix a few must-haves with several items you would not have selected on their own. The discount must be large enough to justify those extras. A simple rule works well: if you would not be happy receiving every item at the displayed total, keep shopping.

For newer buyers, a smaller curated pack is often wiser than the biggest option on the page. It keeps the order focused and gives you room to learn what names, formats, and categories you want to return to later.

A Better Way to Time Your Bundle Order

Promotional bundles tend to move quickly because they solve a real buying problem: they package choice and value together. If you see a lineup that fits your interests, compare it against your wish list before checking out. You may find that the bundle replaces several planned purchases at a better total.

Newsletter promotions and featured collection drops can also be useful signals for shoppers who prefer to buy strategically rather than constantly browse. Keep a short list of the formats and categories you actually want, then use a bundle offer as a chance to act when the match is right.

The best mushroom bundle deals are not about buying the most products possible. They are about putting together a cart that feels intentional – a few well-chosen favorites, a new culture worth trying, or the supplies that keep your next project organized. Shop the bundle that gives your collection or cultivation plan a genuine next step, not just a bigger box.

Posted on

Can Cultures Survive Shipping? What Matters Most

Can Cultures Survive Shipping? What Matters Most

A live culture is not a shelf-stable accessory. It is active biology in a small container, and that changes how it should be packed, shipped, and received. So, can cultures survive shipping? Yes, edible mushroom cultures can handle shipment very well when they are healthy before dispatch, protected from temperature extremes, and moved through the carrier network without unnecessary delays.

For growers ordering ready-to-inoculate material, the goal is not to expect a culture to look identical after every trip. The goal is to receive a clean, viable culture that is ready to recover and perform. A few days in transit can be normal. Excess heat, a long weekend in a warehouse, or a damaged package is where the real risk begins.

Can Cultures Survive Shipping in Real Conditions?

Most properly prepared edible cultures are more durable than first-time buyers expect. Mycelium is living tissue, but it is not as fragile as a freshly picked mushroom. In a sealed syringe, slant, plate, or other ready-to-inoculate format, a healthy culture can usually tolerate routine carrier movement, vibration, and a reasonable shipping window.

The limiting factor is almost always the environment around the package. A culture shipped across mild weather in two or three days faces a completely different trip than one sitting in a hot delivery truck, a freezing mailbox, or a delayed sorting facility. Transit time matters, but temperature exposure often matters more.

The format matters too. Liquid culture syringes are convenient and commonly shipped, but they should be kept from extreme temperatures and physical damage. Agar-based formats can dry out or overheat if delayed for too long. Slants are compact and generally practical for storage, yet they still need a stable trip. No format is invincible, but each can arrive in excellent condition when packing and timing are handled properly.

The Four Factors That Decide Culture Viability

1. Culture health before dispatch

Shipping cannot improve weak or contaminated material. A clean, actively growing culture starts with a much better chance of arriving ready to use. Healthy mycelium has reserves, but cultures that are old, stressed, or already struggling have less margin for travel.

This is why reliable handling begins before a label is printed. Fresh preparation, clean technique, secure closures, and appropriate storage before dispatch all affect what reaches the customer. The package is only the final stage of quality control.

2. Temperature exposure

Heat is usually the bigger concern, especially during summer shipping. Sustained high temperatures can stress mycelium, change the condition of the medium, and reduce viability. Direct sun on a porch or inside a mailbox can create much hotter conditions than the outdoor forecast suggests.

Cold also deserves respect. Brief cool exposure may not cause a problem for many cultures, but freezing temperatures can damage cells and compromise containers. The risk depends on how cold it gets, how long the package remains there, and whether the culture is buffered by insulation or surrounding materials.

The practical takeaway is simple: avoid ordering right before a severe weather event when possible, and plan for delivery rather than letting a live-culture package sit outside all day. A shipment that arrives safely at noon can become a problem by evening if it is left in summer sun or winter cold.

3. Transit time and shipping days

Fast shipping is helpful, but predictable shipping is often even better. A culture moving consistently through the carrier system is preferable to one that spends an extra two days stalled over a weekend or holiday. This is why many live-culture sellers time dispatches around the carrier calendar.

Ordering early in the week can reduce the odds of a package sitting through a weekend. Customers should also account for regional holidays, weather disruptions, and rural delivery schedules. There is no need to panic over a normal transit window, but every additional day gives temperature swings and handling delays more opportunity to affect the package.

4. Packaging and physical protection

Good packaging does several jobs at once. It prevents leaks, cushions against impact, reduces direct exposure to outside air, and keeps contents organized so they do not rattle around in transit. A well-packed culture should arrive contained, protected, and clearly identifiable.

Insulation can help moderate short-term temperature shifts, though it is not magic. Heavy insulation in hot weather can hold heat if the package starts warm, while insufficient insulation offers little defense against a cold truck. The right approach depends on season, destination, format, and expected transit length.

What to Do When Your Culture Arrives

Receiving a live culture is part of the process. Bring the package inside promptly, especially during temperature extremes. Do not leave it in a vehicle, mailbox, garage, or porch while you finish the rest of your day.

Inspect the outer package first. Look for crushing, punctures, leakage, broken seals, or obvious heat damage. Then check the culture itself without rushing to make assumptions. A liquid culture may look different after moving through the mail, and mycelium can settle during transit. That alone does not mean it is unusable.

If the packaging is intact, follow the storage guidance for the specific format until you are ready to work with it. Avoid repeated warming and cooling cycles. A culture does better with calm, consistent handling than with constant checking and unnecessary movement.

If there is a clear issue, document it right away. Take photos of the shipping box, label, packing materials, and product condition before discarding anything. Prompt, detailed communication gives the seller the best chance to understand what happened and determine the appropriate next step.

Signs a Shipped Culture May Need Attention

A delayed package is not automatically a failed package. Likewise, an attractive-looking culture is not a guarantee of performance. The best assessment comes from clean technique and a small test rather than guesswork.

Visible leaks, cracked containers, broken seals, or a package that has clearly frozen or overheated deserve immediate attention. In liquid culture, unusual discoloration, a strong off odor after opening, or signs inconsistent with healthy mycelial growth can be reasons to pause and inspect more closely. With agar formats, drying, excessive condensation, or unexpected growth can signal that the culture needs evaluation before use.

For growers who want more confidence before committing a culture to a larger project, a small transfer or test inoculation is a smart move. It protects your bulk materials and lets you confirm clean, vigorous growth under your own conditions. That extra step is especially useful after a weather delay or a rough-looking delivery.

How Buyers Can Improve Shipping Outcomes

A few decisions on the customer side can make a meaningful difference. Choose a shipping address where someone can receive the package, rather than a location where it will sit unattended. Watch tracking updates closely when the forecast is unusually hot or cold. If your area is dealing with severe weather, consider waiting for a more stable window before placing the order.

Be realistic about seasonality. Worldwide shipping expands access to specialty mycology supplies, but longer routes and customs processing can add uncertainty. For time-sensitive live cultures, domestic delivery or a shorter route may be the better choice when available. For collectors and growers planning ahead, ordering before extreme seasonal weather arrives can save unnecessary stress.

It also helps to order with a plan. Have your workspace, media, and storage area ready before the package lands. Live cultures are most convenient when they move from delivery to proper storage or careful use without a long pause in between.

Shipping Is a Variable, Not a Verdict

Live culture shipping is a balance of biology, logistics, and common sense. Healthy edible cultures can travel successfully every day, but the outcome depends on more than the carrier’s estimated delivery date. Fresh material, smart packing, moderate conditions, and prompt receiving all work together.

When you shop cultures through a dedicated mycology source, look beyond the strain name or format. Consider when you are ordering, where the package will be delivered, and whether the weather supports a smooth trip. A little timing on the front end gives your culture its best chance to arrive ready for the next stage of growth.

Posted on

Mushroom Culture Ordering Guide for Better Grows

Mushroom Culture Ordering Guide for Better Grows

A culture can look like a small purchase on a product page, but it sets the direction for every bag, jar, and fruiting block that follows. This mushroom culture ordering guide is built for growers who want to order with purpose: choosing the right species, the right format, and the right amount for the project in front of them.

The best order is rarely the biggest one. It is the one that matches your substrate, grow space, timeline, and experience level. Whether you are filling a monotub with oyster mushrooms, dialing in a gourmet grow tent, or building a rotation of reliable edible varieties, a little planning keeps the culture from becoming the weak link.

Start With What You Want to Grow

Species selection comes before format, price, or bundle size. Every culture has its own preferred temperature range, colonization speed, fruiting conditions, and substrate strengths. A variety that thrives on hardwood sawdust may not be the best choice for a simple straw setup. Likewise, a culture suited to cooler fruiting conditions can be frustrating if your grow area stays warm year-round.

For newer growers, dependable edible species with broad substrate compatibility are usually the smart place to start. Oyster varieties are popular because they colonize aggressively and work with several common substrates. Lion’s mane, shiitake, chestnut, and pioppino each bring distinct growth habits and more specific environmental preferences. That does not make them difficult by default. It means your setup should guide your choice.

Before adding a culture to the cart, answer three practical questions: What substrate are you preparing? Where will the culture fruit? How much time can you spend maintaining temperature, humidity, and fresh-air exchange? A clear answer prevents the classic mistake of ordering a fascinating culture that does not fit the equipment you actually have.

Choose the Right Culture Format

When shoppers say “culture,” they may mean several different products. The labels matter because each format serves a different stage of cultivation.

Liquid culture

Liquid culture contains living mycelium suspended in a nutrient solution. It is ready for inoculation and is a practical choice when you want to move directly into prepared grain, liquid culture media, or another compatible sterile medium. Many growers like it for fast expansion and easy portioning.

The trade-off is that liquid culture demands clean handling. A healthy syringe is only one part of the equation. Your receiving grain or medium, inoculation technique, and workspace all need to be on point. If you are comfortable with sterile workflow and want an efficient path to larger volumes, liquid culture is often the right call.

Agar culture

Agar plates or slants provide a visible way to assess mycelium before expansion. They are especially useful for growers who enjoy culture work, want to make transfers, or need a more deliberate quality-control step before inoculating grain.

Agar is not always the fastest format for a first-time grower, but it gives you information that a sealed syringe cannot show at a glance. It also makes sense for anyone building a small culture library over time. Expect a little more hands-on work and plan for proper sterile tools and storage.

Ready-to-inoculate products

Ready-to-inoculate options can reduce the number of variables between culture arrival and colonization. They are convenient for growers who want a more direct project, particularly when paired with a species appropriate for the included substrate.

Convenience has a trade-off: these products are less flexible than building your own workflow from separate culture, grain, and bulk substrate components. For many hobby growers, that is a fair exchange. For those running repeated grows, ordering culture separately may offer better control over scale and substrate choice.

Read Product Details Like a Grower

A product name is only the starting point. The product description should tell you the culture type, species or strain, approximate volume or plate count, recommended storage, and any handling notes. If the listing identifies preferred fruiting temperatures or substrate recommendations, compare them to your actual conditions rather than treating them as background information.

Pay attention to volume without assuming more is automatically better. One syringe can be enough for a modest project when used carefully. Larger volumes and multipacks make more sense when you are inoculating multiple containers, testing several recipes, or maintaining a regular production cycle.

Bundles can be a strong value when every item has a job. A mixed gourmet bundle is useful if you want to compare species or keep your grow schedule active across several fruiting windows. It is less useful if you only have room for one project and half the cultures will wait too long in storage. Buy for your next realistic few weeks, not for an imaginary warehouse operation.

Freshness, Shipping, and Arrival Timing

Living cultures are not shelf-stable collectibles. They are active biological material, and transit conditions matter. Order when you can receive the package promptly rather than leaving it outdoors, in a hot mailbox, or in an unheated entryway.

Check the seller’s shipping policy before ordering, especially if you are outside the continental US or purchasing during periods of extreme heat or cold. Worldwide availability can be valuable, but longer transit windows may affect how you plan delivery and storage. If your local weather is severe, consider waiting for a milder shipping week when possible.

When the package arrives, inspect the contents promptly. Confirm that the label matches your order, check for damage, and follow the product-specific storage directions. Do not leave a culture on the counter simply because you are not ready to inoculate that night. Refrigeration is commonly appropriate for many culture products, but the listing and included instructions should always be the final word.

Plan Your Order Around Your Workflow

The most successful culture orders are placed backward from inoculation day. Start with the date you can prepare your grain, substrate, or ready-to-grow materials. Then account for shipping time, delivery flexibility, and the time needed to organize a clean workspace.

If your supplies are scattered across different orders, wait until you know they will arrive together. Culture should not be the first item sitting in storage while you search for filter bags or realize your pressure cooker gasket needs replacing. A simple checklist helps: culture, receiving medium, substrate, containers, sanitation supplies, labels, and a fruiting plan.

For repeat growers, keep notes on every order. Record the culture name, arrival date, inoculation date, substrate, incubation conditions, and fruiting results. After a few runs, those notes become more useful than generic advice because they reveal what performs in your own environment. You may find that one oyster variety handles your summer conditions better, while another earns its spot in cooler months.

Avoid Common Ordering Mistakes

The first mistake is ordering based on a photo alone. Fruit body color and shape are appealing, but cultivation performance is tied to your setup. A beautiful specialty species may require conditions that are not practical in a basic grow tent.

The second is treating all cultures as interchangeable. Species, formats, and storage windows differ. Match the format to your skill level and project goals rather than choosing solely by what appears to be the fastest option.

The third is overlooking space. A small culture can become several colonized bags quickly. Know where incubation will happen, where fruiting will happen, and how you will manage humidity and fresh air before scaling up. A controlled small grow teaches more than an overloaded shelf full of competing projects.

Finally, buy from a seller that presents clear categories, straightforward product information, and options that fit how you grow. Myceli Nation is built for that kind of shopping, with culture choices and cultivation supplies gathered in one mycology-focused storefront. Still, the right product is the one you can use well, not merely the one with the most impressive name.

Your Mushroom Culture Ordering Guide, Put to Work

A good culture order starts with a realistic grow plan and ends with a clean, timely inoculation. Choose a species that fits your conditions, select a format that fits your workflow, and order only what you can properly receive, store, and use. That approach leaves more room for the part that keeps growers coming back: watching a healthy culture take hold and turn careful preparation into a harvest.

Posted on

How to Prepare a Sterile Culture Workspace

How to Prepare a Sterile Culture Workspace

A single airborne mold spore can turn a promising plate, jar, or liquid culture into a frustrating loss. The goal when you prepare a sterile culture workspace is not to make your entire home laboratory-grade sterile. It is to create a controlled, repeatable zone where clean culture work has the best possible odds.

For hobby cultivators, the difference often comes down to workflow. A clean bench, organized tools, and a realistic understanding of air movement will do more for consistency than rushing into an expensive setup. Start with the space you have, build good habits, and upgrade equipment when your volume and goals justify it.

Prepare a Sterile Culture Workspace Before You Start

Sterility is a high standard. In a home setting, what you are usually building is an aseptic workspace: a clean area with fewer contaminants, limited airflow, and a methodical process. That distinction matters because it keeps expectations practical. You cannot control every microbe in a room, but you can avoid introducing unnecessary contamination at the exact moment a culture vessel is open.

Choose a small room or corner that is easy to clean and has minimal traffic. A bathroom can work if it is freshly cleaned, dry, and not being used immediately before culture work. A bedroom or spare room is often better because it tends to have less humidity and fewer surfaces exposed to water. Avoid kitchens, basements with visible dust, rooms with open windows, and areas near fans, pets, laundry, or houseplants.

Give the room time to settle. Turn off ceiling fans, HVAC airflow if possible, air purifiers that create a direct draft, and anything else that stirs the air. Do not sweep or vacuum right before working. Those tasks send settled particles upward, exactly where you do not want them.

Clean the work surface with soap and water first if there is any visible residue. Then use a suitable disinfectant according to its label directions. Isopropyl alcohol is useful for wiping down nonporous tools and surfaces, but it works best on a surface that is already physically clean. Let the surface air-dry rather than immediately wiping it away.

Choose the Right Air-Control Setup

Your workspace needs depend on what you are doing. Transfers between agar plates, inoculating sterile media, and handling culture containers all benefit from a protected working zone. Two common options are a still-air box and a laminar flow hood.

Still-Air Boxes for Small-Batch Work

A still-air box, often called a SAB, is a clear tote modified with arm holes. It does not create sterile air. Instead, it protects the work area by preventing drafts and allowing airborne particles to settle before you begin. For many home growers working with a few plates or jars at a time, a properly used still-air box is a smart, budget-friendly starting point.

Wipe the inside and outside before each session. Place all required items inside before you begin, then allow the air to become still for several minutes. Move slowly once your hands are inside. Quick movements create turbulence, which can carry contaminants across open culture vessels.

Do not use an open flame inside a still-air box. Heat can damage the plastic, and the confined environment is not appropriate for flame work. If a tool needs heat sterilization, do it outside the box, allow it to cool, and then proceed with a clean workflow. Many cultivators reduce the need for repeated heating by using sterile disposable scalpels or pre-sterilized tools for individual sessions.

Laminar Flow Hoods for Frequent Culture Work

A laminar flow hood pushes HEPA-filtered air in a smooth, consistent direction across the work surface. It is a serious upgrade for people making frequent agar transfers, maintaining larger culture libraries, or preparing multiple units in a session. The trade-off is cost, size, noise, and the need to understand proper placement.

A flow hood is only as useful as its filter, blower performance, and technique. Keep your work close to the filter face, avoid blocking the airflow with large objects, and work in an orderly line from clean items toward items that have been opened or handled. Even filtered airflow cannot rescue poor cleaning habits or cluttered setup.

Build a Clean Workflow, Not Just a Clean Table

The strongest contamination control happens before the first container is opened. Set out only what the session requires: culture plates or jars, sterile media, labeling materials, gloves if you use them, alcohol, wipes, and the tools needed for the specific transfer. Extra items create clutter and give contaminants more surfaces to ride in on.

Label culture vessels before opening them. Include the culture name or identifier, date, transfer number if relevant, and any note that will help you track performance later. Trying to write on a plate or jar after you have started handling open cultures adds unnecessary movement and distraction.

Arrange materials in the order you will use them. Put clean, unopened items in one area and completed or potentially exposed items in another. This simple separation prevents a common mistake: touching a used item and then returning to a clean tool without realizing it.

Your personal prep matters too. Showering is not required for every session, but clean hands, freshly washed forearms, and clean clothing are worthwhile. Avoid loose sleeves, fuzzy fabrics, and anything that sheds. Tie back long hair. If you wear gloves, sanitize them regularly and treat them as another surface that can become contaminated. Gloves do not replace handwashing or careful technique.

Before entering the workspace, silence your phone or leave it outside. Culture work rewards focus. Reaching for a phone, opening a door, or stepping away midway through a transfer breaks the clean sequence you just established.

Technique That Protects Cultures

When working with agar plates, open lids only as far and as long as necessary. Keep the lid positioned as a shield over the plate whenever possible rather than setting it flat on the table. Make your transfer, close the plate, and move it to the finished side of the workspace.

For jars, bottles, and other containers, avoid hovering directly over an open opening. Keep movements deliberate, but not hesitant. The longer an opening sits exposed, the more opportunity there is for airborne particles to settle inside.

Sanitize tools between separate cultures. If you are using reusable metal tools, follow a sterilization method appropriate for the tool and setup. Allow a heated tool to cool before it touches culture material. A tool that is too hot can damage the sample and create misleading results that look like poor culture performance.

Avoid talking, coughing, or breathing directly toward open vessels. You do not need to hold your breath or treat the process like a surgical procedure. Just position yourself intelligently and keep open work brief. In a still-air box, slow hands and short exposure time matter more than elaborate motions.

Common Mistakes That Undermine a Clean Setup

A workspace can look spotless and still perform poorly when the process is inconsistent. One frequent issue is overusing alcohol. Alcohol sanitizes surfaces, but spraying it constantly into the air does not create a sterile environment and may introduce fumes or moisture where they are not needed. Wipe surfaces, let them dry, and focus on controlled air and careful handling.

Another mistake is working immediately after cleaning the room. Let the area settle. A freshly wiped table is useful, but dust and fibers disturbed during cleaning may still be floating nearby.

Clutter is equally costly. A crowded box or flow hood makes it hard to maintain clean and dirty zones. It also increases the chance that your hands will bump an item, block airflow, or drag a sleeve across something you intended to keep clean.

Finally, do not assume every failure comes from the workspace. Contamination can originate in the culture source, the media, a flawed container seal, or a sterilization issue earlier in the process. Keep notes on each batch, including dates, tools used, media type, and environmental changes. Patterns reveal more than guesswork does.

Stock Supplies That Support Consistency

The best workspace is the one you can reset quickly. Keep a dedicated bin or shelf for culture work so your supplies are not scattered across the house. Basic restocking usually includes gloves, wipes, alcohol, labels, markers, sterile tools, agar plates or media containers, and disposal bags.

If you are building out a home lab, buy tools according to your actual workflow. A still-air box and quality sterile consumables may produce better results than a large collection of gear used inconsistently. As your projects grow, Myceli Nation can be a useful source for culture-ready supplies and the wider mycology essentials that keep your setup moving.

A clean culture workspace is less about chasing perfection than repeating the same disciplined process every time. Settle the room, simplify the bench, control the air, and let your technique do the rest. The next clean transfer starts long before you lift the lid.

Posted on

Top Mycology Gift Bundles for Enthusiasts

Top Mycology Gift Bundles for Enthusiasts

A great mushroom gift is not a random syringe, print, or piece of gear tossed in a box. The best top mycology gift bundles feel like an invitation to a recipient’s next project, whether they are building an edible grow setup, expanding a culture library, or spending more time at the microscope. The difference comes down to matching the bundle to what they already know, what they enjoy collecting, and what they can actually use.

For the enthusiast who already has jars, tubs, and a favorite workflow, more beginner gear can feel like clutter. For someone who is curious but new to cultivation, a high-quality culture without the supporting supplies can turn excitement into a stalled project. A well-chosen bundle closes that gap.

What Makes a Mycology Bundle Gift-Worthy?

The strongest bundles do more than add a discount. They create a clear use case. A culture paired with practical supplies gives a grower a starting point. A varied set of microscopy materials gives a collector something to compare. A collection of edible cultures turns a single weekend project into a season of experimentation.

Variety matters, but it should have a purpose. Five unrelated items may look generous, yet a focused bundle is often more valuable. Think in terms of a recipient’s bench space, skill level, and goals. Are they interested in gourmet species? Do they enjoy cataloging prints and observing structure? Are they always borrowing tools from friends? Those answers point toward the right format.

It also pays to consider the less glamorous parts of the hobby. Consumable supplies, clean-work accessories, and reliable ready-to-inoculate materials are usually appreciated because experienced hobbyists go through them. A bundle that reduces setup time can be more exciting than a novelty item that sits on a shelf.

Choosing Among Top Mycology Gift Bundles

Start with the recipient, not the product name. Mycology covers collectors, microscopy-focused buyers, edible growers, and people who move between all three. Their ideal gift can look completely different.

For the edible mushroom grower

An edible culture bundle is a practical win for someone who likes growing food with a little personality. Look for a mix that gives them distinct kitchen outcomes, such as rich, savory varieties alongside more delicate or visually striking options. The best mix depends on their growing environment and experience. Some cultures reward precise conditions, while others are more forgiving for a home setup.

Pairing cultures with ready-to-inoculate products makes the gift immediately useful. This is especially smart for a recipient who has talked about trying a new species but has not wanted to source each component separately. Keep the bundle focused on compatible formats so it feels like a project in a box rather than an assortment of loose ends.

For the microscopy-minded collector

A collector bundle should favor range, labeling, and presentation. Prints or other microscopy materials are more rewarding when the recipient can compare morphology across several selections. For someone who already keeps notes, specimens with clear identification and consistent formatting are part of the appeal.

This is also where a varied bundle can make sense. A collector may value a few distinctive additions over multiple versions of something they already own. If you do not know their existing collection, choose a carefully curated set rather than trying to guess one exact favorite. It gives them options without assuming too much.

For the hands-on hobbyist who has the basics

The person who is always reorganizing their workspace usually wants useful gear. A supply-focused gift bundle can include the everyday pieces that keep projects moving, from clean-work essentials to dependable containers and prep materials. It may not be as flashy as a named culture collection, but it is the kind of gift that earns repeat appreciation.

The trade-off is that equipment can be personal. Some growers have strong preferences for formats, sizes, and brands. When in doubt, choose flexible consumables over a specialized piece of hardware. They are easier to fit into an established workflow and less likely to duplicate an item they just bought.

For the newcomer with real curiosity

A first bundle should be approachable, not overwhelming. The goal is to give them an early success they can learn from. A compact edible cultivation set with clear components and an accessible culture is usually a better gift than a large, advanced assortment.

Avoid building a beginner gift around too many choices. New hobbyists benefit from one clear route from setup to observation. Include enough supplies to make the project feel complete, but leave room for them to learn what they enjoy before loading them up with specialty items. A smaller bundle that gets used beats a bigger one that creates analysis paralysis.

Build a Bundle Around a Project, Not a Price Point

Price is useful for narrowing options, but it should not be the main organizing idea. Instead, picture what the recipient will do when they open the package. A “weekend grow” bundle might combine an edible culture with a ready-to-inoculate option and a few needed supplies. A “collection refresh” bundle might center on several distinct microscopy selections. A “bench restock” gift can focus entirely on practical materials.

This project-first approach also helps when you want to make a bundle feel personal without becoming too technical. You can add a short note that says why you picked it: maybe they have been talking about trying gourmet mushrooms, or maybe you noticed their work area is always busy. That small bit of context turns specialty supplies into a thoughtful gift.

At Myceli Nation, the advantage of shopping within a dedicated mycology catalog is being able to compare formats in one place instead of piecing a gift together across unrelated stores. That makes it easier to choose items that belong in the same workflow.

Check These Details Before You Buy

Before settling on a bundle, confirm the recipient’s shipping location and make sure the products are permitted there. Rules can vary by location and by product type, so a thoughtful gift also respects local requirements. If you are unsure, focus on legal edible cultures, general cultivation supplies, or microscopy-related materials that fit their interests.

Next, think about timing. Live cultures and ready-to-inoculate products are best sent when the recipient can receive and store them promptly. If they will be traveling, a supply bundle, print collection, or gift credit may be the better move. A great bundle should arrive at a moment when it can be enjoyed, not become another package to manage.

Finally, resist the urge to buy solely by the biggest item count. Quality, compatibility, and novelty are more valuable than a crowded package. A two- or three-piece combination can feel premium when every component has a job.

Make the Gift Feel Like It Belongs to Them

A mycology gift lands best when it respects the recipient’s level of obsession. Give the advanced grower something that saves time or widens their options. Give the collector materials that add genuine interest to their archive. Give the beginner a clean, achievable first project.

The right bundle is not about filling a cart. It is about handing someone a reason to clear a little space on the bench and start their next mushroom project.