Posted on

Best Mushroom Spore Strains for Your Collection

Best Mushroom Spore Strains for Your Collection

A strain name can make a spore listing feel simple: pick the fan favorite, choose a syringe or print, and check out. But the best mushroom spore strains are not one universal ranking. The right choice depends on whether you are building a microscopy collection, comparing morphology, shopping for a recognizable classic, or looking for something less common to add to your catalog.

For collectors and microscopy-focused enthusiasts, names such as Golden Teacher, B+, Blue Meanie, and Lizard King have staying power for a reason. They are familiar across the mycology community, easy to compare with other collections, and widely discussed enough that you can develop a sharper eye for the differences that make each sample interesting. The key is knowing what a strain label can tell you – and what it cannot.

What Makes a Mushroom Spore Strain Worth Choosing?

A popular name is a useful starting point, not a guarantee. Spore samples contain genetic variation, so individual observations can differ from one sample to another. That is part of the appeal for microscopy collectors: two samples sold under the same strain name may share a recognizable lineage or community identity while still offering their own details to study.

The best choice usually comes down to three things: recognition, presentation, and purpose. Recognizable strains make it easier to compare notes and organize a collection. Clear, professionally prepared spore formats make handling and observation more convenient. Your purpose determines whether you should stick with a dependable classic, choose a distinctive exotic, or buy a bundle that gives you more variety at once.

It also pays to separate reputation from hype. A strain may be famous because it has been part of the hobby for decades, because it has a memorable name, or because collectors enjoy its visual traits. None of those factors automatically make it the best sample for every buyer. A strong collection has room for staples and curveballs.

Best Mushroom Spore Strains to Know

Golden Teacher

Golden Teacher is one of the most recognizable names in the spore world. For a new collector, it is a natural reference point because it appears so often in community conversations and strain comparisons. For an experienced enthusiast, it remains a reliable classic to keep in rotation.

Its main advantage is familiarity. When you are cataloging samples, a well-known strain gives you a shared language with other hobbyists. The trade-off is simple: because it is such a common pick, it may not satisfy someone whose collection is built around unusual or hard-to-find selections. Think of Golden Teacher as a foundation piece rather than a surprise pick.

B+

B+ has earned fan-favorite status thanks to its long-running recognition among hobbyists. It is a smart choice for anyone who wants a named strain that feels established without defaulting to the most obvious option every time.

Collectors often appreciate B+ as part of a classic lineup alongside Golden Teacher and other widely known varieties. If you are choosing between the two, there is no need to overthink a winner. Pick Golden Teacher for the iconic reference point, or B+ when you want another trusted name with its own place in the community.

Blue Meanie

Blue Meanie is a name that calls for a closer look before you add it to your cart. In mycology, common names can be used inconsistently, and Blue Meanie may refer to different species or lineages depending on the seller and context. That makes product details and accurate labeling especially valuable.

For microscopy collectors, this naming overlap is not a drawback by itself. It can be a reason to pay more attention. Verify exactly what a listing identifies, read the product format, and keep your notes specific. A collection becomes more useful when its labels preserve the distinctions that casual strain talk can blur.

Lizard King

Lizard King brings a little more personality to a collection. It is a recognizable name with a distinct identity, making it a good pick for buyers who have already covered the most common classics and want to expand their range.

The appeal here is balance. Lizard King is familiar enough that it does not feel obscure, yet it gives your catalog a different flavor from the usual Golden Teacher and B+ pairing. It works well as a single selection or as part of a mixed order designed around variety.

APE and Other Specialty Favorites

Specialty names, including APE, are often sought out by collectors who want to move beyond entry-level staples. These selections can be compelling because their reputation is rooted in unusual morphology, strong community interest, or rarity within a particular shop’s lineup.

That said, specialty does not always mean better. It may mean a more specific collecting interest, a smaller availability window, or a higher priority on documentation. If you are new to buying spores, adding one specialty selection alongside two or three established classics is often more satisfying than making your entire order a gamble on unfamiliar names.

Choose the Format That Fits Your Shelf

The strain is only half the decision. Spore syringes and spore prints serve different collecting preferences, and neither is automatically superior.

A spore syringe is a convenient, ready-to-use format that suits buyers who want straightforward handling for lawful microscopy work. It can be an easy choice when you are ordering several varieties and want consistent packaging across your selections. Look for clear labeling, secure packaging, and a supplier that identifies the strain plainly.

Spore prints appeal to collectors who value the traditional format and want something especially suitable for archiving and visual comparison. A well-presented print can feel more like a specimen than a supply item. Prints also make thoughtful additions to a collection built around taxonomy, appearance, and provenance.

If you are unsure where to start, choose one format and stay consistent for your first few purchases. Comparing like with like makes your own records more useful. Once you know whether you prefer the convenience of syringes or the archival character of prints, branching out is easy.

Build a Better Strain Lineup, Not Just a Bigger Cart

A thoughtful first lineup does not need to be huge. Start with two familiar classics, add one distinctive name, and leave room for a specialty pick when something catches your eye. Golden Teacher, B+, and Lizard King create a recognizable spread without feeling repetitive. Blue Meanie can be a great addition when the product identification is clear and you want a sample that encourages more careful comparison.

Bundles can make sense when you want breadth and already know you will enjoy every selection included. They are less useful when one or two strains are only there because the price looks attractive. Variety is valuable when it gives you meaningful points of comparison, not when it creates a drawer full of labels you never revisit.

Keep a simple collection log with the strain name, format, source, date received, and any product-specific identifiers. This small habit turns casual shopping into a collection you can actually navigate months later. It also helps you notice which names, formats, and suppliers you return to most often.

Shop With Clear Labels and Real Curiosity

The strongest spore collections are built with curiosity, not just a chase for the most talked-about name. At Myceli Nation, that means having room for the familiar staples, the specialty favorites, and the formats that make sense for your own mycology shelf. Review local laws before ordering, choose clearly identified products, and let your next strain add a genuine new point of interest to the collection.

Posted on

Mushroom Spore Syringe Guide for Smart Buyers

Mushroom Spore Syringe Guide for Smart Buyers

A mushroom spore syringe guide should do more than tell you which syringe to add to cart. It should help you recognize a well-prepared product, match it to your intended project, and handle it in a way that respects the work that goes into clean mycology. Whether you are building a microscopy collection, starting an edible culture project, or comparing fan-favorite varieties, the small details matter.

A spore syringe is simple in format: sterile water, suspended spores, and a sealed syringe fitted with a needle. But selecting the right one, storing it properly, and working cleanly can make the difference between a confident first attempt and a frustrating mystery. Here is what experienced buyers look for before, during, and after ordering.

What a Mushroom Spore Syringe Actually Is

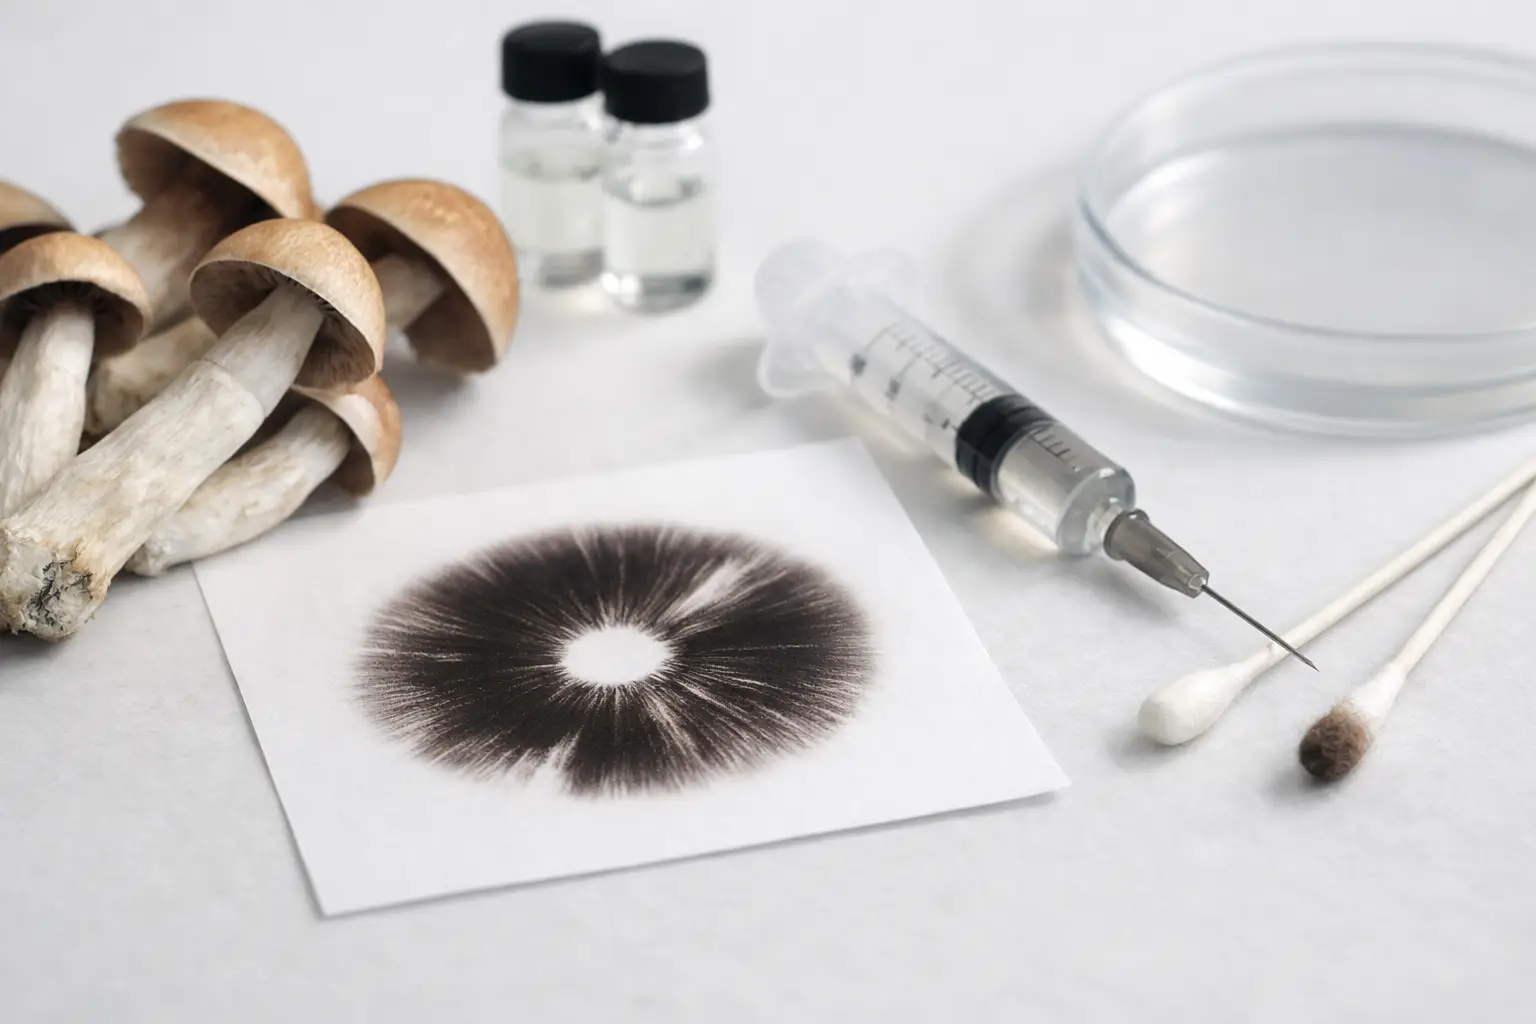
A mushroom spore syringe contains microscopic spores suspended in sterile water. The syringe format is popular because it is compact, easy to label, and designed for controlled dispensing. With a gentle shake, the spores redistribute through the water so a small amount can be applied where it is needed for a lawful mycology, microscopy, or edible cultivation project.

Spores are not the same thing as live culture. A spore syringe begins with spores, which may need time to germinate and develop before you can evaluate the resulting growth. An edible liquid culture, by comparison, contains established living mycelium and is usually chosen when speed and consistency are the priority. Neither format is universally better. The right choice depends on whether you want to observe genetics from spores, preserve a collection, or work from an established culture.

The liquid in a syringe can look mostly clear, lightly cloudy, or show small dark clusters after spores settle. Appearance alone is not a complete quality test. Spores are microscopic, and different varieties can settle differently. Clear labeling, careful packaging, proper storage, and a trusted specialty supplier are stronger buying signals than expecting the water to look dramatically dark.

Choosing the Right Spore Syringe

Start by identifying your goal. Collectors and microscopy-focused buyers often choose varieties based on taxonomy, visual interest, or a desire to compare spore characteristics. Edible mushroom growers may prioritize species that suit their preferred growing conditions and cooking plans. If you are new to the format, do not let a long strain name make the decision for you. Read the product details, confirm the species or variety, and make sure it fits the project you actually intend to run.

A useful product listing should make the basics easy to find: the variety name, syringe volume, included needle information, handling guidance, and any relevant legal or regional restrictions. Buy from a source that treats labeling as part of quality control. A syringe you cannot confidently identify later is not a bargain, especially once your collection grows.

Consider volume realistically. More volume is not automatically more useful if your project is small. A standard syringe can support multiple carefully planned applications, while a smaller format may be ideal for testing or for buyers who want to sample a wider range of varieties. Bundles make sense when they provide genuine variety or when you already know how you will organize and use each syringe.

At Myceli Nation, the value of browsing a broad mycology catalog is being able to compare formats side by side: individual syringes, prints, edible cultures, and bundles each serve a different purpose. Shop for the format first, then narrow down the variety.

Spore Syringes vs. Spore Prints

A spore print is another compact way to collect and preserve spores. It is often favored by collectors and people who want a long-term archival format. A syringe is more immediately convenient because the spores are already suspended in sterile water and ready for controlled use.

The trade-off is preparation. Prints require you to prepare a sterile suspension before use, while syringes remove that step. If you value convenience and are working on a near-term project, a syringe is usually the straightforward choice. If you are building a catalog or prefer a compact backup format, a print can be a smart addition.

Clean Handling Starts Before the Cap Comes Off

Most avoidable problems come from rushed handling, not from the syringe itself. Before opening any package, set up a clean, uncluttered work area. Wash your hands thoroughly, disinfect the surface, and gather every item you will need so you are not reaching across the workspace halfway through the process.

Keep the syringe capped until the moment you are ready to use it. Avoid touching the needle, the cap interior, or any sterile contact surface. If the needle is packaged separately, open it only when your station is prepared. These habits are basic, but they are the backbone of reliable work.

Before dispensing, gently shake the syringe to redistribute settled spores. Do not treat it like a cocktail shaker. A few calm motions are enough. Then use steady, minimal pressure on the plunger. Forcing liquid quickly can make a precise application harder and create unnecessary mess.

If your project involves sterile media or prepared material, follow the product-specific handling instructions closely. Different materials have different moisture levels, access points, and ideal application amounts. More solution does not always mean better results. Excess moisture can create its own complications, so measured application is usually the better move.

Storage That Protects Your Purchase

Spore syringes should be kept cool, dark, and clean. Refrigerated storage is commonly preferred for longer-term holding, provided the syringe is protected from freezing and stored where it will not be crushed, punctured, or exposed to frequent temperature swings. A dedicated container or clean resealable bag helps keep labels readable and the syringe separate from household spills.

Do not freeze a spore syringe. Freezing can damage the format and create avoidable uncertainty. Leaving it in direct sunlight, a hot car, or near a heat source is equally unhelpful. If a shipment arrives during very warm or cold weather, bring it inside promptly rather than letting it sit outdoors.

Label discipline pays off fast. Keep the original label intact, then record the variety, arrival date, and intended use in a notebook or digital log. If you purchase several syringes at once, this simple habit prevents accidental mix-ups later. For collectors, a photo of each label can provide an extra backup.

Common Mistakes That Waste Good Material

The first mistake is assuming every issue is visible. A syringe may look clear and still contain spores, while a darker syringe is not automatically superior. Evaluate the supplier, packaging, label accuracy, and your own handling process instead of relying on one visual cue.

The second is skipping sterile technique because the project seems small. Contamination does not care whether you used one drop or one milliliter. Clean hands, clean surfaces, protected tools, and minimal exposure all reduce the number of variables you have to troubleshoot.

The third is treating spores and cultures as interchangeable. Spores can produce genetic variation, which is part of their appeal for observation and selection, but that variation also means outcomes may differ. A culture is often more predictable because it begins from established mycelium. Choose based on the result you need, not just the product name that sounds most familiar.

Finally, do not ignore local laws and product restrictions. Mushroom-related rules can vary by species and location. Responsible buyers confirm what is permitted where they live and use products only for lawful purposes.

A Better Way to Build Your Mycology Collection

Instead of ordering randomly, build around a clear plan. You might keep a small microscopy selection, a separate group of edible varieties, and a few prints for archival interest. Organize each item by format, date, and project type. This makes repeat ordering easier and helps you learn what formats genuinely fit your workflow.

For new buyers, one or two well-labeled syringes can teach more than a large assortment stored without a plan. For experienced enthusiasts, bundles can be worthwhile when they fill a real gap in the collection or support a series of comparisons. The best shelf is not the fullest one. It is the one where every label has a purpose.

Good mycology rewards patience, clean habits, and careful records. Start with a syringe you can identify, store it like it matters, and give every project enough attention to teach you something useful.

Posted on

How to Use a Spore Syringe for Gourmet Mushrooms

How to Use a Spore Syringe for Gourmet Mushrooms

A spore syringe is one of the most accessible ways to begin a legal gourmet mushroom project, but it is not a shortcut around clean technique. Learning how to use spore syringe supplies well comes down to three things: choosing the right starting material, keeping your workspace disciplined, and giving the culture time to show you what it is doing. A steady hand helps. Patience matters more.

For hobby growers, microscopy enthusiasts, and anyone building a broader mycology setup, spores are also a chance to observe mushroom genetics from the beginning. Unlike a ready-to-inoculate culture, a syringe contains spores suspended in sterile water. Those spores need to germinate, pair, and establish themselves before you see vigorous growth.

What a Spore Syringe Is Designed to Do

A spore syringe holds a suspension of mushroom spores in sterile water, usually in a sealed syringe with a sterile needle. It is commonly used to introduce spores to an appropriate sterile medium, where they can germinate and form mycelium.

That distinction is worth understanding before you start. A liquid culture contains already-growing mycelium and often moves faster. A spore syringe starts earlier in the life cycle, which can mean more variation from one project to the next. That variability is part of the appeal for collectors and curious growers, but it also means results may be less predictable.

For most legal gourmet species, spores are best approached as a clean-workflow project rather than a casual add-on to your supply shelf. Match the syringe to a species you are legally permitted to work with and to a method you can keep clean from start to finish.

Set Up Before You Open Anything

The biggest mistake beginners make is treating cleanliness as something to handle halfway through the process. Prepare your space first, then bring out the syringe only when everything else is ready.

Choose a small, calm room with minimal airflow. Turn off fans, close windows, and keep pets, loose fabric, and unnecessary supplies out of the area. Wipe down your work surface with an appropriate disinfectant and let it dry. Wash your hands thoroughly, then use clean gloves if they fit your workflow.

Your basic setup should include the following:

  • A legal gourmet mushroom spore syringe
  • A suitable sterile medium or prepared project material
  • Alcohol wipes or a disinfecting solution
  • A flame source or sterile single-use needle, depending on your setup
  • Labels and a marker
  • A clean container for used materials

Labels are not an afterthought. Write down the species or variety, the date, the material you inoculated, and any batch details you want to track. Once several projects are underway, memory becomes unreliable fast. Clear labels make it easier to compare progress, spot issues, and learn which materials perform best in your environment.

How to Use a Spore Syringe With Clean Technique

Keep the syringe capped until the moment you are ready to inoculate. Before use, gently shake or roll it to distribute the spores through the water. Do not treat it like a paint shaker – aggressive shaking can create excessive bubbles and make the syringe harder to control.

If your syringe has a separate needle, attach it without touching the sterile end. If you are working with a reusable metal needle, sterilize it according to your chosen clean-work protocol, allow it to cool, and avoid placing it on any surface afterward. A hot needle can damage the material you are trying to inoculate, so cooling matters.

From there, the exact method depends on the medium. Some growers begin spores on agar because it makes early growth easier to inspect. Others use a prepared, sterile substrate product designed for the species they are working with. Agar offers more visibility and control, while ready-to-inoculate materials can simplify the first stage for growers who are not yet building a full lab-style workflow.

Use only the amount called for by the product or method you selected. More solution does not automatically mean better results. Overapplying liquid can create overly wet conditions and complicate observation. A measured approach gives the spores an appropriate starting point without changing the moisture balance of the medium.

Once inoculated, seal or close the material as intended and place it in a stable location away from direct sunlight, temperature swings, and constant handling. The best next move is usually to leave it alone. Repeated opening, moving, or inspecting can introduce problems that were not there at the start.

Agar, Grain, or Ready-to-Inoculate Materials?

There is no single best answer because the right route depends on your experience level and goals.

Agar is often the most informative option. It lets you watch for germination and observe whether growth appears clean before moving forward. The trade-off is that agar work requires more tools, more practice, and careful handling. If you enjoy the technical side of mycology, it is a valuable skill to build.

Prepared sterile grain or similar materials can be convenient for experienced growers who already understand how to evaluate healthy growth. However, spores can carry naturally occurring microbes from their source environment. Starting directly on a less-visible medium makes it harder to identify a problem early.

Ready-to-inoculate products sit in the middle for many home mycology projects. They reduce preparation time, but they do not eliminate the need for clean technique. Buy the format that fits the workflow you can realistically maintain, not simply the one that seems fastest.

What Healthy Early Progress Can Look Like

Spores do not operate on a fixed calendar. Germination can vary according to species, genetics, freshness, medium quality, and environmental conditions. Avoid comparing every project to a photo posted by someone working with different materials and a different setup.

On a visible medium, healthy mycelium may appear as fine, bright growth spreading gradually from the inoculation area. Growth patterns differ between species, so focus less on chasing one exact look and more on watching for consistency. A clean project generally becomes more organized over time rather than developing unexpected colors, wet patches, or strong off odors.

If something looks questionable, resist the urge to keep opening it for a closer look. Keep it isolated from other projects and make notes. Observation is part of cultivation skill, and not every attempt will be worth carrying forward. Knowing when to pause, separate, or restart protects the rest of your supplies.

Storage Tips for Unused Spore Syringes

An unopened or partially used syringe should stay capped, clearly labeled, and stored according to the supplier’s instructions. In general, keep it away from heat and direct light. Avoid leaving it in a hot car, near a heating vent, or in an area where it will be repeatedly warmed and cooled.

For a syringe you have already used, maintain clean handling before recapping it. Do not reuse a needle that has touched a nonsterile surface. If you are not sure whether the needle remained sterile, replace it rather than gambling with the next project.

It also helps to organize syringes by species, arrival date, and intended use. That simple inventory habit prevents accidental mix-ups and makes it easier to rotate through your collection thoughtfully. For growers building a varied pantry of gourmet genetics, organization is as useful as another piece of equipment.

Common Problems Are Usually Workflow Problems

When a project stalls or shows signs of contamination, the syringe is not automatically the cause. The issue could come from the workspace, the inoculation point, the medium, storage conditions, or handling after inoculation. Treat each attempt as a record of your process rather than a pass-or-fail verdict on your ability.

A few habits make troubleshooting much easier: work with one clearly labeled project at a time, change only one variable when testing a new method, and keep a brief grow log. Note the date, material, room conditions, and observations. After a few runs, patterns become far easier to see.

Myceli Nation is built for enthusiasts who want more than a random assortment of supplies. Whether you are selecting spores, building a cleaner workspace, or comparing formats for your next legal gourmet project, the goal is the same: make each step intentional.

Start clean, label everything, and let the culture set the pace. The most satisfying mycology projects are rarely rushed – they are observed, adjusted, and built one careful attempt at a time.

Posted on

Spore Syringe Bundles for More Strain Variety

Spore Syringe Bundles for More Strain Variety

A single syringe can be a great pick when you already know exactly what you want. But when the goal is to compare recognizable varieties, refresh a collection, or shop a broader range without filling your cart one item at a time, spore syringe bundles make more sense. They bring variety into one purchase and give enthusiasts a cleaner way to explore the names and profiles that keep the mycology community talking.

For collectors and microscopy-focused buyers, the appeal is not simply getting more. It is getting a deliberate mix. A well-chosen bundle can put established fan favorites beside less familiar varieties, making it easier to build a collection with personality instead of buying the same type on repeat.

Why Spore Syringe Bundles Earn a Place in Your Cart

Bundles are built for shoppers who want options without the friction of comparing every item individually. Rather than choosing one variety, checking out, and returning later for the next, you can select a multi-pack that already covers several distinct names. That is useful when you are shopping for microscopy, adding to a reference collection, or simply deciding which varieties you want to know better.

There is also a practical value to buying as a set. Promotional packs often create a more approachable route to a varied lineup than purchasing every syringe separately. The value depends on the bundle itself, of course. A lower price is only a real win if the varieties match your interests and you would have chosen most of them anyway.

The best bundles feel curated rather than random. They may center on recognizable classics, colorful or unusual selections, or a balanced spread of popular names. That structure saves time for buyers who know the market but do not want to spend an hour sorting through a long catalog.

Choosing the Right Spore Syringe Bundle

Start with your reason for shopping. A buyer focused on familiar names may want a pack built around staples such as Golden Teacher, B+, Blue Meanie, or Lizard King. Someone expanding a collection might prefer a mixed bundle that pairs known favorites with varieties they have not encountered before. Neither approach is better. It depends on whether consistency or discovery is the point of the order.

Next, look at the actual composition of the pack. A five-pack is not automatically more useful than a three-pack. If two or three items overlap with what you already own, a smaller but more varied selection can be the stronger choice. Read each included variety rather than judging the bundle by the item count alone.

It also helps to think about how you organize your collection. If you label purchases by variety, date, and supplier, a bundle can add several entries at once. That is a benefit for enthusiasts who enjoy keeping a clear record of their microscopy materials. On the other hand, if you prefer to spend more time with one selection before moving to another, an individual syringe may be a better fit than a large mixed pack.

Build Around a Theme, Not Just a Discount

The most satisfying purchase usually has a purpose. You might choose a classics bundle because you want the most talked-about names in one place. You might choose an exotic assortment because your collection is already full of familiar options. Or you may want a best-seller pack when you are looking for a straightforward introduction to what other shoppers are choosing.

A theme makes future shopping easier, too. Once you know you are building a collection around established favorites, rare names, or visual variety, the next purchase has context. You are not just adding more products. You are adding the right products for your own interests.

What to Check Before You Buy

Product details matter, especially when several items are sold together. Confirm the number of syringes included, the listed varieties, and whether the bundle is a fixed assortment or a rotating promotional selection. Fixed packs are ideal when you are shopping for a specific name. Rotating packs can be fun for collectors who enjoy an element of surprise, but they may not suit a highly planned order.

Packaging and labeling are worth considering as well. Clear identification helps keep a multi-item order organized after it arrives. When multiple varieties land at once, accurate labels make a difference for anyone maintaining a reference collection or comparing notes across purchases.

Shipping availability is another part of the decision. Myceli Nation serves a broad mycology community with access to a diverse catalog, but buyers should always review destination-specific requirements before placing an order. Rules can vary by location, and responsible shoppers make sure their intended purchase and use align with local regulations.

Finally, consider timing. Bundles are a smart choice when you are ready to explore multiple varieties now. They are less useful when you only have one specific item in mind and the extras would sit untouched. There is no prize for buying the largest pack. A good order is one that fits your interests, budget, and plans for keeping your collection organized.

Variety Makes Comparison More Interesting

One of the strongest reasons to shop bundles is side-by-side comparison. Names can carry a lot of reputation in mycology circles, but having several selections in your own collection gives those conversations more context. You can examine differences in appearance under microscopy, keep notes on characteristics that stand out to you, and develop your own sense of which varieties you want to revisit.

That process is more engaging than chasing a single hype-driven name. Popular varieties are popular for a reason, but a collection becomes more rewarding when it includes both the obvious picks and the ones that caught your eye for a different reason. A bundle creates room for both.

It can also make shopping feel less fragmented. Instead of piecing together an order from several separate product pages, you begin with a ready-made assortment and spend your attention on the details that matter: variety names, product format, availability, and the kinds of selections you want represented in your collection.

When Individual Syringes Are the Better Choice

Bundles are not always the answer. If you are replacing one familiar variety, looking for a specific product name, or have a tightly defined budget, purchasing individually offers more control. It can also be the better option when you already own several items commonly included in popular packs.

Think of individual purchases as precision shopping and bundles as range shopping. Precision is useful when you know exactly where you are headed. Range is useful when you want to see more of the map. Both belong in a well-stocked mycology storefront, and the better format comes down to how you prefer to browse, compare, and collect.

A Better Way to Shop the Bundle Section

Before checking out, take a minute to list the varieties you already have, the names you are curious about, and the type of assortment you want next. That small step prevents accidental duplicates and makes it easier to spot a bundle that genuinely adds something new.

Then shop with a little flexibility. The perfect pack may not exist at every moment, particularly when promotional assortments change. If a bundle includes most of what you want plus one unexpected variety, that surprise may end up being the item that makes the order memorable.

The Mycelium Network is built for enthusiasts who want more than a one-off purchase. Choose spore syringe bundles that give your collection a direction, leave room for curiosity, and make the next conversation with fellow mycology fans a little more interesting.

Posted on

How to Choose Mushroom Strains for Your Setup

How to Choose Mushroom Strains for Your Setup

A name can get your attention, but it should not make the decision for you. Learning how to choose mushroom strains starts with looking past fan-favorite genetics and matching a culture or specimen to your actual setup, skill level, and goal. The right choice is the one you can handle confidently, observe closely, and enjoy working with from start to finish.

For some growers, that means a dependable edible culture that fits a kitchen grow. For collectors and microscopy-focused buyers, it may mean a clean print with distinct visual characteristics. Either way, strain selection is less about chasing hype and more about knowing what you want the genetics to do.

Start With Your Goal, Not the Strain Name

Before browsing categories, decide what a successful project looks like. Are you growing gourmet mushrooms for the table? Building skill with agar and culture work? Comparing spores under a microscope? Looking for a giftable bundle that gives you room to experiment? Your answer narrows the field quickly.

Edible cultures are usually the most direct route for growers who want a practical food crop. Oyster varieties, lion’s mane, shiitake, and chestnut mushrooms each bring different flavors, fruiting styles, and environmental preferences. A ready-to-inoculate option can also reduce the number of early variables, which is useful when you are learning how your space behaves.

Spores and prints suit a different kind of project. They invite observation, documentation, and genetic exploration, but they also require more patience and clean technique. If your goal is microscopy or building foundational lab skills, format may matter just as much as the strain itself.

How to Choose Mushroom Strains by Growing Conditions

Every strain has preferences. Temperature, fresh air exchange, humidity, substrate, and available space affect results far more than a catchy name on a listing. A genetics choice that performs beautifully in a dialed-in fruiting tent may be frustrating in a warm apartment or a low-humidity room.

Check the temperature range first

Temperature is one of the fastest ways to filter choices. Cool-fruiting varieties are often better suited to basements, garages, and climate-controlled spaces, while warm-weather varieties can be more forgiving in naturally warmer homes. If you cannot reliably manage temperature, choose genetics with a wider comfort range instead of trying to force a narrow-range variety into an unsuitable environment.

For edible species, this distinction is especially useful. Blue oyster mushrooms often prefer cooler conditions than pink oyster mushrooms, while lion’s mane generally rewards growers who can keep fruiting conditions steady. That does not make one objectively better. It simply makes one a better fit for the season and space you have.

Be honest about your humidity and airflow control

High humidity without enough fresh air can create weak, misshapen fruits. Too much airflow without proper humidity can dry surfaces before they develop well. Some varieties tolerate a little inconsistency better than others, but no strain completely ignores its environment.

If you are working with a basic tub, countertop fruiting chamber, or small tent, choose a project with manageable environmental demands. Once you can recognize what healthy mycelium and proper fruiting conditions look like, moving into more particular genetics becomes much easier.

Match the substrate to your workflow

Substrate is not an afterthought. Wood-loving gourmet cultures, for example, generally need a different approach than varieties that perform well on supplemented sawdust, straw, or other prepared media. A strain may be excellent, but it still needs a substrate it can colonize efficiently.

This is where ready-to-inoculate products earn their place. They simplify preparation and let you focus on inoculation, colonization, and fruiting rather than building every input from scratch. Experienced growers may prefer the control of making their own substrate, while newer cultivators often benefit from reducing avoidable steps.

Choose a Format That Matches Your Experience

The same genetics can be sold in several forms, and each format changes the project.

A spore syringe is a familiar option for microscopy work and hands-on cultivation practice. It is compact, versatile, and easy to store correctly before use. Because spores represent genetic diversity, results can vary more than they do with a stabilized culture. That variability is part of the appeal for many enthusiasts, but it is not always the fastest route to predictable performance.

A spore print is a classic collector and microscopy format. Prints are easy to catalog, compare, and preserve when handled with clean technique. They are also a strong choice for buyers who enjoy the visual side of mycology and want to work carefully from a dry specimen.

Liquid cultures and other ready-to-inoculate formats are generally appealing when speed and consistency matter. With active, clean mycelium, you are beginning further along in the process than you would with spores. The trade-off is that cultures have a more defined handling window and require attention to storage and freshness.

If you are buying your first item, do not assume the most advanced format is automatically the best. Choose the format you understand well enough to use properly. Good technique beats ambitious shopping every time.

Look at Traits, Not Just Reputation

Popular names become popular for a reason. Some are widely recognized, visually distinctive, or frequently requested by collectors. Still, reputation only tells part of the story. Read the available product details for notes on species, format, intended application, and handling guidance.

For edible genetics, focus on traits that change your grow and your meal: flavor, texture, fruiting temperature, colonization speed, and substrate preference. A fast colonizer can be appealing in a busy workflow, while a slower culture may be worth the wait if it produces a flavor or form you specifically want.

For spores and prints, pay attention to provenance, labeling, and presentation. Clear identification matters if you are organizing a collection, maintaining records, or comparing samples. A well-labeled product helps you build better habits from the first purchase.

It also helps to separate “easy” from “low maintenance.” An approachable strain still needs sanitation, suitable conditions, and patience. Easy simply means it may be more forgiving when your conditions are close, rather than perfect.

Build a Small, Useful Strain Lineup

New buyers sometimes order a long list of strains before they know what their setup can support. Variety is fun, but too many simultaneous projects make it harder to diagnose problems. If one container stalls, you want to know whether the issue was the substrate, temperature, moisture, handling, or genetics.

A better first lineup has a purpose. Choose one dependable edible culture for practical growing, one additional variety with different climate or substrate preferences, and one microscopy-focused item if observation is part of your hobby. That gives you contrast without turning your workspace into a confusing experiment.

Bundles can make sense when the products fit your plan rather than simply adding quantity. A mixed edible bundle can help you compare fruiting behavior across species. A print pack can be a smart way to expand a catalog. But if you only have capacity for one project, a carefully selected single item may give you better results and better notes.

Buy With Traceability and Care in Mind

Genetics are only as useful as the way they are stored, shipped, and handled. Choose products with clear format descriptions and practical information. When an item arrives, inspect the label, follow storage guidance, and keep a simple log of the arrival date, inoculation date, conditions, and observations.

That log becomes more valuable than memory after just a few grows. You may find that one culture loved your winter fruiting area while another performed better during warmer months. Over time, your own records will tell you more about what belongs in your rotation than any generic “best strain” list.

Use clean tools, avoid cross-contamination between projects, and follow local rules for the products and activities you choose. Mycology rewards careful work. Small habits, such as labeling containers and documenting changes, create much better outcomes than constantly switching genetics.

The Mycelium Network is built for that kind of curiosity: try a strain with a clear purpose, give it conditions it can actually use, and let your observations guide the next addition to your collection.

Posted on

Exotic Mushroom Spore Varieties Worth Knowing

Exotic Mushroom Spore Varieties Worth Knowing

A standard catalog can get you started. Exotic mushroom spore varieties are where the search becomes more personal: unusual morphology, respected lineage names, regional history, distinctive print colors, and the simple appeal of adding something less common to a serious collection. For microscopy-focused buyers and mushroom enthusiasts, the point is not chasing the loudest name. It is knowing what makes a variety distinctive and selecting a format that fits your intended use and local laws.

The best collections balance familiar fan favorites with strains that have a story. Some are sought for their recognizable visual traits, others for the way a name connects to a historic region, a long-circulating lineage, or a dedicated community of collectors. That variety is exactly why a well-organized mycology shop matters. You should be able to compare options without bouncing between fragmented suppliers or guessing what a product name actually represents.

What Makes a Spore Variety Exotic?

“Exotic” is not a strict taxonomic label. In a retail setting, it usually refers to varieties that sit outside the most common entry-level selection. They may be less frequently stocked, visually unusual under a microscope, tied to a specific geographic origin, or recognized by collectors for a notable phenotype.

That distinction matters because a variety name is useful context, not a laboratory guarantee. Names can reflect a reported lineage, a regional association, a breeder-selected trait, or community shorthand. A responsible buyer reads the listing closely, looks for clear format and handling information, and treats every named variety as a chance to study variation rather than a promise of identical results.

For collectors, the appeal often starts with identity. A well-labeled print or syringe with a clear variety name has more value than a mystery sample, even when both look interesting. Documentation supports better organization, more meaningful comparison, and a collection you can revisit with confidence months later.

Exotic Mushroom Spore Varieties by Character

A useful way to shop is to think in terms of character rather than trying to crown one variety as universally “best.” The right pick depends on whether you are building a reference collection, looking for a striking microscopy subject, or expanding beyond the usual names in your lineup.

Classic names with lasting collector appeal

Some varieties earn their place because they have stayed relevant for years. Golden Teacher, B+, Blue Meanie, and Lizard King are recognizable examples that many enthusiasts encounter early in their research. Their popularity makes them useful reference points when comparing label conventions, print presentation, and the way different vendors categorize familiar lines.

A classic name is not automatically ordinary. A carefully prepared spore print from a well-known variety can be one of the most satisfying pieces in a collection, especially when it is clearly identified and stored correctly. Familiar varieties also make it easier to understand where more unusual names fit within the broader hobby.

Regional and heritage-inspired varieties

Regional names carry an immediate sense of place. They may refer to a country, island, mountain range, or climate zone associated with a reported origin story. Heritage-oriented varieties appeal to collectors who enjoy the cultural and geographic side of mycology as much as the sample itself.

Still, regional branding deserves a measured approach. Geographic associations can be meaningful, but they are not a substitute for transparent product details. Look for a seller that provides the variety name, product type, packaging information, and a clear statement of the product’s intended lawful use. Good labeling turns a compelling name into a more credible item for your records.

Distinctive morphology and pigment lines

Some exotic offerings stand out because of their reported visual characteristics. Unusual pigmentation, cap shape, stem structure, or spore appearance can make a variety especially interesting for microscopy and display-oriented collections. These are the listings that often catch the eye first, and for good reason.

The trade-off is that morphology can vary. Environmental conditions, sample handling, and natural biological variation all affect what someone sees. For that reason, choose these varieties for their study value and collector appeal, not because a product photo suggests every observation will look exactly the same.

Choosing the Right Format for Your Collection

The variety is only half the decision. The format changes how you receive, store, and work with your purchase. Myceli Nation’s product categories make it easier to shop according to the format you prefer instead of forcing every buyer into one path.

Spore prints are a natural fit for collectors who value a compact, traditional specimen. A clearly labeled print can be easy to archive and compare alongside other varieties. It also gives the product a tangible, old-school mycology feel that many enthusiasts appreciate.

Spore syringes offer convenience for buyers who prefer a ready-prepared format for lawful microscopy and research applications. When evaluating a syringe, pay attention to labeling, packaging quality, and handling guidance. A reputable listing should make the format clear rather than leaving you to infer what is included.

Multi-packs and bundles are worth considering when you already know the direction of your collection. A themed group of varieties can provide stronger contrast than several random single selections. The best bundle is not simply the one with the biggest count. It is the one with enough variety to make each item feel purposeful.

What to Check Before You Buy

Specialty spores are easier to shop for when you use a consistent filter. Before adding an item to your cart, review four essentials:

  • Variety identification: The product should have a specific, readable name rather than vague “exotic” labeling alone.
  • Format and quantity: Confirm whether you are selecting a print, syringe, or another product type, along with the stated amount.
  • Packaging and handling details: Quality retailers communicate how products are packaged and any applicable storage expectations.
  • Local legality: Laws and regulations vary by jurisdiction. Buyers are responsible for understanding the rules where they live and purchasing only for lawful purposes.

These checks are not glamorous, but they prevent most avoidable disappointments. Clear product information is especially valuable with exotic varieties, where names can be unfamiliar and availability may change quickly.

Build a Collection With a Point of View

The strongest collections are not built by grabbing every new name that appears. They are shaped by a question. You might collect varieties with regional naming traditions, compare classic fan favorites against less common lines, or focus on the visual range found across spore prints. A point of view gives your purchases continuity and makes every new addition more interesting.

Keep simple records as you go. Note the variety name, format, date received, seller, and any visible details that matter to you. This is useful for organizing a growing collection, but it also helps separate a memorable product from a merely flashy listing. Over time, your notes become part of the hobby.

Availability is another reason to shop with intention. Exotic selections often rotate, and limited drops can disappear faster than standard catalog items. That does not mean every limited item is a must-have. It means that when a variety fits your collection goals, it is worth reviewing the listing carefully and making a considered choice rather than waiting for a restock that may not arrive soon.

The Value of a Better Selection

Exotic mushroom spore varieties are compelling because they turn mycology shopping into more than a repeat purchase. They invite comparison, curiosity, and a deeper appreciation for the names, histories, and visual details that make the hobby feel alive. Whether you prefer a recognizable classic, a heritage-inspired line, or an unusual collector specimen, choose products with clear identification and shop with a collection goal in mind.

A great next addition is not always the rarest one. It is the variety that gives your collection a new angle to study, a better story to tell, and a reason to keep exploring The Mycelium Network.

Posted on

Blue Meanie Spore Syringe: Before You Buy

Blue Meanie Spore Syringe: Before You Buy

A blue meanie spore syringe is one of those products that gets attention fast, but the name alone does not tell a buyer everything they need to know. In specialty mycology, recognizable names can point to different genetics, different supplier labeling practices, and different expectations around microscopy. The smart move is to look past the label and assess the product details, format, and source before adding it to your cart.

For collectors and microscopy-focused buyers, the appeal is clear: a syringe format is compact, familiar, and easy to store appropriately until it is ready for lawful research or observation. But as with any specialty spore product, consistency starts with clear identification and transparent handling standards.

What Is a Blue Meanie Spore Syringe?

A spore syringe is a suspension containing mushroom spores in sterile water. It is commonly packaged in a sealed syringe and intended for microscopy, taxonomy study, spore collection, and other lawful mycology purposes. Compared with a spore print, the syringe format offers a ready-to-observe sample in a form many hobbyists already recognize.

The phrase “Blue Meanie” deserves a closer look. It is a popular marketplace name, not always a precise scientific identifier. Depending on the seller and catalog, it may refer to a particular named variety or may be used more broadly. That makes product-page details especially valuable. A listing should make it clear how the sample is identified rather than relying entirely on a bold strain name.

This is not a small distinction. Two products with similar branding may have different lineage descriptions, visual traits, or intended research context. Buyers who care about accurate collection records should document the exact listing name, supplier, purchase date, and any identification details provided at the time of purchase.

Why the Syringe Format Appeals to Collectors

Spore prints remain a classic option for many mycology enthusiasts, especially those building a physical reference collection. A blue meanie spore syringe, however, can be a practical format for buyers who prefer a contained sample with straightforward handling for microscopy.

The appeal usually comes down to convenience. Syringes are individually packaged, easy to organize alongside other samples, and simple to distinguish with careful labels. For enthusiasts comparing multiple varieties, this can make cataloging a collection less complicated than managing several loose-format items.

That said, no format is automatically better for every buyer. A print may appeal to collectors who value a traditional archival format. A syringe may appeal to those who want a prepared liquid sample for observation. The best choice depends on the purpose of your purchase, the type of collection you keep, and how you prefer to document your materials.

What to Look for Before Ordering

The strongest product listings do more than repeat a strain name. They give buyers the information needed to make a confident, informed choice. When comparing specialty spore syringes, pay attention to how a seller presents identity, packaging, and ordering expectations.

Clear labeling matters first. Look for a product title that is consistent with the description, along with any relevant species or variety information the retailer can provide. If a listing uses a popular nickname such as Blue Meanie, the surrounding details should help distinguish that specific item from similarly named products elsewhere.

Packaging information matters too. Buyers should know what format they are receiving, how the product is sealed, and whether individual samples are labeled for easy organization. Good retail presentation is not just about appearance. It helps collectors maintain accurate records after delivery.

It is also worth reviewing the seller’s policies before checkout. Shipping availability, destination restrictions, payment options, and order-processing timelines can vary by location. Mycology products are subject to different rules in different jurisdictions, so buyers are responsible for knowing the laws that apply where they live before placing an order.

Finally, consider the retailer’s overall catalog. A dedicated mycology shop with syringes, prints, edible cultures, and supplies gives enthusiasts a more useful way to compare formats and build a collection over time. A broad catalog does not replace careful product research, but it can make it easier to find compatible products without jumping between unrelated sellers.

Reading Product Names Without Guesswork

Mycology product names can be memorable, collectible, and sometimes confusing. Blue Meanie is a good example of why buyers should avoid assumptions based on a name alone. Nicknames travel quickly through forums, product catalogs, and collector circles, while scientific and variety-level descriptions are often more specific.

When a name appears across multiple shops, compare the wording rather than assuming every listing represents the same thing. Note whether the seller identifies a species, provides a lineage description, or uses only a marketing name. If details are limited, treat the product as limited in documentation rather than filling in the blanks yourself.

This approach is useful for any collection, not just Blue Meanie samples. Golden Teacher, B+, Lizard King, and other fan-favorite names are often familiar to buyers, but a well-organized collection benefits from more than familiarity. It benefits from complete labels, saved order records, and a clear distinction between confirmed information and community shorthand.

Storage and Handling for Microscopy Collections

Responsible handling starts with leaving sealed products sealed until they are needed for a lawful, intended use. Keep samples in a clean, dry, temperature-stable place away from direct sunlight, excessive heat, and unnecessary handling. Retain the original label whenever possible, especially if you maintain a larger collection.

Organization can be as simple as a dated storage box, a collection log, and separate sections for syringes, prints, and edible cultures. Record the product name exactly as listed, along with the retailer and order date. That record becomes valuable when you are comparing samples later or reviewing the history of a particular item.

Avoid relying on appearance alone to identify an unlabeled sample. Once original packaging or documentation is lost, confidence in the item’s identity drops quickly. This is one reason clear labeling from the seller and disciplined organization from the buyer go hand in hand.

Comparing Syringes, Prints, and Other Formats

A shopper looking for a Blue Meanie sample may encounter more than one format. There is no universal winner because each format serves a slightly different collecting preference.

Spore syringes are popular for their contained presentation and convenience for microscopy-oriented buyers. Spore prints are often chosen for collection, visual study, and archival interest. Ready-to-inoculate products and cultures occupy a different category entirely, with their own use cases and local legal considerations.

Instead of choosing based on what is most talked about, choose based on what you actually want to document or observe. If your focus is building a labeled assortment of samples, consistency in packaging and product information may matter more than hype. If you are comparing varieties for microscopy, product identity and careful recordkeeping should come first.

A Better Way to Shop Specialty Spores

The most reliable purchase decisions come from a simple mindset: buy the information along with the item. A good blue meanie spore syringe listing should feel clear, not mysterious. It should tell you what format you are ordering, how it is labeled, what you can reasonably expect from the transaction, and whether the retailer’s policies work for your location.

At Myceli Nation, The Mycelium Network is built around giving enthusiasts a central place to browse recognizable favorites, compare specialty formats, and find the mycology supplies that fit their collection goals. Whether you are adding one carefully documented sample or organizing a wider library of spores and prints, prioritize accurate labels, responsible storage, and a source that treats specialty mycology with the detail it deserves.

The best addition to a collection is not simply the one with the most recognizable name. It is the one you can identify, document, and feel confident about long after the package arrives.

Posted on

Best Way to Take Spore Prints Cleanly

Best Way to Take Spore Prints Cleanly

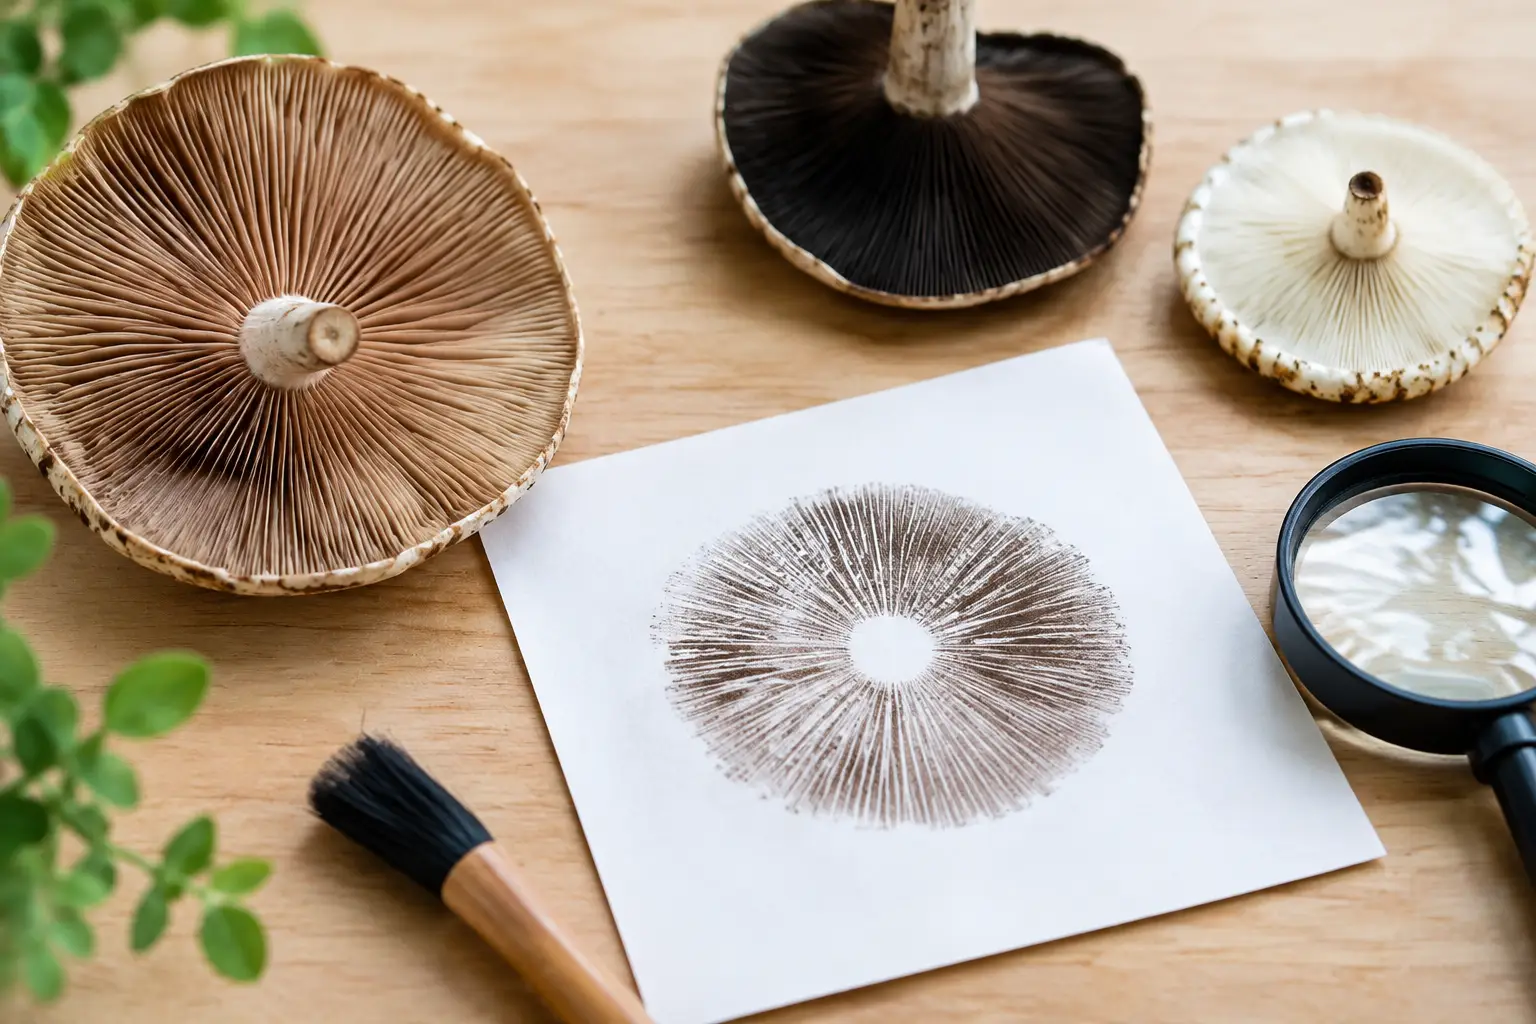
A good spore print tells you a lot before you ever put it under the scope. Color, density, and cleanliness all matter, and the best way to take spore prints is usually not the fastest way. If you rush the cap onto whatever surface is nearby, you often end up with smeared deposits, excess moisture, or a print that is hard to store without contamination.

For collectors and microscopy-focused hobbyists, clean technique matters more than fancy gear. You do not need a lab setup to get a usable print, but you do need a stable surface, a mature cap, and a little patience. Most problems come from one of three places: the mushroom was picked too early, the environment was too damp, or the print surface was poorly chosen.

What is the best way to take spore prints?

The best way to take spore prints is to work with a mature, freshly harvested cap, place it gill-side down on a clean nonporous surface, cover it to reduce airflow, and leave it undisturbed long enough for a visible deposit to form. In practice, that means matching the surface and timing to your goal.

If you want a print for storage, foil is usually the easiest option. It folds cleanly, handles moisture better than paper, and makes transfer easier later. If you want to inspect spore color clearly, white and black paper can be useful, but paper absorbs moisture and is less forgiving when the cap is wet.

Glass also works well when cleanliness is the priority, though it is less convenient for storage. There is no single perfect surface for every situation. The right choice depends on whether you care most about display, microscopy prep, or long-term handling.

Start with the right cap

A perfect surface cannot fix an immature specimen. If the cap has not developed enough, it may drop very few spores or none at all. On the other hand, an overmature cap may release unevenly, hold too much moisture, or begin breaking down before the print is finished.

Look for a cap that is open and visibly mature, with intact gills and no obvious rot or bruised, soggy tissue. Freshly harvested material gives the most reliable results. If the stem is long, trim it close to the cap so the gills can sit flat against the print surface.

This small step makes a big difference. A cap that rocks or tilts tends to produce a partial print, not a full one.

Best surfaces for taking spore prints

Foil for clean handling and storage

For most growers and collectors, foil is the safest bet. It is cheap, easy to keep clean, and easy to fold once the print is dry. That makes it a strong choice if you want to preserve the print or use it later for microscopy-related handling.

Heavy-duty foil is better than the very thin kind because it wrinkles less. Wrinkles can interrupt the print pattern and make later transfer more awkward. If you are choosing one surface to keep on hand, foil is usually it.

Paper for visible contrast

White paper helps with dark spore deposits, while black paper helps with lighter ones. This is useful when your main goal is simply to observe color and pattern. The trade-off is that paper can trap moisture, and a damp cap on paper may create a muddy print instead of a crisp one.

If you use paper, keep the environment dry and avoid overwatering or rinsing the cap beforehand. Paper is better for short-term viewing than for long-term storage.

Glass for precision

Glass slides or clean glass plates can produce very crisp prints. They are easy to sanitize and helpful if you want a very clean deposit. The downside is convenience. Glass is not as easy to package, fold, or store, so it is usually better for immediate use than for building a collection.

How to take a spore print without making a mess

Set up your workspace first. Wipe down the surface, wash your hands, and have your foil, paper, or glass ready before you cut the cap. A rushed setup is where most accidental smears happen.

Place the cap gill-side down on the surface. Then cover it with a clean cup, bowl, or jar. The cover helps in two ways: it protects the cap from drafts and slows moisture loss just enough to encourage deposition. Too much airflow can dry the cap before it drops well, but too much trapped humidity can make the print wet and blurry.

That balance is the real trick. If your environment is already humid, use a larger cover with a little space underneath instead of sealing things tightly. If your room is very dry, a simple glass or bowl usually works well.

Leave the cap undisturbed for several hours. Overnight is common, but the right timing depends on the species, maturity, and moisture level of the cap. Some prints show up quickly within a few hours. Others benefit from a longer wait. The mistake is checking too often. Every time you lift the cover or move the cap, you increase the chance of smearing the deposit.

A cleaner print usually comes from less moisture

People often assume that more humidity means a better print. Not exactly. You want the cap to stay viable long enough to release spores, but if condensation forms under the cover, the spores can clump or streak.

If the cap surface is visibly wet, blot the top gently before placing it down. Do not press the gills. If condensation starts collecting under the cup or bowl, your setup may be too warm or too sealed. In that case, use a drier room, a slightly larger cover, or shorten the printing time.

The best way to take spore prints cleanly is often to lean a little dry rather than a little damp. A slightly lighter print is usually more useful than a heavy smear.

When to remove the cap

Lift the cap straight up once a visible deposit has formed. Avoid sliding it sideways. Even a good print can be ruined at the last second by dragging the cap across the surface.

If the print looks faint, you can set the cap back down carefully and give it more time, but only if the cap is still fresh and the surface is still dry. If the print already looks wet or muddy, more time will rarely improve it.

After removing the cap, let the print air dry fully before covering, folding, or storing it. This part gets skipped more often than it should. A print that looks dry can still hold enough moisture to cause problems later.

How to store a spore print properly

Once dry, fold foil prints inward so the deposit is protected. Paper prints can be placed in a clean envelope, though foil still tends to hold up better over time. Keep prints in a cool, dark, dry place away from direct sunlight and swings in temperature.

Labeling matters more than people think. Include the date, variety, and any notes about the source or print quality. If you handle multiple caps in one session, clear labeling saves confusion later.

For collectors building out a wider catalog, consistent storage makes the whole process easier. That is part of why product format matters too. Many hobbyists prefer ready-made print options because they are simpler to archive and compare across varieties.

Common mistakes that ruin spore prints

The first is using an immature cap. The second is too much moisture. The third is moving the cap before the spores have had time to settle. After that, most issues come from poor surfaces or poor storage.

Another common mistake is chasing the darkest possible print. Dense does not always mean better. If the deposit is so heavy that detail disappears, it can be harder to work with than a lighter, cleaner print.

It also helps to keep expectations realistic. Some caps drop heavily and beautifully. Others produce lighter prints even under good conditions. That does not always mean you did something wrong.

Best way to take spore prints for beginners

If you are just starting out, keep it simple. Use a mature cap, a square of clean foil, and a bowl or cup as a cover. Put the setup in a low-traffic area, leave it overnight, and let the print dry fully before folding it.

That basic method works because it removes the usual points of failure. You do not need specialty equipment. You just need a cleaner process and enough patience to let the cap do the work.

For enthusiasts who like to compare formats, build collections, or restock their microscopy supplies without bouncing between suppliers, having access to clean prints and dependable materials makes the hobby smoother. That is part of the appeal behind communities like Myceli Nation – fewer guesswork purchases, more time focused on the fungi themselves.

A clean spore print is a small thing, but it rewards careful hands. Slow down, choose the right surface, and let the cap finish the job before you touch it again.

Posted on

How to Spore Print Lion’s Mane

How to Spore Print Lion’s Mane

If you’re figuring out how to spore print lion’s mane, the first thing to know is that it does not behave like a gilled mushroom. That single detail is where most failed attempts start. Lion’s mane releases spores from tiny teeth, not caps and gills, so timing, orientation, and patience matter a lot more than people expect.

For growers used to oyster or button mushrooms, lion’s mane can feel a little awkward at spore-print time. The fruiting body is shaggy, dense, and often harvested before it gets truly mature because texture and flavor are best on the younger side. If your goal is getting a visible print, you usually need to let one fruit go past peak kitchen quality. That trade-off is normal.

How to spore print lion’s mane successfully

A lion’s mane spore print starts with a mature fruiting body that is still clean and intact. You want a specimen with long, well-developed teeth and no signs of rot, heavy bruising, or bacterial slime. A very young fruit usually will not drop enough spores to give you much to work with, while an overripe one can turn messy fast.

Unlike broad-capped mushrooms, lion’s mane does not lend itself to the classic cap-on-foil method. The spores fall from the hanging spines, so you need to position the fruit so those teeth are pointed down over a clean surface. In practical terms, that means placing a trimmed chunk or a small whole fruit over foil, black paper, glass, or another smooth collection surface where spores can settle.

White spores on a white plate are a frustrating choice. Since lion’s mane spores are pale, a dark background tends to make the print easier to spot. Black paper can work, but smooth foil or glass is often easier if you plan to scrape and transfer material later.

What you need before you start

Keep the setup simple. You need a mature lion’s mane fruit, a sterile blade or scissors, clean aluminum foil or a sterile glass dish, and a cup, bowl, or container to cover the sample. Some growers lightly mist the surrounding area beforehand to settle dust, but you do not want moisture collecting directly on the print surface.

Clean handling matters here because lion’s mane prints are often faint. Any lint, dust, or fibers can overwhelm what you are trying to collect. Wash your hands, sanitize your tools, and work in a still-air area away from vents or fans.

Choosing the right fruiting stage

This is the part that makes or breaks the process. Lion’s mane should be mature enough that the teeth are elongated and the fruit has begun shifting from tight pom-pom growth into a more open, cascading form. If the spines are still short nubs, wait. If the fruit has started yellowing heavily or softening, you may still get spores, but contamination risk rises and quality drops.

A lot of growers harvest lion’s mane before prime spore release because that is when it looks best and cooks best. So if you are serious about learning how to spore print lion’s mane, plan ahead and designate one fruit for the job. Letting one specimen mature fully is usually more productive than trying to print leftovers from a harvest that was taken early.

Whole fruit or trimmed section?

It depends on the shape. A small whole fruit can be suspended or set over the print surface if the teeth naturally hang downward. A large cluster is often easier to trim into a manageable section. The main goal is simple: exposed fertile surface facing down, close enough to the collection surface for spores to land, but not pressed against it.

If the fruit sits directly on the foil or glass, air circulation around the teeth is reduced and moisture can build up. Leave a little clearance if you can. Even a small support ring made from clean foil can help elevate the sample.

Step-by-step setup for a lion’s mane spore print

Start by preparing your collection surface. Lay down foil shiny side up, or place a clean glass dish in your work area. Then cut a mature section of lion’s mane with minimal handling of the teeth.

Place the fruit so the spines point straight down toward the surface. Cover it with a clean bowl, deli container, or large cup to reduce airflow and contamination. The cover should protect the setup without sealing in heavy condensation.

Leave it undisturbed for 8 to 24 hours. Lion’s mane can be less dramatic than some other species, so don’t expect a bold, dark print. In many cases, what you get is a subtle white dusting rather than a sharply defined pattern.

When time is up, lift the cover carefully and remove the fruit gently. Tilt the surface under good light. A flashlight from the side can help reveal a thin spore layer that looks invisible head-on. If you see a faint powdery deposit, that is often your print.

Why some prints seem to fail

Most failed lion’s mane prints come down to three things: the fruit was too young, the spores were too pale to notice, or excess moisture interfered with collection. There is also the possibility that the specimen simply was not in an active spore-drop window during the time you left it set up.

This is one of those cases where patience beats overhandling. If the first attempt gives you little or nothing, try again with a more mature fruit or extend the collection window. Just keep an eye on humidity inside the cover. Too dry and spore drop may be weak. Too damp and the surface gets messy.

Handling and storing the print

Once you have a visible lion’s mane spore print, let the surface air dry briefly in a clean, still area if there is any trace of moisture. Then fold the foil carefully or transfer the print to a clean storage setup. If you used glass, you can scrape the spores with a sterile blade into a sterile container.

Label everything right away. Include species name and date at minimum. It sounds basic, but once you start collecting more than one sample, unlabeled material becomes guesswork fast.

Storage should be cool, dry, and dark. The cleaner the print when collected, the better it tends to hold up. If your print is mixed with condensation spots, substrate debris, or tissue fragments, it is less reliable as a clean reference sample.

Print quality versus culture quality

There is a practical point worth saying plainly: with lion’s mane, cloning tissue is often more straightforward than chasing a heavy spore print. Spores can absolutely be collected, but many growers prefer tissue work when they want to preserve a fruit they already like. Spore printing is still useful for study, documentation, and collection purposes, but it is not always the most efficient route if your only goal is propagation.

That does not mean printing lion’s mane is a waste of time. It just means expectations should be realistic. Some species throw obvious, satisfying prints. Lion’s mane tends to be more subtle and more dependent on perfect timing.

Common mistakes when learning how to spore print lion’s mane

One common mistake is harvesting too early because the fruit looks ready from a culinary standpoint. Another is using a white plate and assuming no spores dropped when the print is simply hard to see. The third is trapping too much humidity under the cover, which can leave you with moisture instead of a clean powdery deposit.

Rough handling is another issue. The teeth are delicate, and squeezing or flattening them can reduce your chances of getting a good print. Try to move the fruit as little as possible once it is cut and positioned.

It also helps to avoid high-traffic workspaces. A faint white print can be spoiled by a single stray hair, paper fiber, or dust layer. If you are already set up with basic sterile workflow for cultures and supplies, use that same mindset here.

What a good lion’s mane print should look like

Do not expect a classic umbrella-shaped print pattern. Since the fertile surface is made up of hanging spines, the deposit may look diffuse, uneven, or softly dusted rather than sharply outlined. That is normal.

Under angled light, a successful print often appears as a pale white powder on the collection surface. On dark material, it may show up as a soft chalky patch. On foil, it can be more reflective and easier to spot when you tilt it.

If you are building out a personal reference collection or just refining your technique, this is where repetition helps. One clean, mature fruit can teach you more than several rushed attempts.

For growers and collectors in The Mycelium Network, that is really the mindset to bring to lion’s mane – less hurry, more observation. Give the fruit time, keep the setup clean, and let the species show you how it wants to print.

Posted on

How to Spore Print Oyster Mushrooms

How to Spore Print Oyster Mushrooms

Oyster mushrooms can drop spores fast, and if you wait too long, your shelf, grow tent, or fruiting block will wear the evidence. If you want to learn how to spore print oyster mushrooms, timing matters just as much as clean technique. Catch them at the right stage, and you can get a dense, visible print without much fuss.

For growers, collectors, and microscopy-minded enthusiasts, oyster prints are useful because they let you observe spore color, compare phenotypes, and preserve material from a fruit you liked. They are also one of the easier mushrooms to print when the caps are mature and the environment is reasonably still. The catch is that oyster mushrooms are heavy spore producers, so they can go from perfect to over-dumped quickly.

What makes oyster mushrooms a little different

Oyster mushrooms do not behave exactly like the classic button-cap mushroom most people picture when they think about spore printing. Their caps are often shelf-like, the stems can be off-center or nearly absent, and the gills run down the stem. That shape changes how you position the cap and how much surface contact you need.

They also produce white to pale lilac-gray spores depending on species and variety. On plain white paper, a print can look faint even when it is actually dense. That is why dark paper, black foil, or a half-black, half-white background works better than a single light surface. If you have only white paper on hand, the print may still form, but you may have to tilt it under bright light to see it clearly.

How to spore print oyster mushrooms successfully

The best oyster mushroom for printing is mature but not collapsing. Look for a cap that has opened well, with visible gills and a fresh edge that is no longer tightly curled under. If the cap is still young and rolled inward, it may not release enough spores yet. If it is old, waterlogged, or starting to soften, you are more likely to get a messy print or contamination.

Cut the cap cleanly from the cluster with a sterile blade or clean scissors. Try to choose a cap with intact gills and minimal bruising. Oyster fruits often grow in overlapping shelves, so take a moment to separate one that has enough flat area to sit gill-side down.

Place the cap gill-side down on your printing surface. Foil is a favorite because it is easy to keep clean and simple to fold for storage later. Dark paper works too, but foil tends to hold up better if the cap releases a little moisture. If the cap is curved and wants to tip, trim excess stem tissue so it sits more evenly.

Then cover it with a clean glass, bowl, or cup. This does two things. It reduces air movement, which keeps the spores from drifting away, and it protects the print from dust. Set the covered cap somewhere stable at room temperature and leave it alone for several hours.

For many oyster mushrooms, 6 to 12 hours is enough. Some prints come in faster, especially from very mature caps. Overnight is usually safe if the fruit is still firm, but going too long can add moisture and blur the pattern. If your room is humid and the cap is especially fresh, check sooner rather than later.

When you lift the cap, do it gently and straight up if possible. A good print should show the outline of the gill structure as a pale deposit on the surface. It may look subtle at first. Tilt the foil or paper in the light before assuming nothing happened.

Best surfaces and setup for a clear print

If your goal is a print you can actually see and store cleanly, surface choice matters more than people expect. Black foil gives great contrast for light oyster spores and is easy to fold. Standard aluminum foil also works, though the reflectivity can make the print harder to photograph. Matte black paper can look excellent, but it is less forgiving if the mushroom releases moisture.

A split background is practical if you are not sure how visible the spores will be. Put the cap across black and white paper, or use a surface with two contrasting tones. That trick helps with species that print faintly.

Your setup should be clean, but it does not need to be a lab. Wipe the work area, wash your hands, and avoid breezy rooms, fans, and open windows. Oyster spores are light and abundant. Any air movement can scatter them before they settle into a crisp print.

Common reasons oyster mushroom prints fail

Most failed prints come down to one of three things: immature caps, poor contrast, or too much moisture. A cap that looks good for eating is not always mature enough for printing. Oyster mushrooms often need to flatten out more than people expect before they really start dropping.

Poor contrast is another common issue. Because oyster spores are so light, growers sometimes think the cap produced nothing when the spores are there but nearly invisible. Switching from white paper to dark foil often solves the problem immediately.

Moisture is the other problem. If condensation forms under the cup, the spores can clump or smear. In that case, the cap may still be releasing plenty of spores, but the print loses definition. A fresh cap, short print time, and dry room usually give cleaner results.

There is also the matter of species and strain variation. Some oysters are simply more generous than others. Blue, pearl, and phoenix types can all print well, but the density and visibility can vary with maturity, growing conditions, and how recently the mushroom was harvested.

How to store an oyster mushroom spore print

Once the print is complete, let the surface air dry for a short time if there is any visible moisture. Do not leave it exposed longer than needed. After that, fold the foil carefully around the print or place the paper in a clean sleeve or envelope.

Label it right away with the species or variety, date, and any notes you care about, such as substrate, flush number, or notable fruit traits. That sounds basic, but unlabeled prints pile up fast in a serious grower setup.

Store the print somewhere cool, dry, and dark. Humidity is the enemy here. If the print picks up moisture later, contamination risk goes up and the deposit can degrade. A sealed bag with a desiccant pack helps if your storage area runs damp.

Should you print from store-bought oysters or homegrown fruits?

You can do either, but the results depend on freshness. Homegrown fruits usually give you a better shot because you know exactly how mature they are and how they were handled. A cap taken directly from a fresh cluster tends to print more reliably than one that sat in packaging or refrigeration for days.

Store-bought oyster mushrooms can still work if they are fresh, dry, and fully opened. The trade-off is that retail handling may reduce spore release, and condensation in packaging can age them faster than they look.

If you are actively cultivating edible species, printing from your own grow gives you more control. It is also easier to compare fruits from different flushes or culture lines when you are documenting what performs best.

A few small technique upgrades that help

If you want a cleaner print, trim away any excess tissue that keeps the cap from lying stable. If the cap is especially thick or shell-shaped, you can support one side very gently so the gills face down more evenly. Just do not press the cap into the surface.

If you are printing multiple caps, give each one space. Oyster mushrooms can dump enough spores that overlapping deposits become hard to read. Separate prints are easier to label, store, and compare.

And if you are building out your mycology shelf with prints, cultures, and grow supplies, staying organized pays off. The Mycelium Network approach works here too – clear categories, clean handling, and labeled inventory save headaches later.

What a good oyster print should look like

A strong oyster print usually appears as a pale, powdery deposit that mirrors the cap and gill pattern. It may be bright white, creamy white, or slightly gray-lilac depending on the variety and the light. It should not look muddy or wet.

Do not expect every print to be dramatic on the first try. Oyster mushrooms are generous, but they still respond to timing, cap condition, and environment. Once you dial in those variables, the process becomes simple enough to repeat whenever you have a mature flush ready.

The nice thing about oyster mushrooms is that they reward attention. Watch the caps closely, print them at the right stage, and they will usually show you exactly what they are carrying.