
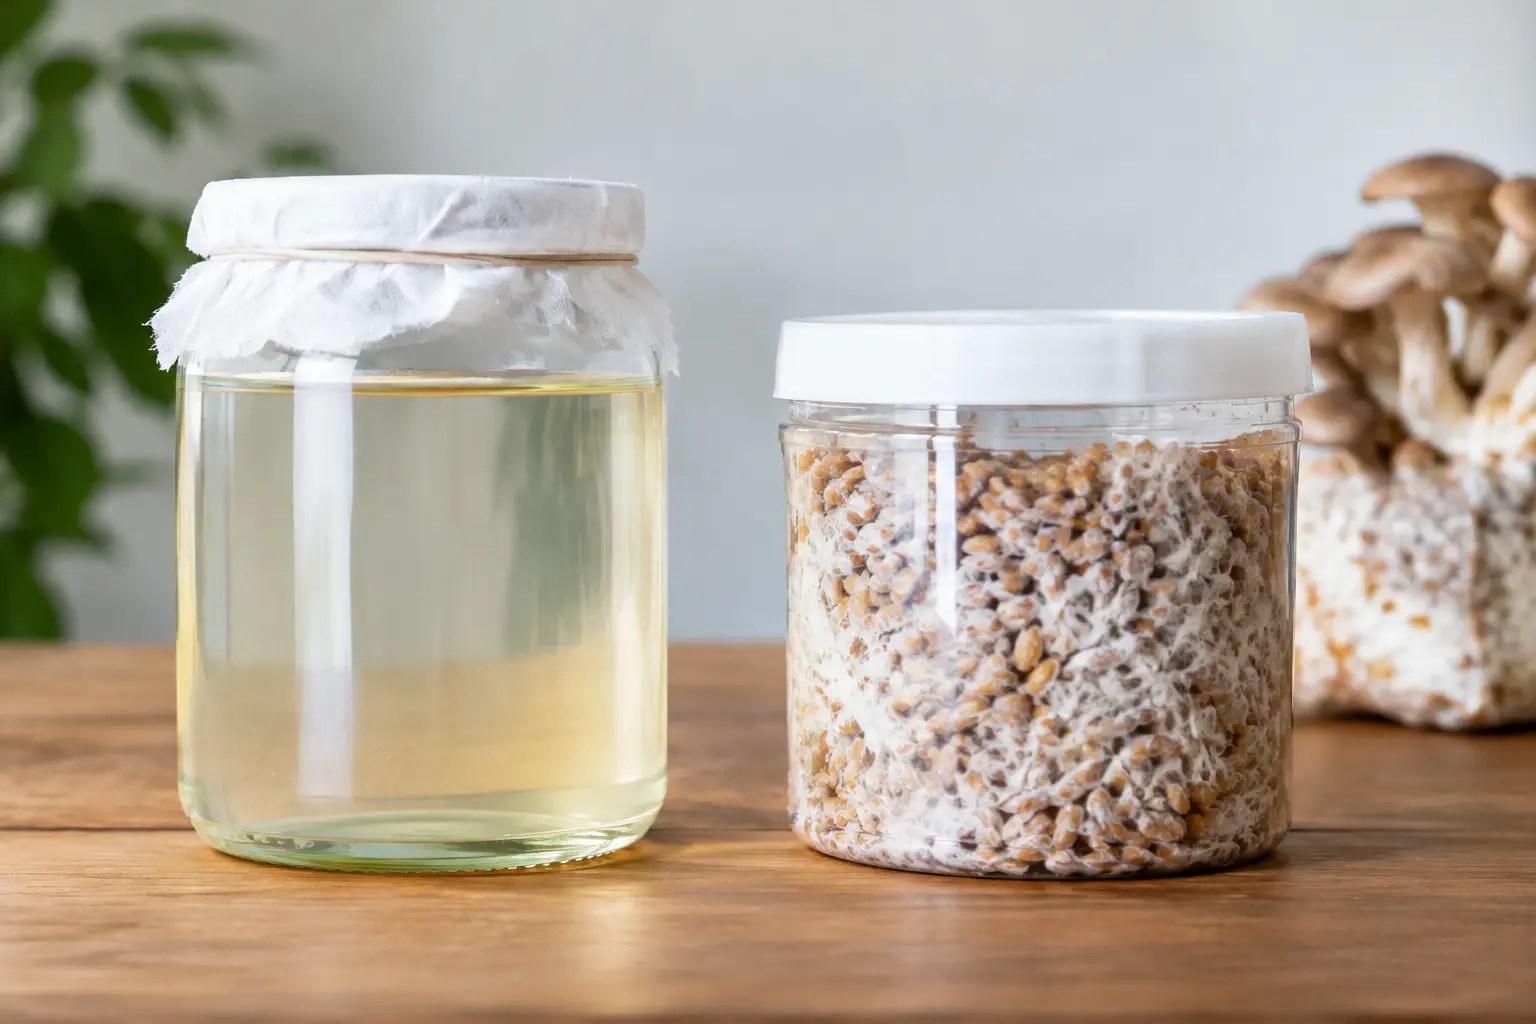
A jar can look fully colonized and still leave you with a bad decision: do you expand it through liquid culture, or put it straight to grain? The liquid culture vs grain spawn question is less about which option is universally better and more about what stage your culture is in, how much you need to expand, and how confidently you can keep your work clean.
For edible mushroom growers, both are valuable tools. Liquid culture is a fast, scalable way to move clean mycelium into multiple containers. Grain spawn is the solid, nutrient-rich expansion step that prepares that culture for a bulk substrate or other fruiting media. They are related, but they do different jobs in a cultivation workflow.
Liquid Culture vs Grain Spawn: The Core Difference
Liquid culture is mycelium grown in a sterilized nutrient solution, usually water with a simple sugar source. Healthy growth appears as white, cloud-like strands or suspended clusters moving through a mostly clear liquid. The culture can be drawn into a sterile syringe and used to inoculate grain, more liquid culture, or appropriate sterile media.
Grain spawn is mycelium grown on hydrated, sterilized grain. Millet, rye, oats, and sorghum are common choices because each grain provides moisture, nutrition, and many inoculation points. Once a jar or bag is thoroughly colonized, the grain is typically broken apart and mixed with a suitable bulk substrate for species such as oyster, lion’s mane, chestnut, or shiitake.
Think of liquid culture as an expansion and distribution format. Think of grain spawn as the bridge between a clean culture and a productive substrate. A liquid culture can make several grain jars quickly; grain spawn gives the mycelium the physical food source and structure it needs before the next stage.
Why Growers Choose Liquid Culture
The biggest advantage of liquid culture is speed at scale. A small amount of verified-clean culture can inoculate many grain jars or bags, and the liquid disperses through the grain more evenly than a small wedge of agar. That head start can reduce colonization time, especially when you are preparing several projects from the same edible culture.
It is also convenient. A syringe lets you add measured amounts through a self-healing injection port without opening a grain container. For growers running repeatable batches, this keeps the workflow tidy and makes expansion easier to track. One healthy master culture can support a practical rotation of grain inoculations without constantly returning to a plate.
Liquid culture does require discipline, though. Clear broth is not proof of cleanliness. Some contaminants are difficult to spot in liquid, and a culture can look normal until it reaches grain. The smart move is to test a small sample on agar before using a liquid culture for a larger run. Agar reveals growth patterns in a way liquid simply cannot.
Storage is another consideration. Liquid culture is useful for short- to medium-term working stock when refrigerated properly, but it is not the best answer for every long-term preservation plan. A culture collection is more reliable when you maintain clean master cultures on agar and make liquid culture only as needed.
When liquid culture makes the most sense
Liquid culture is a strong choice when you have a clean, proven culture and want to inoculate multiple grain containers efficiently. It is especially useful for repeat grows of a favorite gourmet strain, for preparing several bags at once, or for building a consistent supply of grain spawn for a small mushroom operation.
If you are still evaluating a new culture, avoid treating liquid culture as a shortcut around verification. Put cleanliness first, then scale. Fast expansion only helps when the culture being expanded is worth multiplying.
Why Grain Spawn Still Does the Heavy Lifting
Grain spawn is where mycelium gains momentum. Each colonized grain becomes an inoculation point after you break up and distribute the spawn through a substrate. That broad distribution gives the mycelium a better chance to colonize evenly before competitors find an opening.
For many cultivators, grain spawn is also easier to read than liquid culture. Healthy colonization is visible across the grains, and you can assess texture, coverage, moisture, and suspicious colors before moving forward. A sweet, sour, or otherwise off smell is a clear signal to stop rather than mix questionable spawn into more material.
The trade-off is that grain spawn takes more space and more prep. Grain must be hydrated correctly, loaded into jars or filter bags, and sterilized thoroughly. Overly wet grain can clump and encourage bacterial problems; underhydrated grain can slow growth. It is a hands-on step, but it is also one of the most useful quality checkpoints in the whole process.
Grain spawn is not usually the ideal format for long storage. Even under refrigeration, it continues to age, dry out, or lose vigor over time. It performs best when used while it is fresh, fully colonized, and at peak health.
When grain spawn is the better choice
Choose grain spawn when you are ready to inoculate bulk substrate or when you want a visible, practical checkpoint before that move. It is the standard expansion stage for growers producing bags, buckets, trays, or blocks of substrate.
It can also be the better first step for someone learning sterile technique. Working from a clean agar culture to a small number of grain jars keeps the process easier to observe. If one jar develops an issue, you can isolate the loss without risking a larger liquid culture batch.
Speed, Risk, and Cost in a Real Workflow
Liquid culture often wins the speed contest, but only after a clean culture is established. Inoculating grain with a syringe of active mycelium is generally faster than beginning from spores because the mycelium is already growing. Grain spawn then takes over by turning that small amount of culture into enough inoculation points for a larger substrate run.
Risk works differently at each stage. A contaminated liquid culture can spread a problem into every jar it touches. A contaminated grain jar is usually contained to that jar or bag, assuming you do not use it. That does not make grain spawn risk-free, but it gives you a more obvious inspection point before you expand further.
Cost depends on your scale. For one or two projects, purchasing or preparing a modest amount of grain spawn may be simpler than maintaining liquid culture equipment and a testing routine. For recurring grows, liquid culture can reduce per-container costs because a single clean culture can inoculate many jars. The savings disappear quickly if sanitation slips, so do not scale faster than your sterile technique allows.
A Practical Decision Framework
Start with the question behind the purchase or prep. Are you trying to evaluate a culture, expand a proven one, or inoculate a fruiting substrate? If you are evaluating, use agar as your reference point and keep the batch small. If you are expanding a culture you already trust, liquid culture can save time and create a more repeatable workflow. If you are ready for the next production step, fresh grain spawn is the workhorse.
For home growers, a sensible path is often simple: maintain a clean culture, make a small liquid culture only when you need expansion, inoculate grain, then use that grain spawn promptly. This approach avoids holding too much material in any one format and gives you multiple chances to spot trouble early.
The right choice may change from one run to the next. A single jar of grain spawn can be perfect for a weekend oyster mushroom project, while liquid culture makes more sense when you are preparing several bags of the same strain. Build the workflow around clean culture, realistic scale, and the species you want to grow. At Myceli Nation, that is the kind of practical mycology thinking that keeps a grow organized from the first culture to the final harvest.