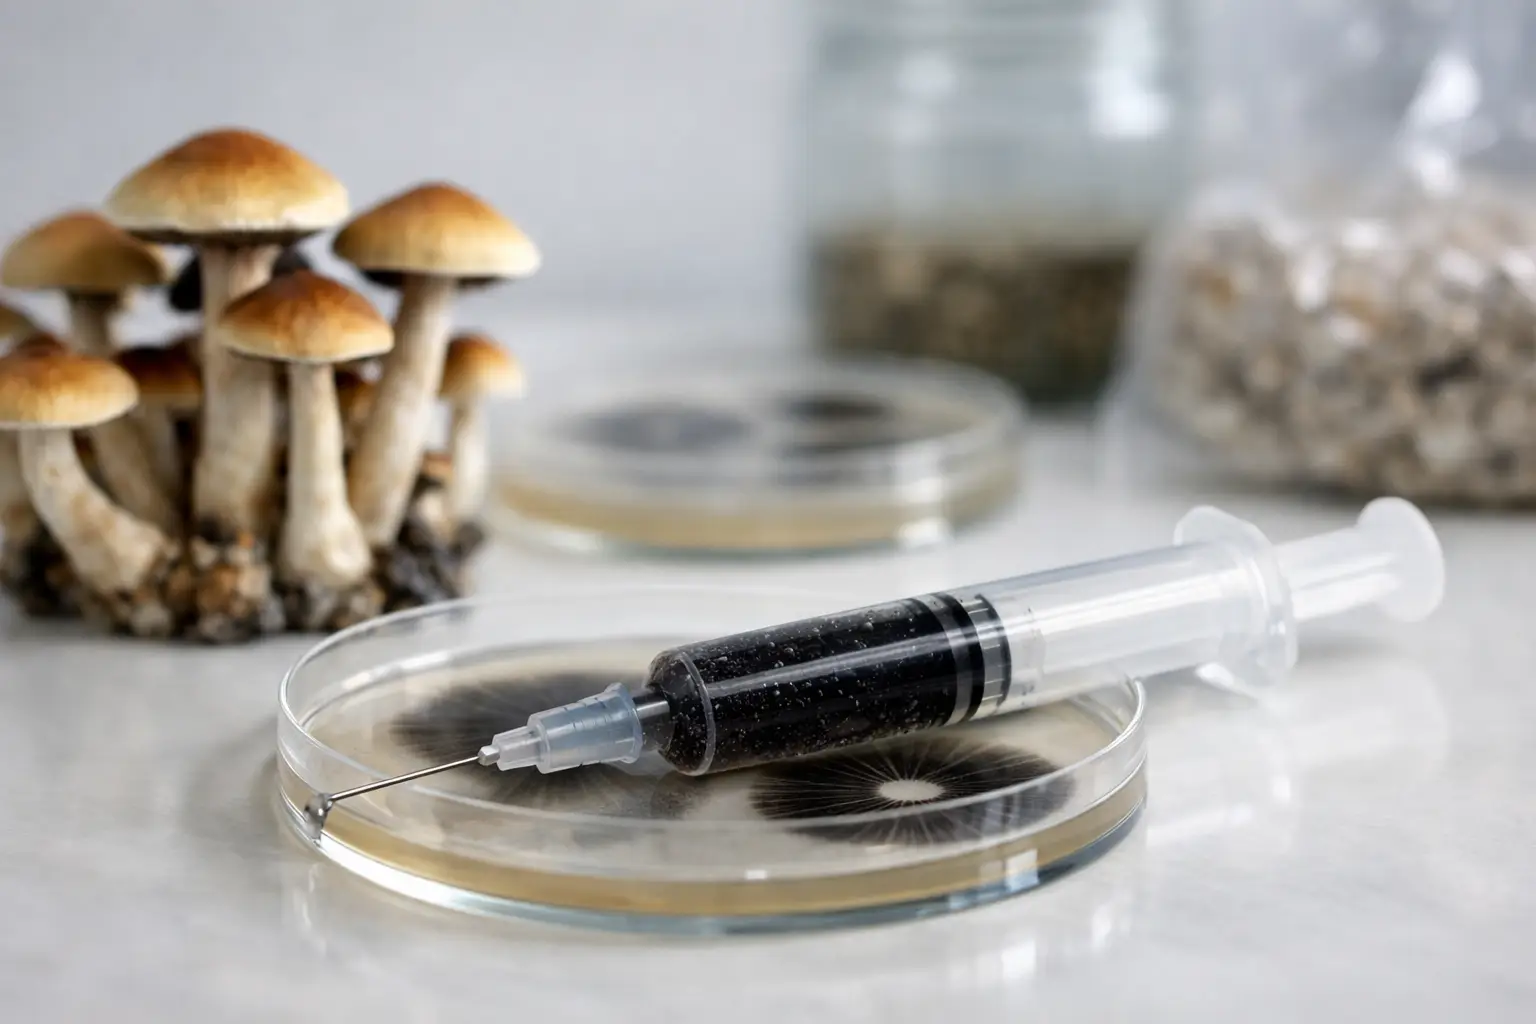
Posted on

Culture Supplier Review: What Buyers Should Check

Culture Supplier Review: What Buyers Should Check

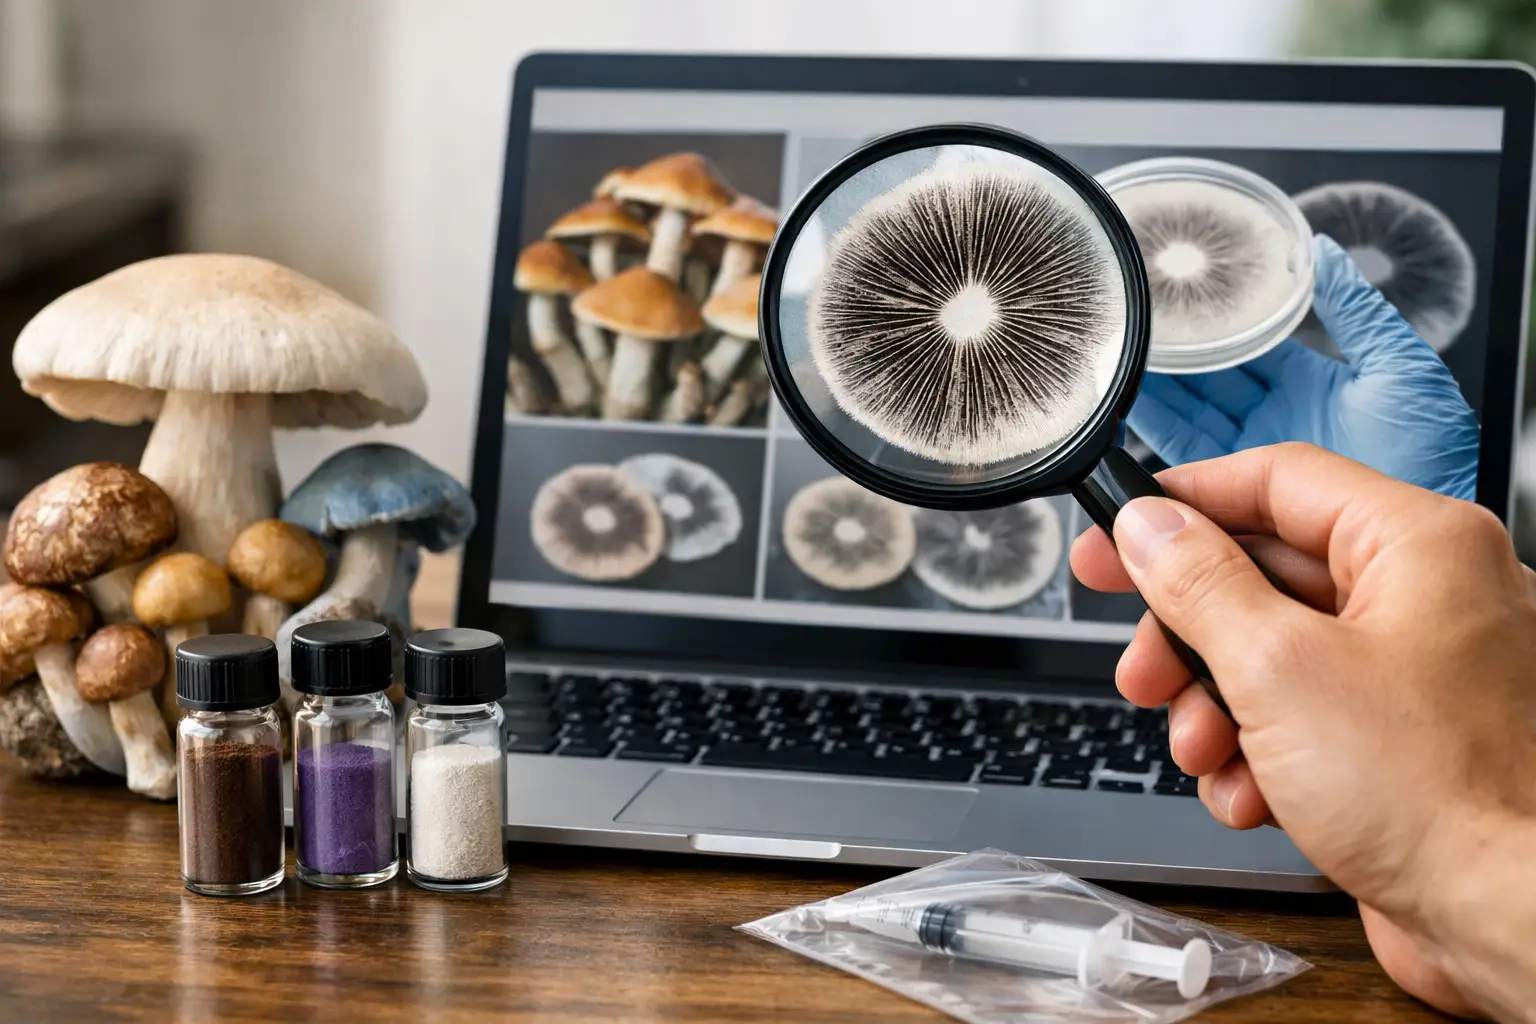
A culture can arrive in perfect-looking packaging and still be the wrong fit for your grow. That is why a useful culture supplier review goes beyond a quick star rating or a single clean result. Buyers need to know what was ordered, how it was handled, whether the labeling matched the listing, and how the supplier responds when something is off.

For edible growers and mycology collectors, cultures are not interchangeable inventory. Species, genetics, format, freshness, and supplier practices all shape what happens after the package lands at your door. The best supplier is not automatically the one with the longest catalog or the lowest sticker price. It is the one that gives you enough clarity to order with confidence.

Start a culture supplier review with the product details

A supplier’s product page should answer the questions an informed buyer would ask before checkout. At minimum, look for the culture format, the species or variety, the amount included, storage expectations, and a clear explanation of what you are receiving. A listing that says only “mushroom culture” leaves too much room for confusion.

Liquid culture, agar-based formats, slants, and ready-to-inoculate products each serve different workflows. A first-time buyer may favor a format that is straightforward to use, while an experienced grower may care more about a specific isolated culture or the ability to expand it for future projects. Neither choice is universally better. The right format depends on your experience, your setup, and how soon you plan to use it.

Pay attention to naming, too. Familiar common names are useful for browsing, but scientific naming and straightforward strain or variety identification add another layer of confidence. If a supplier offers several selections within the same species, the listings should make the differences easy to understand instead of treating every option as a mystery box.

Look for specificity, not hype

Product language should be enthusiastic without making promises it cannot support. Phrases such as “fan favorite” or “fast-moving” can help shoppers discover popular options, but they should sit beside real details: culture type, quantity, handling guidance, and available stock.

Photos are helpful, especially when they show the actual format and packaging, but they are not proof of quality by themselves. Clear written specifications matter more than polished graphics. When comparing two suppliers, the listing that is easier to understand is often easier to work with after purchase as well.

Clean handling and packaging matter more than flashy branding

Cultures are living materials. Shipping delays, extreme temperatures, and careless packing can affect their condition before you ever open the parcel. A reputable supplier does not need to reveal every internal process, but it should communicate practical expectations around dispatch timing, packaging, storage, and what to do after delivery.

Look for shipping information that is specific enough to plan around. Does the supplier explain typical order processing times? Is there a clear note about weather-related delays? Are tracking updates available? These details are especially relevant when ordering during very hot or cold periods, or when sending a package to an address where it may sit outside.

A culture supplier review should also consider how materials are labeled. Discreet outer packaging may matter to some buyers, but accurate internal labeling matters to everyone. You should be able to identify what arrived without guessing which product belongs to which order line. Lot identifiers or dates can be a plus, particularly for buyers managing several cultures at once.

No supplier can control every carrier delay. What separates a dependable shop from a frustrating one is how it prepares customers for normal risks and how it handles the exceptions.

Read reviews for patterns, not perfection

Every specialty retailer will eventually receive a negative review. The useful question is not whether complaints exist. It is whether the same problem appears repeatedly and whether the supplier addresses it in a reasonable way.

When reading customer feedback, separate product feedback from shipping feedback. A delayed carrier scan does not necessarily say anything about culture quality. On the other hand, repeated reports of unclear labeling, mismatched items, weak packaging, or unresponsive support deserve attention.

Give more weight to reviews that include context. A buyer who states what they ordered, when it arrived, how it was stored, and how the seller responded provides more useful information than a one-line reaction. Photos can add credibility, although they should still be interpreted carefully because handling after delivery varies from one order to another.

It also helps to check whether reviews reflect the products you actually want. A supplier may earn strong feedback for basic supplies while offering limited information on cultures, or it may excel at a narrow range of gourmet selections while not being the best source for a broad order. Match the review evidence to your cart.

Questions worth asking before you buy

A supplier should make it reasonably easy to find answers to a few practical questions:

  • What format is being sold, and how much is included?
  • How is the culture identified on the listing and package?
  • When should it be used or stored after delivery?
  • What happens if the wrong item arrives or the package is damaged?
  • Is customer support available through a clear contact channel?

If the answers are scattered, vague, or only appear after payment, consider that a signal. A well-organized storefront usually reflects a well-organized customer experience.

Compare value across the whole order

The lowest price is not always the best value. A cheaper culture with unclear labeling, limited support, or inconsistent packaging can cost more in time and replacement purchases than a slightly higher-priced option from a transparent retailer.

Instead of comparing one number, compare the total order experience. Look at the culture amount, the number of selections available, shipping charges, handling information, bundle options, and replacement policy. A bundle can be useful when it groups products you genuinely plan to use. It is less useful when it pushes extra formats or varieties into your order simply because the discount looks attractive.

Catalog breadth is another trade-off. A large store can make it easier to source cultures, supplies, and related products in one order. That convenience matters when you want fewer shipments and a simpler checkout. A smaller specialist may offer a more focused selection and deeper notes on each culture. Your choice depends on whether you value one-stop shopping, narrow specialization, or a balance of both.

At Myceli Nation, that balance starts with category-based browsing, culture options, and cultivation supplies that make it easier to build an order around your actual project rather than chase random listings across multiple stores.

Check support before there is a problem

Support policies are easy to ignore until an item arrives damaged, a label seems incorrect, or a package is delayed. Read them before placing an order. You are looking for clear timing, realistic documentation requirements, and instructions that tell you what to do next.

A fair policy does not have to guarantee every outcome. Living products and carrier networks involve variables. But it should distinguish between issues the buyer can document at delivery and issues that fall outside the supplier’s control. Strong support language is plainspoken: contact us within a stated window, provide the order number and photos if needed, and we will review the issue.

Responsiveness matters just as much as policy wording. If you have a pre-purchase question about a format, product availability, or order status, the quality of the reply can tell you a lot. Helpful support is specific, direct, and realistic. It does not dodge the question with copy-and-paste language.

Build a supplier list that fits your grow plan

The most useful culture supplier review ends with a decision framework, not a verdict that every buyer must follow. Keep a short list of suppliers that meet your standards for product clarity, packaging, support, and selection. Then choose based on the project in front of you.

For a single culture purchase, clear identification and handling information may be your top priority. For a larger supply order, bundled value and consolidated shipping may matter more. For a repeat source, consistency and responsive service become the deciding factors.

Buy with a plan, keep your order records, and give each supplier a fair evaluation based on the product you actually received. The right culture source should make your next step feel clearer, not more complicated.

Posted on

Spore Print or Syringe? Pick the Right Format

Spore Print or Syringe? Pick the Right Format

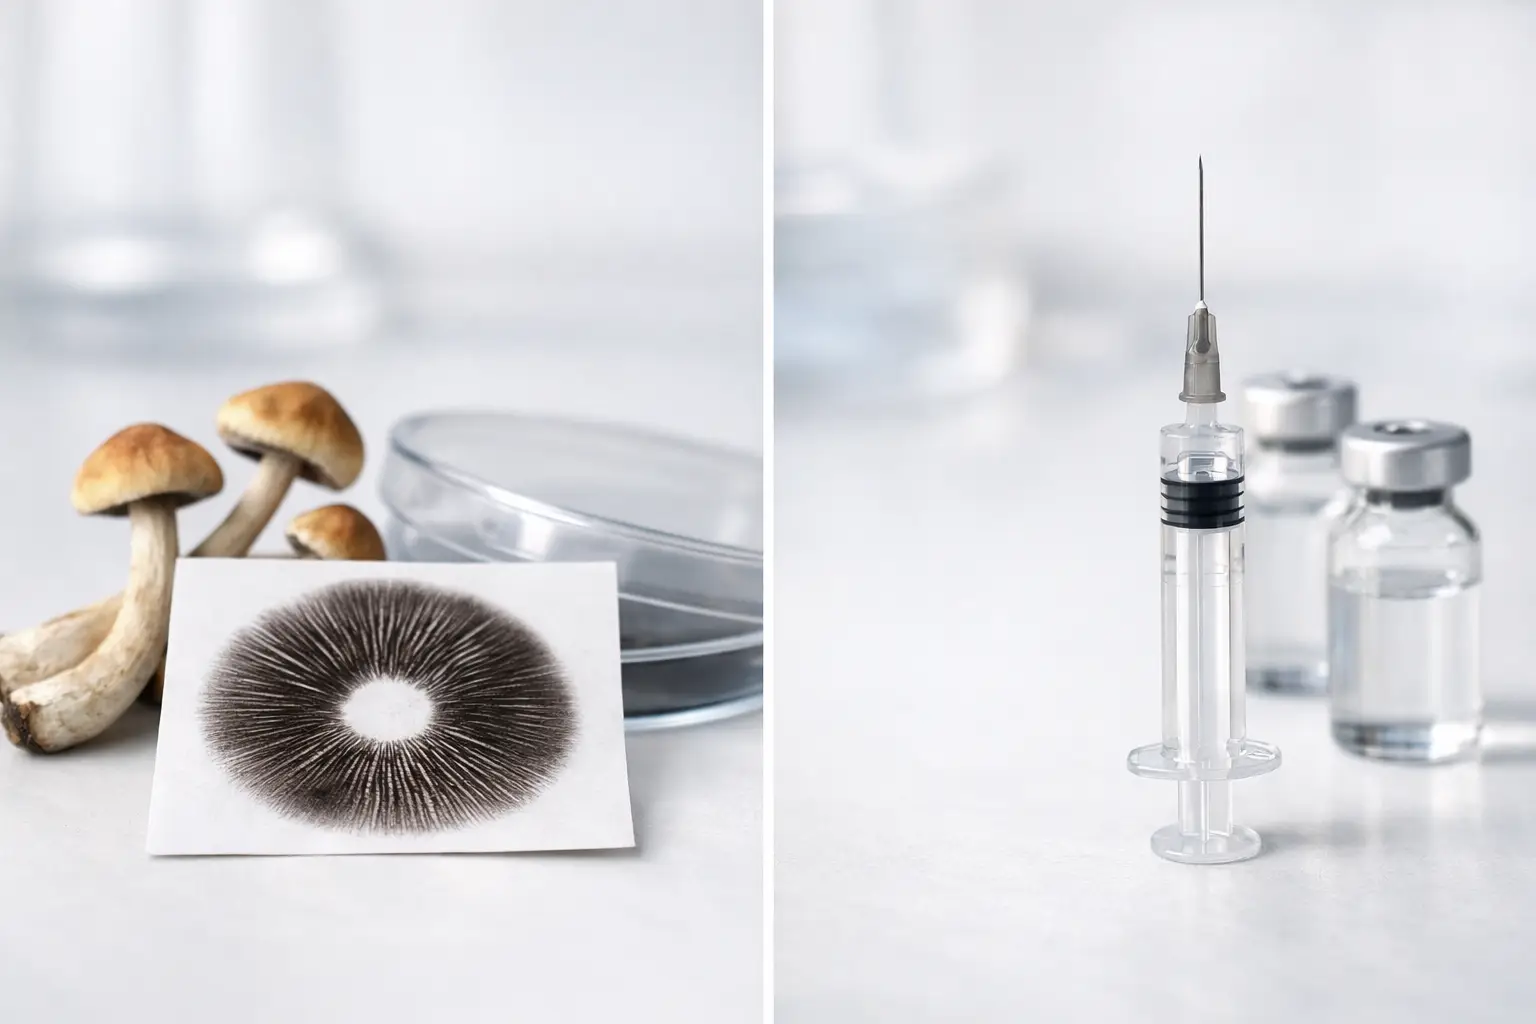
A spore print or syringe can represent the same species, but they deliver a very different experience at the bench, in storage, and in a collection. One puts the spores on display in their original deposit pattern. The other suspends them in a prepared liquid format for convenient handling. Neither is automatically better – the right pick depends on what you want to observe, preserve, compare, or add to your mycology lineup.

For collectors and microscopy-focused buyers, format matters almost as much as species. A clean, well-presented print has archival appeal and gives you a visible record of spore color and density. A syringe is compact, familiar, and built around easy, measured access. Understanding the trade-offs makes shopping by category much simpler.

Spore Print or Syringe: The Core Difference

A spore print is a deposit of spores left on a sterile surface, commonly foil or another nonporous material. It is a physical snapshot of a mushroom’s reproductive material. The deposit may appear dark purple-brown, black, rusty brown, or another shade depending on the species. For microscopy work, the visual character of the print can be part of the appeal before a sample is ever prepared for observation.

A spore syringe contains spores suspended in sterile water. The format is typically sealed in a syringe with a capped needle attachment or dispensing tip, depending on the product. It offers a more contained presentation and a format many hobbyists find easier to store, label, and handle in small quantities.

The most useful distinction is simple: a print is a visible specimen-like format, while a syringe is a liquid delivery format. That difference affects how each product travels, how it is stored, and what kind of buyer tends to prefer it.

Why Collectors Choose Spore Prints

Spore prints have a tangible quality that syringes cannot quite replicate. Each one shows a natural deposit pattern, which can range from a dense, bold impression to a lighter radial spread. For enthusiasts building a diverse archive of species and varieties, that visual identity is part of the value.

Prints are also straightforward to inspect upon arrival. You can see the substrate, the general density of the deposit, and the way the product has been packaged. A properly packaged print is flat, easy to file away, and convenient for buyers who organize their collection by species, date, source, or region.

There is a practical reason to choose prints, too. They generally take up very little space and do not require the rigid shape of a syringe for storage. If your goal is a well-labeled mycology archive rather than a ready-to-handle liquid format, prints make excellent sense.

That said, a print requires more hands-on care if you need to remove a small sample for microscopy. The working surface, tools, and sample handling all matter. Buyers who prefer a contained, portion-friendly format may find a syringe more comfortable.

Best fit for a print

Choose a print when you value visible spore characteristics, flat archival storage, traditional collecting, or the ability to keep an organized physical reference library. They are especially appealing to buyers who enjoy comparing specimens side by side.

Why Buyers Choose Spore Syringes

A syringe is designed around convenience. The spores are already dispersed in liquid, so the format is compact and ready for controlled dispensing when used for lawful microscopy and study purposes. For buyers who do not need the visual presentation of a print, that simplicity is often the deciding factor.

Syringes are also easy to identify at a glance when they are clearly labeled. A neatly organized storage box can hold several varieties without the need to keep individual foil packets flat and separate. This makes them popular with shoppers building variety packs or adding several fan favorites to a single order.

The main trade-off is visibility. Spore density in a syringe is not always obvious to the naked eye. Some spores may settle over time, and the liquid itself does not provide the same immediate visual information as a deposited print. That is normal for the format, but it means a syringe is less satisfying for someone who wants a display-worthy specimen.

Best fit for a syringe

Choose a syringe when you prioritize compact storage, controlled liquid handling, and a familiar ready-to-use format for permitted research or microscopy applications. It is a practical choice for buyers who know they prefer liquid products and want to compare several varieties without overcomplicating their setup.

Storage, Shelf Life, and Handling Considerations

Both formats benefit from careful storage. Keep products clearly labeled, protected from unnecessary heat and direct light, and stored according to the seller’s product guidance. A cool, clean, stable environment is generally preferable to a car, windowsill, garage, or any location with frequent temperature swings.

Prints should stay dry and protected from crushing, bending, or contamination. Keeping each print in its original packaging until you are ready to examine it helps preserve its condition. If you maintain a collection, adding the purchase date and a simple inventory note can make future comparisons much easier.

Syringes should remain capped, sealed, and protected from damage. Avoid forcing or altering components, and do not treat a syringe as a display item. Its strength is contained storage and measured handling, not visual presentation.

Shelf life is not a single fixed number because storage conditions, packaging quality, age, and the product itself all play a role. Instead of relying on a universal timeline, buy from a source that provides clear product information, inspect your order promptly, and store it responsibly from day one.

How to Shop by Your Actual Goal

The fastest way to choose is to start with the experience you want, not the product name. If you want a physical specimen that looks at home in a labeled reference collection, begin with prints. If you want a contained liquid format that is easy to organize with other supplies, start with syringes.

Buyers interested in comparing spore color, deposit structure, or the visual differences among varieties will often get more satisfaction from prints. Buyers who prefer straightforward product handling and compact organization may lean toward syringes. There is no rule saying a serious enthusiast has to choose only one. Many collections include both because each format serves a different purpose.

Species selection should come after format, not before it. Once you know whether you prefer a print or syringe, comparing available varieties becomes more useful. Look for accurate labeling, careful packaging, clear category organization, and product details that help you match the format to your intended lawful use.

For culinary mushroom projects, it may also be worth considering whether an edible culture or another ready-to-inoculate product better matches your goals. Spores, cultures, and prepared products are not interchangeable categories. Shopping with the end use in mind prevents unnecessary guesswork and helps you build a more useful supply shelf.

Quality Signals Worth Looking For

Good shopping decisions come down to more than picking a popular name. Look for clean presentation, clear identification, secure packaging, and a seller that treats product categories seriously. A well-organized catalog makes it easier to compare individual items with bundles, starter options, and collector-friendly selections.

For prints, packaging should protect the sample and make the label easy to read. For syringes, look for intact packaging, secure caps, legible labels, and sensible shipping practices. If you are ordering multiple formats, keep them separated and logged when they arrive so you can maintain clean records.

Myceli Nation is built for buyers who do not want to hunt across scattered suppliers for every format. Whether you are adding a single specimen to your archive or comparing several options in one order, a category-first approach keeps the process direct.

Choose the Format You Will Actually Enjoy Using

A print rewards curiosity, observation, and careful collecting. A syringe rewards convenience, containment, and efficient organization. The better option is the one that fits how you engage with mycology, not the one that happens to be most common in someone else’s supply box.

Start with one format that matches your immediate interest, label it well, and give yourself room to compare the other format later. A thoughtful collection grows best when every item has a clear reason to be there.

Posted on

Culture Contamination Prevention Guide for Growers

Culture Contamination Prevention Guide for Growers

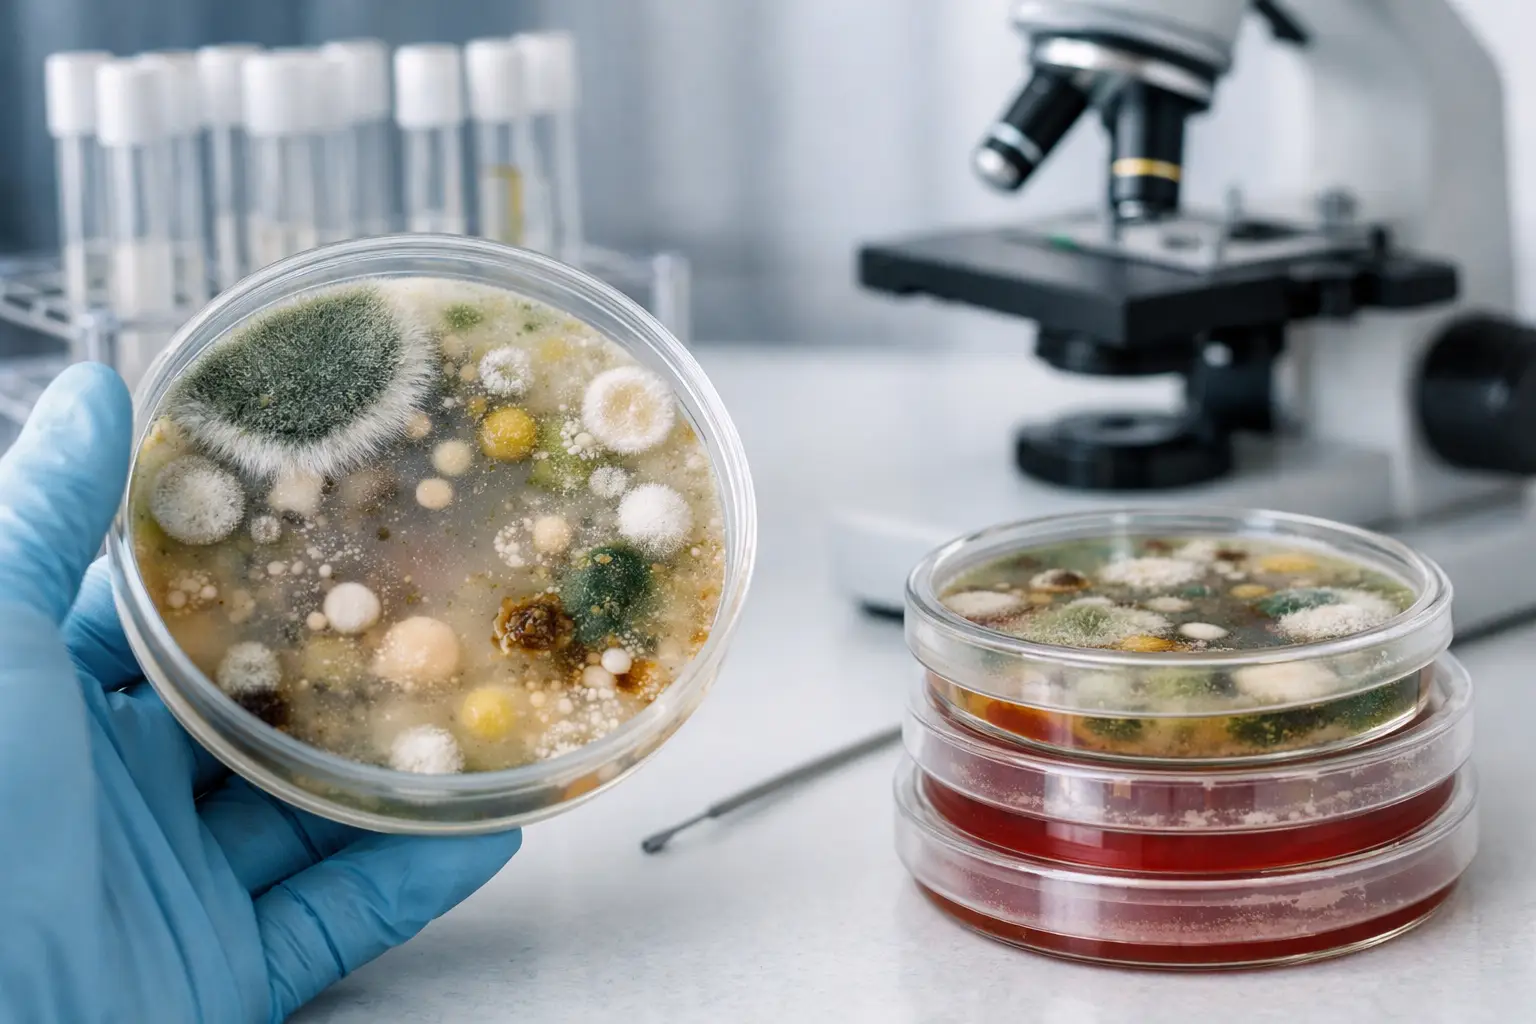
A clean-looking plate can still carry trouble. Bacteria may hide beneath healthy-looking mycelium, while mold spores can settle during one rushed transfer and show up days later. This culture contamination prevention guide is built for growers who want cleaner agar work, more dependable liquid culture, and fewer mystery losses between inoculation and fruiting.

Contamination is not always a sign that your skills are bad or your genetics are weak. It usually means one link in the chain needs attention: the culture source, the sterile media, the work area, the tools, or the incubation conditions. The goal is not to create a laboratory-grade cleanroom at home. The goal is to build a repeatable workflow that gives unwanted organisms fewer chances to win.

Start With Clean Culture, Not Hope

The easiest contamination to prevent is the contamination you never transfer. Before expanding a culture, inspect it under good light and give it time to reveal its behavior. Healthy mycelium should grow in a consistent pattern for that species and medium. It may be wispy, dense, rhizomorphic, or tomentose, but it should not suddenly produce wet patches, dull gray spreading zones, or colors that deepen over time.

Agar is your best checkpoint. Even when a liquid culture looks clear, a small amount transferred to agar can reveal bacteria or competing mold that would otherwise travel into every jar or bag. For growers building a library of edible cultures, testing first may feel slower, but it saves far more time than inoculating a large batch with a questionable master.

When selecting tissue from a plate, take the leading edge of vigorous growth rather than the oldest, most crowded center. The outer edge is where clean mycelium is actively expanding away from anything left behind near the original transfer. If a plate has a suspicious sector, do not rationalize it because the rest looks good. Transfer away from the issue only if there is clearly clean, separated growth. Otherwise, discard it and protect the rest of the workspace.

Build a Clean Transfer Routine

Good sterile technique is less about dramatic gestures and more about doing small things in the same order every time. Set out only what you need before beginning: sealed plates or jars, labels, a scalpel or inoculation loop, a flame source if your workflow uses one, alcohol for surface sanitation, gloves, and a waste container. Searching for a marker halfway through a transfer creates unnecessary movement and exposure.

A still-air box and a properly used flow hood solve different problems. A still-air box reduces air movement around open containers. A flow hood provides filtered, directional air and is generally better suited to frequent culture work, but only when its filter, airflow, and setup are maintained correctly. Neither tool compensates for dirty hands, unsterilized tools, or opening containers too wide for too long.

Before each session, clean the work surface, let it dry, and wash your hands thoroughly. Keep sleeves, hair, loose packaging, and fans away from the work zone. If using gloves, remember that gloves are not automatically sterile. Treat them as another surface that needs to stay clean. Avoid touching phones, door handles, or product packaging once transfers begin.

Work deliberately. Open one plate or vessel at a time, keep lids close to the opening, and make the transfer with minimal hovering. Sterilize the tool between cultures, not just between sessions. A tool that touched one plate can carry invisible cells, spores, or residue into the next one.

Flame, alcohol, and heat: use each for the right job

Alcohol is excellent for cleaning surfaces and glove exteriors, but it does not replace heat sterilization for a scalpel blade or loop. If you flame sterilize a tool, let it cool without waving it around or touching it to an unclean surface. A hot blade can damage a small agar wedge, and a cooled but contaminated blade defeats the point.

Pressure sterilization is the standard for nutrient media, grain, and many reusable items. Follow the timing and operating guidance for your equipment, account for load size, and allow pressure to return to normal naturally. Cutting a cycle short may save minutes while creating a much larger loss later.

Keep Media and Containers From Becoming Weak Links

A clean transfer into poorly prepared media is still a contamination event waiting to happen. Agar plates should be poured into clean containers, allowed to set, and stored in a way that limits condensation. Excess moisture can let bacteria spread quickly across the surface and make clean growth harder to read.

With liquid culture, clarity alone is not proof of cleanliness. Some bacterial contamination remains subtle, especially in nutrient-rich broth. Use a tested master culture, sterilize the media thoroughly, and keep the injection port and lid assembly clean. If a jar develops unexpected cloudiness, sediment, a sour odor, or unusually sluggish growth, test it on agar before trusting it.

Grain deserves equal attention because it is forgiving only until it is not. Overhydrated grain creates wet pockets where bacteria thrive; underhydrated grain can stall colonization and invite uneven results. Proper hydration, complete sterilization, and filters that allow gas exchange without exposing the contents are all part of the same system.

Do not overlook container handling. The outside of a jar, plate sleeve, or culture bag can carry dust from storage shelves, shipping boxes, or old grow areas. Keep culture supplies organized in a clean, dry zone away from fruiting chambers, houseplants, compost, and high-traffic areas. Separating clean culture work from messy substrate work is one of the highest-value changes a home grower can make.

Control the Room, Not Just the Tools

Contamination prevention begins before the first container opens. Choose a room with low traffic and few fabric surfaces. A spare room with the HVAC temporarily off during transfers is often more workable than a busy kitchen, even if the kitchen looks cleaner at first glance. Pets, open windows, laundry, and ceiling fans all increase the number of airborne variables.

Temperature matters, but warmer is not always better. Incubating cultures above the preferred range can stress mycelium while giving bacteria and molds a faster path. The right range depends on the species, so follow the guidance for your culture rather than using a single temperature for every jar and plate.

Humidity should also stay out of your culture-storage equation. Plates and culture jars do not need the same conditions as a fruiting area. Store them cleanly, away from direct sunlight, and with enough organization that you can inspect dates, labels, and growth without repeatedly handling every item.

How to Read the Early Warning Signs

Fast action prevents one bad culture from becoming a bad batch. Mold often announces itself with sudden, fluffy growth that looks different from the intended mycelium and may later develop green, black, pink, or other pigmentation. Bacteria may appear as glossy wet spots, cream-colored slime, cloudy liquid, or a sharp sour smell. Yeast can create creamy, pasty growth and fermentation-like odors.

Visual diagnosis has limits. Some healthy cultures look unusual depending on species, media, temperature, and age. When uncertain, isolate the item, label it clearly, and observe it separately rather than opening it near clean work. A questionable plate on the shelf is manageable. Opening it in the middle of transfer work is not.

Photographing plates on the day they are poured, inoculated, and inspected gives you a useful reference. Over a few runs, patterns become obvious: a recurring issue tied to one batch of agar, one jar style, one supplier lot, or one step in the workflow.

Make Your Culture Work Traceable

The best growers do not rely on memory. Label every plate, jar, and bag with the culture name, transfer generation, date, and a simple identifier for the media or batch. If contamination appears, those details help you trace where it entered.

Keep a short log of what changed between sessions. Maybe the problem started after moving workspaces, switching grain preparation, using older plates, or rushing transfers after a long break. You do not need a complicated lab notebook. A consistent record turns random frustration into useful data.

For many hobbyists, maintaining a small number of clean master cultures is more practical than constantly expanding everything at once. Smaller culture libraries are easier to inspect, test, and refresh. Once a culture proves clean and vigorous, expand it in stages rather than putting every available jar on the line.

A Culture Contamination Prevention Guide That Stays Useful

There is no single disinfectant, container, or technique that guarantees a clean run. Reliable results come from layers: clean starting material, sterile media, controlled air, disciplined transfers, and the willingness to discard suspect cultures early. If one layer slips, the others still reduce the odds of a total loss.

Myceli Nation growers often build better results by treating culture work as a repeatable craft, not a race to inoculate more containers. Slow down at the transfer point, trust agar as a quality check, and let your notes show you where the next improvement belongs.

Posted on

Spore Print Identification Guide for Color Clues

Spore Print Identification Guide for Color Clues

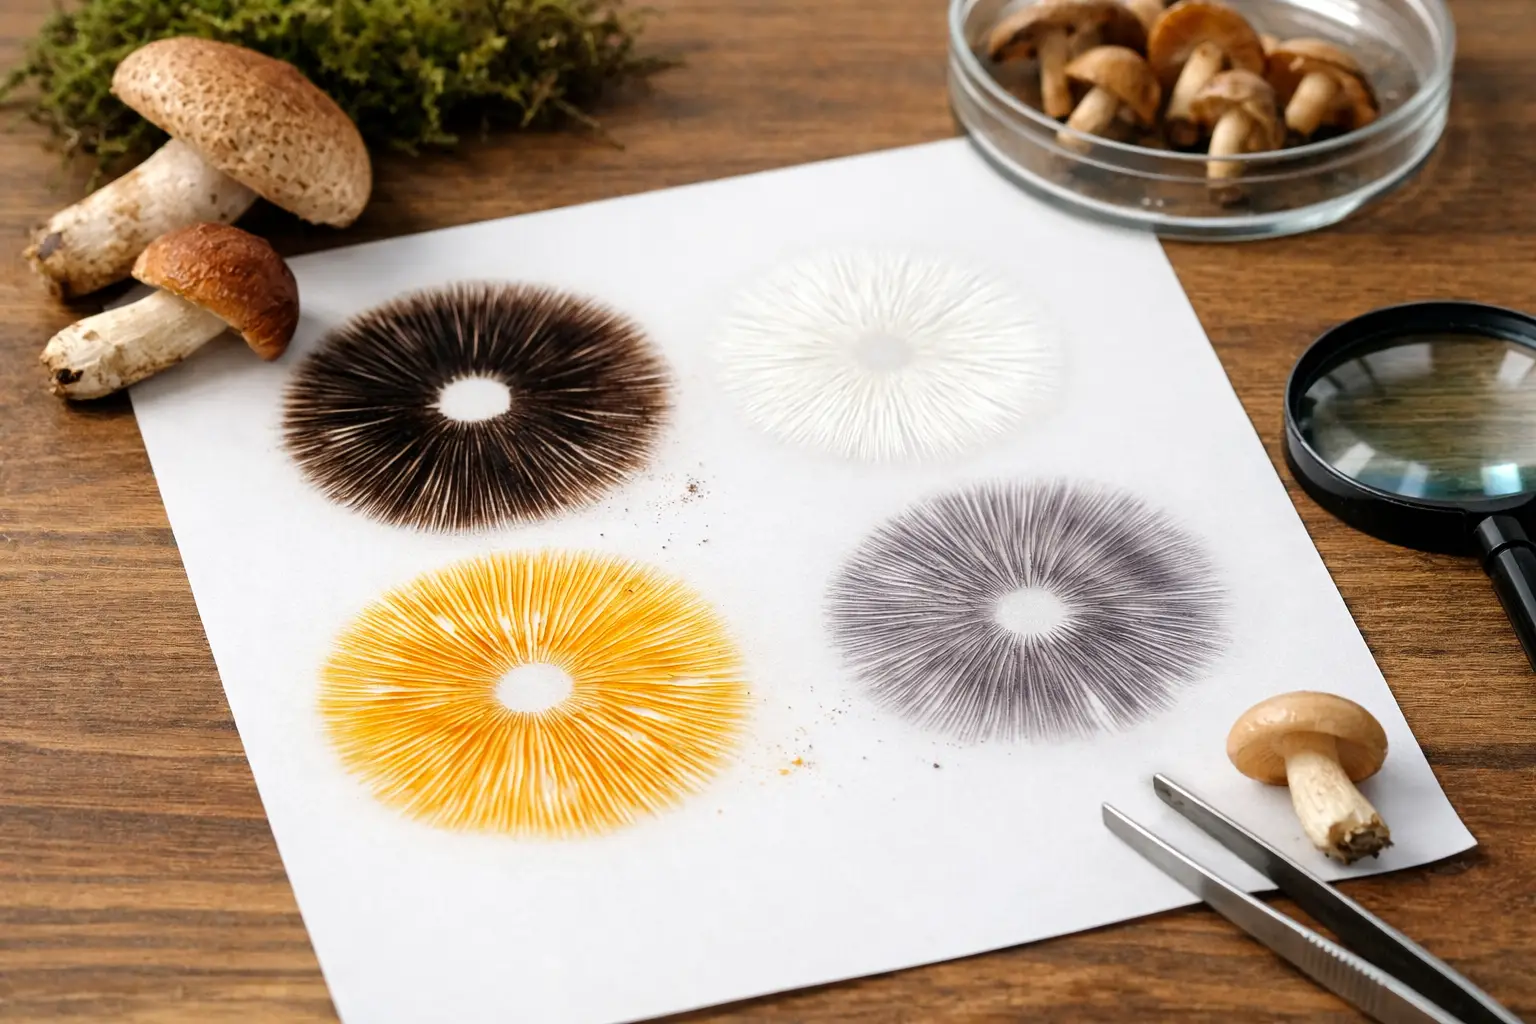
A mushroom cap can look convincing from the top and still tell you very little about its identity. The underside often carries better clues, and a well-made print reveals one of the most useful: the true color of the spores. This spore print identification guide explains how to collect, read, and use that clue without treating it as a shortcut to certainty.

Spore prints are simple, low-tech, and worth the time. They help hobbyists sort look-alike mushrooms, give microscopy-focused collectors material to examine, and make field observations more complete. But they are one piece of a larger identification process, not a green light for consumption. Never rely on a spore print alone to identify a wild mushroom or determine whether it is safe to eat.

What a Spore Print Actually Shows

A mature mushroom releases spores from its fertile surface. On gilled mushrooms, spores drop from the gills. On boletes and other pore-bearing mushrooms, they fall from the pores. When enough spores collect on a clean surface, their combined pigment becomes visible as a print.

That combined color can be much easier to judge than individual spores under a basic microscope. A print described as white, cream, pink, brown, purple-brown, black, or rusty orange can immediately narrow the possibilities. The key word is narrow. Several unrelated groups can share a print color, while one group may show small shifts in shade depending on age, moisture, lighting, and how thickly the spores landed.

Think of a print as a filter. It can rule out candidates that do not fit, but it rarely provides a final name by itself. A rusty orange print, for example, points your research in a very different direction than a pure white print. It does not settle the question without checking the rest of the specimen.

How to Make a Clean, Readable Print

Start with a mature cap that is fresh enough to still release spores. A cap that is overly dried, waterlogged, immature, or decomposing may leave a weak or misleading result. Choose a specimen with exposed gills or pores and avoid washing it before printing.

Cut the stem close to the cap. Place the fertile side down on a smooth surface, then cover it with a bowl, cup, or glass. The cover reduces air movement and helps retain humidity. Leave it undisturbed for several hours or overnight.

White paper works for darker prints, but it can hide a white or pale cream deposit. Black paper solves the opposite problem. The most practical setup is a sheet divided into black and white halves, with the cap centered across both colors. Glass slides, foil, or a clean nonporous card can also work, though the background contrast still matters.

Humidity is a trade-off. A dry cap may benefit from a tiny drop of water on top of the cap, not on the printing surface. Too much moisture can cause the cap to soften, smear pigment, or leave a muddy mark that is harder to interpret. If the specimen is already damp from rain, use a dry, covered setup and check it sooner.

When you lift the cap, look for more than color. Notice whether the print is dense or faint, whether it mirrors the gill pattern, and whether the deposit has an obvious central patch from the cap. Photograph it under neutral light before handling it. Warm indoor bulbs can make a cream print appear yellow or a brown print look more orange than it is.

Keep Samples Separate and Labeled

If you are printing more than one specimen, label the surface before placing each cap. Add the collection date, habitat, host tree or substrate, and a specimen number. A print with no field notes quickly loses much of its value.

For educational collections and microscopy work, let the print dry fully before storing it in a clean folded paper packet or protected sleeve. Avoid sealing a damp print in plastic. Trapped moisture invites mold and can blur the evidence you wanted to preserve.

Reading Spore Print Colors Without Overcalling Them

Color names sound straightforward until you compare a dozen real prints. “Brown” can mean tobacco brown, chocolate brown, cinnamon brown, or a nearly black purple-brown. The goal is not to force a perfect color label. It is to observe the best broad category first, then record the nuance.

White to cream prints occur across many common mushroom groups. They are useful, but they demand extra care because a thin white deposit can be invisible on white paper. Check the dark half of the surface, tilt it under side lighting, and look for a powdery pattern rather than assuming no print means a white print.

Pink to salmon-pink prints are often distinctive when they are truly present. Brownish-pink, however, can be difficult to separate from pale brown under poor lighting. Compare the print against a neutral white background and note whether the color has a cool rosy cast or a warmer tan cast.

Brown, purple-brown, and black prints need the most precise wording. A very dark brown print may appear black until you view its thinner edges. Purple-brown deposits can show a wine-toned or plum-like cast in daylight. Rather than writing “dark,” record what you actually see: “very dark purple-brown, darkest at center” is a much stronger field note.

Rusty orange to cinnamon prints are another meaningful category, especially when the color is unmistakably warm and iron-like rather than simply tan. These prints can stain light paper boldly, but a wet cap may cause pigment to spread. If the print is smeared, repeat the process with another mature cap before making a call.

Pair the Print With the Traits That Matter

A useful identification record combines the print with the mushroom’s full context. Start with the fertile surface. Are there true gills, pores, teeth, folds, or a smooth surface? Are gills attached to the stem, free from it, or running down it? These structural details often eliminate possibilities faster than cap color.

Next, document bruising, staining, odor, stem texture, veil remnants, ring presence, and the base of the stem. Carefully excavating the entire base can reveal a bulb, sheath, rooting stem, or other feature that would be missed by cutting the mushroom at ground level. Photograph the cap, underside, stem, and base before changing the specimen.

Habitat is equally important. Record whether the mushroom grew from soil, wood, buried roots, mulch, dung, grass, a living tree, or a dead log. Note nearby tree species when relevant. A mushroom growing in a lawn may be associated with buried wood, while one appearing from a stump has a much clearer substrate clue. Season and region can further refine the picture.

For a more confident result, use the print color alongside a reliable regional field guide, a local mycological group, or microscopic examination. Spore shape, size, ornamentation, germ pores, and reactions in appropriate reagents can separate species that look identical in a print. This is where a collected print becomes more than a color sample.

Common Spore Print Mistakes

The most common error is printing an immature mushroom. If the cap has not begun releasing spores, the blank surface tells you nothing. Collect mature specimens when possible, and make prints from more than one cap when the identification matters.

Another mistake is judging a print against the wrong background. A pale print on white paper may disappear, while a nearly black print on black paper can look thinner than it is. Split-color paper prevents much of this confusion.

People also confuse deposited spores with moisture stains, gill debris, or cap pigment. A real print usually follows the pattern of the gills or pores and has a dry, dusty appearance once fully dry. A wet, flat blotch with no visible structure deserves skepticism.

Finally, do not let a familiar-looking cap override contradictory evidence. If the print color, gill attachment, habitat, or stem base does not match your expected species, pause. Look-alikes are common, and confidence built on one attractive feature is exactly where field identification goes wrong.

Build a Better Collection Habit

A spore print is most valuable when it becomes part of a repeatable observation routine. Carry paper, a marker, a small container for covering caps, and a notebook or phone for habitat photos. This small kit turns an interesting find into a documented specimen.

For collectors building a reference set, keep each print tied to its notes and images. Over time, you will develop a sharper eye for the difference between white and cream, cinnamon and rusty orange, or dark brown and purple-brown. That pattern recognition is useful, but it should make you more curious, not more careless.

Myceli Nation is built for enthusiasts who appreciate that kind of hands-on mycology. Whether your interest is microscopy, edible culture work, or learning the language of mushroom traits, careful records make every specimen more informative.

The next time a mushroom catches your eye, let the cap be the invitation, not the answer. Make the print, study the surrounding clues, and leave room for the possibility that the specimen still has more to teach you.

Posted on

Mushroom Microscopy for Clearer Spore Work

Mushroom Microscopy for Clearer Spore Work

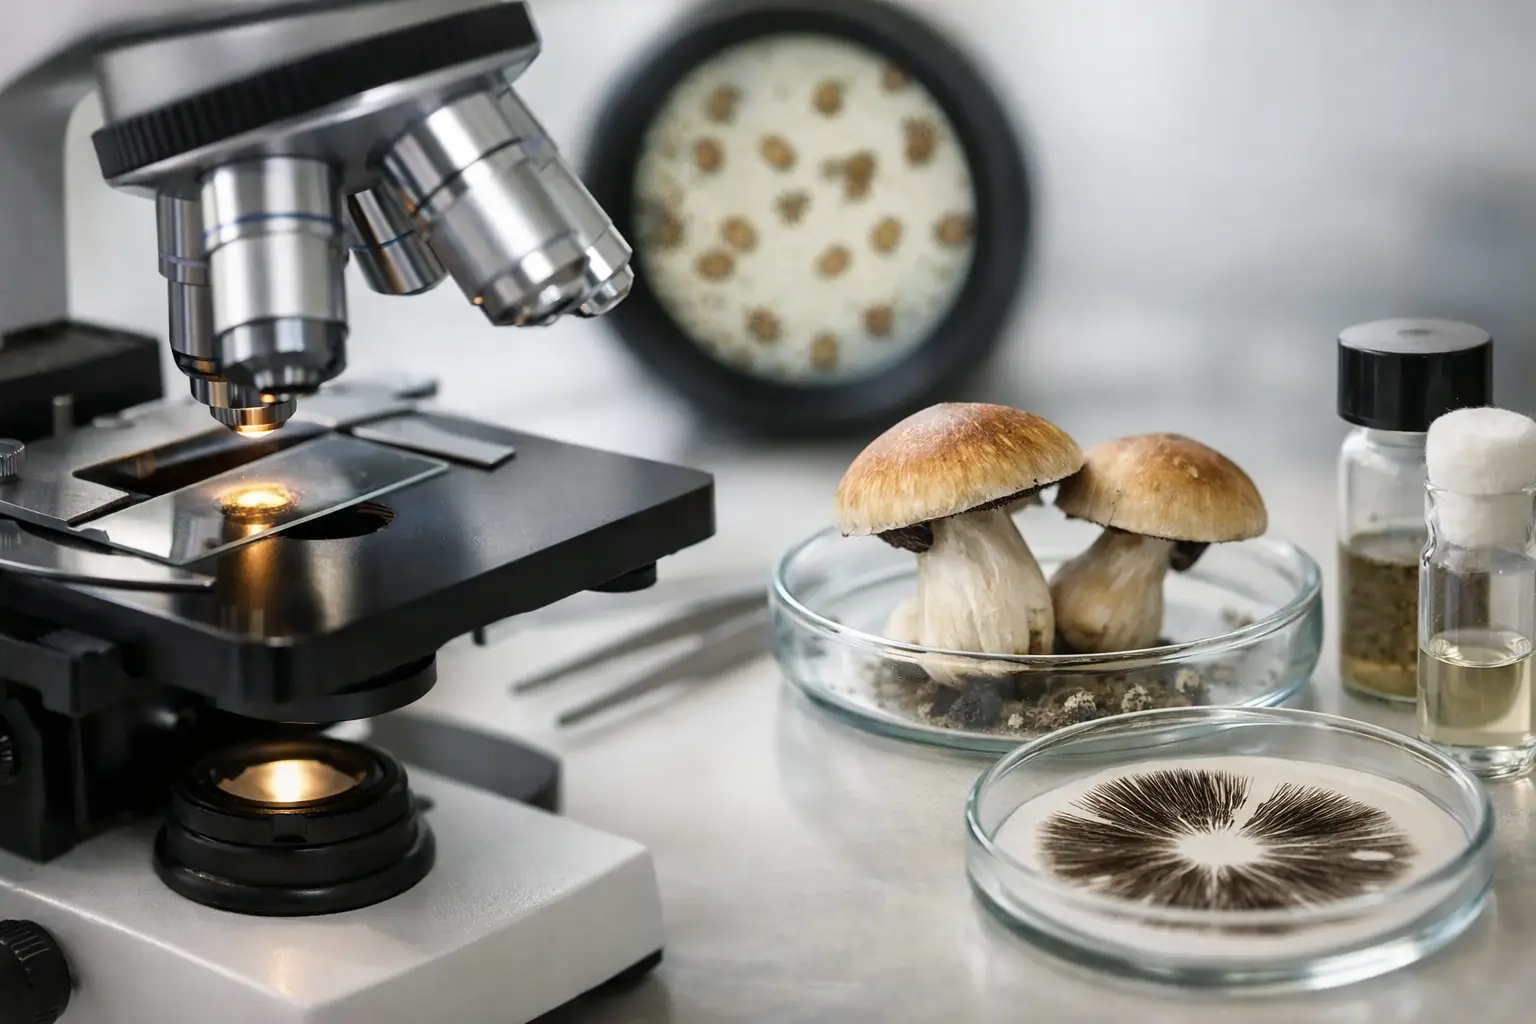
A spore print can tell you a lot before it ever reaches a slide: color, density, freshness, and whether your handling has stayed clean. Mushroom microscopy takes that first read further. Under magnification, a print becomes a field of individual spores with measurable shapes, surfaces, and colors that help you build better records, compare collections, and appreciate the real variation between mushrooms.

For collectors and microscopy-focused hobbyists, this is not about chasing a single perfect image. It is about creating a repeatable workflow. A clean slide, the right amount of moisture, and a few careful observations will teach you more than rushing through expensive gear ever will.

What mushroom microscopy can show you

At the basic level, mushroom microscopy lets you inspect spore morphology. Size, shape, wall thickness, ornamentation, color, and the presence or absence of a germ pore are all details worth recording. Some spores appear smooth and oval, while others can look angular, elongated, dark-walled, or subtly textured depending on the sample and the optics.

A microscope also reveals whether a print contains a reasonably consistent spore population. Variation is normal. A single field may include spores at different orientations, a few damaged specimens, and debris from the print itself. The goal is not to expect identical spores in every view. Instead, look for a recurring range of traits across multiple fields of view.

Microscopy works especially well alongside the observations you already make: cap and gill features, print color, substrate, growth habit, and collection notes. Spores alone rarely settle every identification question, particularly with wild mushrooms. Treat the slide as one useful piece of evidence rather than a shortcut around careful documentation.

Build a sensible microscopy setup

You do not need a lab packed with specialty equipment to get started. A compound microscope with 400x total magnification is enough to see basic spore shape and color. A model capable of 1000x with an oil-immersion objective gives a closer look at finer detail, but it also demands better technique. Start with the magnification you can use confidently.

For a practical bench setup, keep clean glass slides, cover slips, a fine needle or inoculation loop, droppers or pipettes, distilled water, lens paper, and a notebook close at hand. A small slide storage box is helpful once you begin keeping comparative samples. A phone adapter can be useful for documenting what you see, though a hand-drawn observation with measurements is often more reliable than a blurry image.

Lighting matters as much as magnification. Begin at low power to locate the sample, then increase magnification slowly. Adjust the condenser and iris diaphragm until the spores show clear edges without washing out the field. Too much light can flatten fine details. Too little light makes every speck of debris look more dramatic than it is.

A 1000x oil-immersion setup is best reserved for sessions where you are ready to work deliberately. Oil should only contact the oil-immersion objective, and it needs to be cleaned off promptly with proper lens paper. If that sounds like more maintenance than you want, there is no shame in doing excellent work at 400x first.

Choose a sample that gives you a fair read

Fresh, dry, well-kept prints tend to make slide preparation easier. If a print has absorbed moisture, picked up dust, or been handled repeatedly, you may see extra debris and clumped spores. That does not make it worthless, but it can make the first viewing session frustrating.

Work with a very small amount of material. Beginners often add too much, creating a thick dark layer where individual spores overlap. You want a light dusting in the mounting drop, not a mound. When in doubt, use less than you think you need. You can always prepare a second slide.

How to prepare a clean spore slide

Start by cleaning the slide and cover slip so lint or fingerprints do not become part of the mystery. Place a small drop of distilled water in the center of the slide. With a clean needle, transfer a tiny trace of spores into the drop and gently disperse them. Avoid grinding the sample into the glass, which can damage delicate material and introduce larger fragments.

Lower the cover slip at an angle, allowing one edge to touch the water before releasing it. This method helps reduce trapped air bubbles. A few bubbles are common and not a disaster, but they are distracting under higher magnification. If the drop floods beyond the cover slip, blot the outer edge carefully with clean absorbent paper rather than pressing down on the glass.

Give the slide a minute to settle. Then begin on the lowest objective, focus on the cover slip edge, and move toward the area where the spores are dispersed. Once you find a clear zone, increase magnification. At higher power, use fine focus only. Large focus adjustments are the fastest way to lose the field you just found.

Water mounts are ideal for a straightforward first look. Other mounting media and stains can improve contrast or preserve samples, but they introduce variables that are best explored after you are comfortable with basic wet mounts. If you change your medium, note it in your records. A spore can look different depending on the preparation method and lighting.

What to record while you observe

Good microscopy notes turn a one-time view into a collection you can actually use later. Record the date, sample label, source format, mounting medium, microscope magnification, and any notable observations. Add the print color as seen with the naked eye, not just its apparent shade under the microscope.

For spore measurements, measure a useful sample size rather than choosing the biggest or most photogenic spores in the field. Record a range for length and width, then note the general shape. Are most spores broadly oval, narrowly elliptical, cylindrical, or irregular? Do they look smooth? Is a pore visible at one end? Are the walls pale or deeply colored?

It helps to write what you actually see before trying to name it. “Mostly smooth, dark brown, oval spores, with a visible pore on many specimens” is stronger documentation than a quick conclusion based on memory. If you revisit the sample months later, precise notes give you something real to compare.

Common slide problems and simple fixes

If your field is crowded, make another slide with less material. If spores are drifting constantly, use a smaller drop or wait longer for the mount to settle. If everything looks hazy, check the cover slip, objective lens, and condenser before assuming the sample is poor.

If you cannot find spores at all, go back to low power and scan systematically. The sample may be sitting near the edge of the drop or buried in a dense patch of debris. If the spores are too faint, adjust illumination gradually instead of immediately reaching for higher magnification.

Contamination can be educational, too. Fibers, bacteria, dust, and fragments of mushroom tissue all have their own appearance. The key is recognizing that not every object on a slide is a spore. Comparing several areas of the same mount helps separate the repeating pattern from random noise.

Make microscopy part of your mycology routine

The most useful microscope is the one you return to. Keep your sessions short at first: prepare one or two slides, observe them carefully, record what you find, and clean the equipment. That pace builds confidence without turning every sample into a long project.

As your collection grows, compare prints prepared with the same method. Consistent lighting, magnification, and notes make those comparisons more meaningful. Myceli Nation is built for enthusiasts who enjoy that kind of hands-on curiosity, whether they are collecting prints, working with cultures, or simply learning how much detail a microscope can reveal.

A clear slide will not answer every question, but it will sharpen the questions worth asking. Start small, keep your observations honest, and let each session add one more useful layer to your mycology knowledge.

Posted on

What Causes Agar Contamination in Culture?

What Causes Agar Contamination in Culture?

A plate can look perfect when it leaves the pressure cooker and still show a fuzzy green patch, wet sheen, or fast-moving colony a few days later. So, what causes agar contamination? Usually, it is not one dramatic mistake. It is a break somewhere in the clean workflow: during media prep, pouring, inoculation, incubation, or from the sample itself.

For cultivators working with spores, tissue, or edible cultures, agar is where clean genetics become visible. It is also where small lapses become impossible to ignore. Learning to read contamination patterns and trace their source saves plates, time, and frustration.

What Causes Agar Contamination Most Often?

Agar contamination happens when bacteria, mold spores, yeast, or other unwanted organisms land on or enter nutrient agar before the intended mycelium can fully claim the surface. Agar is a rich food source. The same nutrients that support healthy mycelial growth can support nearly every airborne microbe in a room.

The most common causes are unsterilized media, contaminated tools or work surfaces, poor airflow control, weak plate seals, and dirty starting material. The timing and appearance of growth can help narrow down which one is responsible.

If several unopened plates contaminate, suspect your media preparation, pouring environment, plates, or lids. If clean plates contaminate only after you transfer a sample, focus on your technique or the source culture. If a plate stays clean for days and then develops growth around the edge, sealing or incubation conditions may be part of the problem.

Contamination From Agar Prep and Sterilization

Agar must be fully sterilized before it is poured. Heating media until it looks dissolved is not the same as sterilizing it. Bacterial cells and fungal spores can survive inadequate processing, then reveal themselves once the plates cool.

Pressure and time matter, but so does the volume of media in the vessel. A large bottle of agar takes longer for its center to reach sterilization temperature than a smaller container. Overfilling jars, rushing the cycle, or starting timing before the pressure cooker reaches proper pressure can leave survivors behind.

Water quality and ingredients can also contribute. Use clean water and fresh agar ingredients, and make sure bottles, jars, stir bars, and lids are washed thoroughly before sterilization. Old residue inside a bottle can harbor microbes or create uneven heating. After sterilization, avoid repeatedly opening the vessel or leaving it exposed while waiting for it to cool.

Overcooking has a trade-off. Excessive heat can darken nutrient-rich media and alter its consistency, while underprocessing raises the chance of contamination. Aim for repeatable preparation rather than trying to compensate with extra heat every time.

Problems During Pouring

Pouring is an easy place for clean agar to become dirty. Every second a lid is off is an opportunity for airborne particles to settle. A still-air box or properly used flow hood reduces that exposure, but neither replaces clean habits.

Wipe down the work area before starting. Let disinfectant remain wet for its labeled contact time rather than immediately wiping it dry. Keep movements slow, avoid reaching over open plates, and pour only as many plates as you can handle without rushing. Talking, coughing, fans, open windows, pets, and nearby traffic all add variables.

Condensation is not contamination by itself, but heavy moisture can spread contaminants across a plate and make diagnosis harder. Let poured plates set until the agar has firmed, then store them inverted so moisture collects on the lid instead of dripping onto the agar surface.

Tools, Hands, and Airflow Break the Clean Zone

A sterile scalpel, inoculation loop, or needle can become contaminated the moment it touches a nonsterile surface. The same goes for gloves. Flame-sterilizing a tool is effective only if the full working end is heated and allowed to cool without touching anything else.

Do not wave a hot blade around to cool it. That movement draws it through room air. Let it cool briefly inside your clean workspace, or touch it to a clean, unused area of agar before making the transfer. A tool that is too hot can damage the mycelium, while one that is not properly sterilized can carry contamination plate to plate.

Gloves are useful, but they are not automatically clean. Sanitize gloved hands before work and again whenever they touch a phone, cabinet handle, spray bottle, or anything outside the clean zone. Keep sleeves, hair, and loose clothing away from open plates. The goal is not a perfectly sterile home. It is a controlled space where the sample has the fewest possible chances to pick up hitchhikers.

Still-Air Boxes and Flow Hoods Are Different Tools

A still-air box works by limiting air movement. Once the box is cleaned and allowed to settle, work slowly so you do not create turbulence inside it. Fast arm movements, frequent opening, or spraying the air right before a transfer can stir particles up instead of reducing them.

A laminar flow hood uses filtered moving air to push contaminants away from the work area. It can be highly effective, but only if the filter, fan speed, and workflow are correct. Blocking the filter face with supplies or working too far off-center can compromise the clean stream. Choose the setup that fits your space and volume, then learn its limits rather than assuming equipment makes every transfer safe.

The Starting Culture May Already Be Contaminated

Not every contaminated plate means your agar work failed. Spores, liquid samples, clone tissue, and even apparently clean plates can carry bacteria or mold that are not obvious at first. Agar is valuable because it separates the sample into visible growth zones, making hidden contamination easier to isolate or discard.

A transfer from a fruit body can introduce contaminants from the outer surface, the tool, or the tissue itself. Work with clean inner tissue when possible, take a small sample, and make multiple transfers rather than trusting a single plate. With spores, germination may be uneven and multiple organisms can be present. Patience and selective transfers are often more productive than trying to rescue every plate.

If contamination appears consistently from one syringe, print, culture, or tissue source while your control plates stay clean, the source is the likely variable. Label every plate with the date, medium, source, and transfer number. Good labeling turns a frustrating mystery into a usable record.

How to Identify Common Agar Contaminants

Mycelium can vary by species and genetics, so appearance alone is not a perfect test. Still, a few patterns are common. Healthy growth usually expands from the inoculation point in an organized way, although it may be fluffy, ropey, thin, or tomentose depending on the culture and conditions.

Bacteria often look wet, shiny, creamy, translucent, or slimy. They may form a puddle-like halo around the inoculation point and can slow or distort mycelial growth. Yeast may appear as smooth, moist, off-white or tan colonies. Mold often starts as a fast-growing patch with a distinctly different texture or color, then may turn green, black, gray, or powdery as it matures.

Do not open a suspicious plate to inspect it more closely. Keep it sealed, observe through the lid, and remove it from the grow area. A contaminant can sporulate quickly, and opening it can turn one failed plate into a room-wide cleanup project.

A Better Troubleshooting Routine

The fastest way to improve your agar success is to change one variable at a time. Prepare a small batch of plates and leave several unopened as controls. If those controls stay clean, your media and pouring process are probably sound. Then test your transfer technique with a known clean culture or make a few transfers under the same conditions.

When contamination occurs, note when it appeared, where it began, and whether it repeats across plates. Growth in the center soon after inoculation often points to the sample or tool. Growth around the perimeter may suggest plate handling, lid gaps, or airborne exposure. Contamination that appears in multiple unopened plates is a signal to revisit sterilization and pouring.

For a consistent home workflow, keep these practices in rotation:

  • Clean the workspace and allow disinfectant contact time before each session.
  • Sterilize agar, vessels, and tools with a repeatable process.
  • Use minimal, deliberate movements inside a still-air box or in front of a properly functioning hood.
  • Seal and label plates promptly, then store them inverted at appropriate culture temperatures.
  • Keep control plates from each batch so you can identify where a problem began.

Clean Agar Is Built Through Repetition

Contamination is part of learning culture work, not proof that you are bad at it. Even experienced cultivators lose plates. The difference is that a repeatable process makes failures easier to diagnose, while a rushed process makes every contamination event feel random.

Build your workflow around clean media, controlled air, sterile tools, and carefully tracked source material. Over time, your plates will tell you exactly where the weak point is – and every clean transfer is one more step toward a stronger mycelium library.

Posted on

Penis Envy Mushrooms: A Collector’s favourite

Penis Envy Mushrooms: A Collector’s favourite

Few mushroom names are as instantly recognizable as Penis envy mushrooms. Their unusual morphology, contested lineage stories, and wide range of related labels have made them a fixture in collector conversations for years. But the name alone does not tell you exactly what you are looking at – and that distinction matters when comparing spores, prints, cultures, and vendor descriptions.

For mycology enthusiasts, Penis Envy is less a single, fixed identity than a family of recognizable traits and community-used names. Knowing how those traits, labels, and formats fit together makes it easier to shop thoughtfully, catalog accurately, and avoid treating a dramatic listing name as a guarantee.

Why Penis Envy Mushrooms Stand Apart

The defining visual idea behind Penis Envy is easy to understand: a notably thick, dense stem paired with a cap that may remain small, rounded, or less open than the classic umbrella-shaped mushroom silhouette. Mature examples can look compact and heavy-bodied rather than tall and delicate. That distinctive form is a major reason the variety became so well known.

However, mushroom morphology is variable. Environmental conditions, specimen maturity, handling, and lineage stability can all influence how a sample presents. A photo showing an exceptionally thick stem or tightly formed cap can be useful reference material, but it should never be treated as a standalone identification tool.

The name also carries a strong reputation within enthusiast communities. That reputation has led to plenty of exaggerated claims, inconsistent labeling, and lookalike listings. The practical takeaway is simple: evaluate the source, the stated lineage, the format, and the documentation together rather than relying on a name or photo alone.

The traits collectors often notice

Collectors commonly associate Penis Envy-type specimens with denser-looking stems, compact caps, slower or less typical-looking cap expansion, and dark blue bruising after handling. These are descriptive observations, not a field test or a guarantee of identity. Bruising can occur across multiple mushroom types and may vary substantially between samples.

Microscopy provides a more useful layer of context than surface appearance. Spore characteristics, print quality, labeling, and the condition of the sample can help a collector build a more complete record. Even then, morphology and microscopy should be viewed as parts of a larger identification process, not shortcuts.

Penis Envy Mushrooms Are Not One Fixed Lineage

One of the biggest sources of confusion is the assumption that every Penis Envy listing represents the same exact genetic line. In practice, vendors and communities may use the name for related phenotypes, established selections, cross-named varieties, or their own working labels. Two products carrying similar names can differ in presentation, history, and consistency.

That does not automatically make a listing unreliable. It means the details matter. A stronger product description explains what is being offered in direct terms: the stated variety name, the product format, the intended microscopy or collection use, and any relevant notes on appearance or source history. Vague superlatives are much less useful than specific information a buyer can record and compare.

Lineage stories are also worth treating with healthy skepticism. Mycology culture is full of memorable origin stories, but stories often get condensed or altered as a name travels from one collector to another. If provenance is important to you, preserve the label as sold, note the seller and date, and keep your own reference records instead of relying on forum lore alone.

Popular Penis Envy Labels and Variants

The wider Penis Envy category includes several names that appear frequently in specialty collections. Not every seller uses these labels in exactly the same way, so they are best understood as market and community reference points.

  • Original Penis Envy: Usually used for a classic, thick-stemmed PE-style presentation. The exact history attached to this label can vary by source.
  • Albino Penis Envy: Often shortened to APE, this label is associated with pale or reduced-pigment appearances. It is one of the most recognized names in the broader PE family.
  • PE6: A long-circulating label commonly described as a PE-related cross or selection. Details may differ across catalogs.
  • Uncut Penis Envy: A community-used name that generally refers to a particular PE-style phenotype or selection rather than a universal standard.
  • Melmac: Frequently discussed alongside PE varieties because of its robust, dense appearance. Some vendors treat it as PE-adjacent, while others describe it as separate.

These labels are useful for browsing and conversation, but they are not substitutes for clear sourcing. If you are building a reference library, catalog each item under the seller’s full name first. You can add common shorthand afterward, but keep the original product label attached to your notes.

How to Compare Listings Without Guesswork

When several listings use related names, start with the information that can actually be verified. Product photos can show general presentation, but a detailed description and consistent source practices are more valuable over time.

Look for clarity around the format being sold. A spore print, spore syringe, swab set, and ready-to-inoculate product are not interchangeable from a collector’s perspective. Each has different handling expectations, documentation needs, and practical uses. A well-organized catalog should make the product type obvious before you add it to your collection.

It also helps to assess whether the seller distinguishes between a phenotype name and a broad category name. For example, a listing that simply says “Penis Envy” may be perfectly suitable for someone seeking a general PE reference. A collector looking for a specific variant, however, should seek a more precise label and supporting notes.

Freshness and storage matter, too. Spore materials and prints should be packaged and labeled in a way that supports clean organization. Once received, keep products in their original labeled packaging whenever possible, document the arrival date, and store them according to applicable product guidance and local requirements. Good records turn a growing collection into a useful mycology archive.

Format Matters for Collectors

A spore print is a classic format for microscopy-focused collectors. It is compact, visually interesting, and easy to catalog by date, supplier, and stated variety. Print quality can vary, so collectors often value clean presentation, clear labeling, and protective packaging as much as the name on the label.

Spore syringes offer a different kind of convenience. Their standardized packaging can make inventory management straightforward, especially when a collection includes multiple varieties. For buyers comparing options, the key is not which format is universally better. The better choice depends on the purpose of the purchase, local rules, and how you prefer to document your materials.

Ready-to-inoculate products and cultures are more specialized formats. Availability, lawful use, and restrictions can vary considerably by location. Before ordering, confirm that the format you want is permitted where you live and that you understand the seller’s stated use and handling information.

Legal and Responsible Collecting

Mushroom-related laws vary by country, state, city, and product format. A name that is widely discussed online is not automatically lawful to possess, study, ship, or use in every location. Responsible collectors check their local regulations before placing an order and do not ask vendors to mislabel shipments or work around restrictions.

Responsible sourcing also means avoiding overconfident identification claims. Never consume a mushroom or specimen based on an online photo, a strain name, or a casual comparison. Misidentification can carry serious health risks. Keep collection activities focused on lawful, clearly understood purposes and treat labels as records, not guarantees.

For sellers and buyers alike, transparent communication is the standard worth supporting. Clear product categories, accurate descriptions, careful packaging, and realistic expectations create a healthier marketplace than hype ever will.

Build a Better Penis Envy Reference Collection

The best collections are built with consistency, not impulse. Keep a simple record for every item: the full listing name, format, source, date received, packaging notes, and any microscopy observations. If a seller changes naming conventions later, your original documentation will still give the item context.

It is also smart to compare similar labels side by side over time. Rather than asking which Penis Envy name is “the best,” ask what information is available, how clearly the item is represented, and whether it fills a meaningful gap in your collection. That mindset turns a famous mushroom name into something more useful: a well-documented place in your personal mycology library.

Within The Mycelium Network, a thoughtful collector is never just chasing fan favorites. They are learning the language behind the labels, keeping better records, and choosing products with a clear purpose.

Posted on

How to Buy Mushroom Spores Online With Confidence

How to Buy Mushroom Spores Online With Confidence

A spore listing can look simple until you are comparing formats, strain names, pack sizes, shipping terms, and availability across several storefronts. When you buy mushroom spores online, the best choice is rarely just the lowest price. It is the listing that clearly tells you what you are receiving, fits your intended legal use, and comes from a seller that understands the products well enough to organize them properly.

For collectors, microscopy-focused buyers, and gourmet cultivation enthusiasts, online shopping opens up far more variety than a general garden supplier can offer. The trade-off is that you need to evaluate the shop, the format, and your local rules before checking out. A smart purchase starts with knowing what matters.

Buy Mushroom Spores Online by Starting With the Format

The first decision is not always the strain. It is the format that makes the most sense for your collection, research setup, or edible cultivation plans. Spore syringes, spore prints, and ready-to-inoculate products serve different needs, and treating them as interchangeable can lead to a disappointing order.

A spore syringe is a popular choice because it is compact, clearly portioned, and easy to store according to the seller’s handling guidance. For microscopy work, it gives you a liquid sample that can be observed and compared with minimal extra preparation. Buyers who already know the varieties they like often prefer syringes because browsing and reordering is straightforward.

Spore prints are especially appealing to collectors and microscopy enthusiasts who value the physical presentation of a sample. A quality print should be packaged with care and identified clearly. The format also makes it easier to build a reference collection across distinctive varieties without committing to a large bundle of any one selection.

For legal edible mushroom cultivation, live cultures and ready-to-inoculate products are often the more direct option. These products are designed for growers who want to work with recognized gourmet varieties rather than begin with spores. Read each product description closely, since handling expectations, shelf life, and storage needs can differ from one culture to the next.

Read Product Descriptions Like a Mycologist

A strong listing does more than give a catchy name and a product photo. It identifies the product format, states the quantity or size, explains what is included, and gives practical information about storage or shipping. That level of detail helps you compare like with like.

Start with the basics. Confirm whether the listing is for a syringe, print, culture, bundle, or another product type. Check the listed volume or count rather than assuming two similarly priced items contain the same amount. If the product is part of a pack, look for the exact varieties included and whether substitutions may occur when inventory changes.

Strain names can be useful shorthand, but they are not a substitute for a complete description. Golden Teacher, B+, Blue Meanie, and Lizard King are recognizable names within specialty mycology circles, yet the individual listing should still tell you the actual format and provide accurate product information. A well-organized catalog makes it easier to shop by category, compare fan favorites, and find the product you intended to purchase.

Photos matter, but they should support the description rather than carry it. Clear images of packaging, prints, labels, or product bundles can show that a seller puts care into presentation. Still, written details are what protect you from ordering the wrong item.

Check Local Rules Before You Place an Order

Mushroom-related laws and regulations are not uniform. They can vary by country, state, province, and city, and they may apply differently depending on the species and intended use. Before ordering, confirm that possession, purchase, shipment, and use are permitted where you live.

This is not a formality to skip at checkout. A responsible buyer understands local requirements before placing an order and uses products only in lawful ways. International shoppers should be especially careful: customs rules, import restrictions, and delivery timelines can differ sharply from domestic shipping.

A reputable specialty retailer should communicate shipping coverage and any relevant ordering limitations clearly. If a policy is unclear, do not make assumptions based on a forum post or a product available elsewhere. Rules change, and the location that matters is yours.

What Separates a Good Spore Shop From a Random Listing

The internet makes niche products easy to find, but not every seller offers the same shopping experience. A reliable mycology storefront feels intentional. Categories are clear, product names match the descriptions, and the catalog does not force you to guess whether an item is a print, syringe, or culture.

Inventory breadth is also valuable when it is organized well. A shop with individual options, multi-packs, edible cultures, and cultivation supplies lets you compare formats in one place instead of piecing together an order from several unknown sources. Bundles can be a good value for collectors who want variety, but only when the included products are listed plainly.

Look at the store’s overall signals of specialization. Does it provide useful educational content alongside products? Are best sellers and category pages easy to browse? Is there a clear way to understand shipping expectations and contact the business? A focused retailer such as Myceli Nation builds trust by making the path from discovery to selection less fragmented.

Avoid listings that rely on vague claims, unclear photos, or urgency without details. A discount is only useful if you understand exactly what you are purchasing. The better move is usually to choose a transparent seller and a product format that matches your purpose.

Compare Value Beyond the Sticker Price

A single low price can be misleading. Consider the product amount, packaging, selection, shipping cost, and whether the seller offers a bundle that genuinely fits your interests. A collector buying multiple distinct varieties may get better value from a thoughtfully assembled pack than from several separate orders. Someone focused on one edible culture may be better served by a single, clearly labeled option.

Shipping deserves its own comparison. Check whether the shop ships to your location, how orders are packaged, and what the stated processing window is. For international orders, factor in the possibility of delays and review the destination’s import rules before purchasing. Fast shipping is helpful, but accurate fulfillment and appropriate packaging matter more.

Do not overbuy simply because a promotion is running. Spores, prints, cultures, and other mycology products have different storage considerations. Order an amount you can store properly and use lawfully within the product’s recommended timeframe. Buying with a plan is more useful than filling a cart with options you have not researched.

Build a Better First Order

If you are new to specialty mycology shopping, keep your first order focused. Choose one or two formats you understand, read the listings fully, and confirm the seller’s shipping policy before payment. This gives you a clear baseline for future purchases and prevents the common mistake of ordering a product that does not match your intended use.

Experienced buyers can take a more curated approach. Use category pages to compare familiar names, explore a new print for a collection, or add an edible culture alongside the supplies you already need. The goal is not to chase the biggest catalog. It is to build a selection that is useful, legal, and easy to keep organized.

The right online order should feel considered, not rushed. Choose clear product information over hype, verify local rules before checkout, and let your actual interest in mycology guide the cart. That is how a specialty purchase becomes part of a collection or cultivation setup you are genuinely excited to return to.

Posted on

Golden Teacher vs B Plus: A Clear Comparison

Golden Teacher vs B Plus: A Clear Comparison

Golden Teacher and B+ are two names that show up constantly in spore collections, product searches, and collector conversations. In the golden teacher vs b plus comparison, the useful question is not which name has the bigger reputation. It is what those labels can realistically tell you about a specimen, a print, or a microscopy-ready sample – and what they cannot.

Both are familiar favorites because they are widely recognized, visually distinct in many reported examples, and easy to place within a broader collection. But strain names are shorthand, not a laboratory guarantee. For collectors and microscopy-focused buyers, that distinction is where a smart comparison starts.

Golden Teacher vs B Plus at a Glance

Golden Teacher is one of the most recognized names in the hobby. It is commonly associated with warm golden caps, a classic broad-stemmed profile, and a long-running reputation in mycology communities. Its name has become so established that it often serves as a reference point when collectors begin building a catalog of familiar varieties.

B+, written with the plus sign, has a similarly durable place in the market. Reported examples are often described as having light caramel to golden coloration, pale stems, and a generally classic appearance. The B+ name is especially common in starter collections because it is recognizable without being obscure or difficult to compare against other catalog labels.

The overlap matters. Both names are used for specimens that can share many broad visual traits. A product label may help organize a collection and communicate seller provenance, but it should not be treated as a promise that every sample will present identically under observation.

Appearance Is a Starting Point, Not Proof

When people compare Golden Teacher with B+, cap color is usually the first point of discussion. Golden Teacher is often expected to lean toward yellow-gold or ochre tones. B+ is frequently described with tan, caramel, or light brown coloration. In practice, color can shift with age, handling, storage, lighting, and natural variation.

Stem shape and overall proportions can also vary. One sample may appear sturdy and compact while another from the same labeled line looks taller or more slender. That is not necessarily evidence of a mislabeled product. Biological material is variable, and names used in the hobby do not function like a fixed visual template.

For microscopy work, spore characteristics and sample condition are more useful than internet photo matching. A clean, clearly labeled print or syringe gives a collector a better starting point than a dramatic image with no provenance. If you are comparing products, prioritize seller clarity, format, packaging standards, and the information provided with the item.

What the Names Usually Mean

Golden Teacher and B+ are trade names used across the specialty mushroom space. They carry community recognition, historical associations, and familiar merchandising value. They are helpful when you want to browse a catalog, compare available formats, or maintain a record of what is in your collection.

They do not, on their own, establish a formal genetic identity. Different vendors may work from different source material, and a name can persist through years of sharing, selection, and retelling. That is why two products carrying the same label may not look perfectly alike, especially when compared across sources.

This does not make the labels useless. It simply means they should be read in context. A reputable product listing should make the format clear, use consistent naming, and avoid pretending that a familiar strain name erases biological variation. Good cataloging supports better collecting.

Choosing the Right Format for Your Collection

The Golden Teacher vs B+ decision can be less about choosing a winner and more about choosing the format that fits your purpose. A spore print is a compact, classic option for collectors who value long-term storage and direct microscopy preparation. It also makes a strong addition to a physical archive because the label, date, and source can be documented alongside the print.

A spore syringe is often preferred by buyers who want a convenient, ready-to-observe format. The key is proper labeling and careful handling. Check that the product name, volume, and storage guidance are clearly presented before adding it to your collection.

For buyers looking at bundles, pairing Golden Teacher and B+ can make sense precisely because they are both familiar names with slightly different reported visual profiles. A two-variety set provides a more useful comparison than ordering duplicate labels from unrelated sources and expecting a controlled result.

Myceli Nation serves The Mycelium Network with recognizable varieties, collector-friendly formats, and category browsing that makes it easier to locate what belongs in your next order. Whether you are building a focused archive or exploring fan-favorite names, product transparency should remain the deciding standard.

Reputation Versus Reliable Comparison

There are plenty of strong opinions around these two names. Golden Teacher is often treated as an iconic selection, while B+ is frequently described as an approachable classic. Those reputations help explain demand, but they are not a scientific comparison and should not be used to authenticate a sample.

A more reliable comparison asks practical questions. Is the seller consistent in its naming? Is the product format appropriate for your intended microscopy or collection use? Is the item stored and shipped with care? Are you able to keep a record of the source, purchase date, and label?

Those details create a collection with real reference value. They also make future comparisons more meaningful. Instead of relying on memory or forum lore, you can examine samples with known sourcing and documented handling.

Common Questions About Golden Teacher and B+

Is Golden Teacher better than B+?

Neither is automatically better. They are both popular, recognizable labels with broad appeal among collectors. The better choice depends on whether you prefer a particular reported appearance, want a specific name in your archive, or are selecting a format that complements what you already own.

Can you identify them by appearance alone?

No. Broad visual descriptions can be useful for discussion, but they cannot provide definitive identification. Natural variation, environmental conditions, handling, and the limits of informal strain naming all affect how a specimen may appear.

Why do listings for the same name look different?

Source history and product photography can differ substantially between sellers. Lighting alone can change how cap color reads in a photo. Differences in sample age, preparation, and storage can add even more variation, so compare listing details before comparing images.

Should a collector own both?

If your goal is a well-rounded collection of recognized names, owning both can be worthwhile. Golden Teacher and B+ are familiar enough to serve as useful catalog anchors, while their individual histories and reported traits give you two distinct points of reference.

The best collection is not built around hype or a single “best” label. Choose products with clear provenance, preserve your records, and let your own careful observations give Golden Teacher and B+ their place in the collection.

Posted on

Golden Teacher Spore Syringe Review for Collectors

Golden Teacher Spore Syringe Review for Collectors

A Golden Teacher spore syringe review should start before the package is opened. For collectors and microscopy-focused buyers, the value is not in a flashy strain name alone. It is in whether the syringe arrives properly identified, professionally packaged, and backed by a seller that makes the buying process clear from product page to delivery.

Golden Teacher remains a familiar name across specialty spore catalogs because it is recognizable, widely requested, and easy to find alongside other fan-favorite varieties. That popularity also makes it worth shopping with a sharper eye. A quality review looks beyond the label and considers presentation, traceability, ordering details, and whether the vendor treats its customers like informed members of the mycology community.

Golden Teacher Spore Syringe Review: What Matters

A spore syringe is a straightforward format: spores suspended in sterile water and supplied in a sealed syringe. Its appeal is convenience. Compared with a print, it is compact, ready for microscopy preparation, and generally easier for buyers who prefer an organized, single-item format over handling loose materials.

The first point in any fair Golden Teacher spore syringe review is that visual appearance has limits. A clear-looking solution is not automatically a measure of quality, and visible specks are not a reliable stand-in for a proper microscopic assessment. Spores can be difficult or impossible to judge by eye in a sealed syringe. What buyers can reasonably evaluate is the condition of the packaging, the clarity of product information, and the care evident in fulfillment.

Labeling Should Be Specific, Not Vague

A useful label identifies the variety and gives the buyer confidence that the item was packed intentionally rather than pulled from an unmarked bin. At minimum, the variety name should be easy to read and match the order confirmation. Clear labeling matters even more when several syringes are ordered together, especially if a collector is building a varied library of recognizable names and less common selections.

Lot or batch information can be a positive sign when a seller provides it, but not every specialty retailer uses the same system. The practical standard is consistency. Product name, quantity, and packaging should align with what was advertised, while customer support should be reachable if anything arrives mislabeled or incomplete.

Packaging Reveals a Lot About the Seller

The syringe itself should arrive protected from unnecessary pressure, leaks, and rough handling in transit. A cap or protective covering, secure containment, and a package that prevents the item from moving around are basic signs of careful fulfillment. This is not glamorous, but it is where a dependable supplier separates itself from a casual listing.

Discreet, efficient shipping is also part of the experience. Buyers should be able to find shipping expectations before checkout, including available destinations, order processing details, and any weather or carrier considerations that may affect timing. Worldwide availability can be a major advantage for a specialty shop, but transparent shipping information is what makes that reach genuinely useful.

What the Golden Teacher Name Can and Cannot Tell You

Golden Teacher has strong name recognition, but strain names should be treated as catalog identifiers, not as a guarantee of a uniform biological outcome. Spores naturally carry variation. For microscopy enthusiasts, that is part of the appeal: each sample is a biological material to observe, document, and compare rather than a perfectly standardized consumer good.

That distinction is useful when reading customer feedback. A review that only says “great genetics” without describing packaging, labeling, order accuracy, or microscopy context does not tell a buyer much. More useful feedback explains whether the item arrived as described, whether the seller communicated clearly, and whether the sample was suitable for the reviewer’s lawful intended use.

A good vendor should also avoid making inflated claims around a popular name. The best product pages are specific without being theatrical. They identify the format, the variety, the quantity, and the purpose of the item while setting realistic expectations for buyers who understand the nature of spore materials.

Why Syringe Format Is a Popular Choice

For many collectors, the choice between a spore syringe and a print comes down to handling preference. Prints have their own appeal, especially for archiving and display-minded collectors. Syringes, meanwhile, provide a tidy, self-contained format that can be stored and organized with less fuss.

A Golden Teacher syringe is often a sensible pick for someone placing a mixed order. It pairs naturally with other recognizable varieties, allowing buyers to compare labels, formats, and vendor consistency across a single shipment. Bundles can be appealing here, provided the discount does not come at the expense of clear product descriptions or the ability to identify each item after it arrives.

There is a trade-off, though. A syringe is not a format that can be meaningfully judged through marketing photos. The strongest purchase signal is the seller’s track record for precise fulfillment, protective packing, and transparent policies. When comparing products, give more weight to those practical details than to dramatic product copy.

How to Evaluate a Seller Before Ordering

The product page should answer basic questions without forcing buyers to hunt for them. Look for a clear variety name, format description, quantity, price, stock status, and shipping information. A dedicated mycology storefront should also make it simple to browse related categories, whether the buyer is interested in prints, edible cultures, supplies, or other specialty offerings.

Customer service is equally relevant. Specialty products sometimes require order questions, address corrections, or help identifying what was received. A seller that offers accessible support and straightforward policies gives buyers a better experience than one that relies on vague claims and hard-to-find contact details.

Community signals matter, too, but they should be read carefully. An active educational presence, a newsletter, repeat customers, and a well-organized catalog can suggest that a shop is invested in the space for the long term. They do not replace product-level scrutiny, but they can help buyers distinguish a dedicated retailer from a short-lived storefront.

For buyers looking for broad selection, Myceli Nation positions its catalog around that convenience: recognizable favorites, specialty options, and mycology supplies in one place. The practical benefit is less time moving between fragmented sellers and more time comparing formats that fit your collecting or microscopy interests.

A Balanced Verdict for Prospective Buyers

Golden Teacher spore syringes remain popular because they are familiar, convenient, and easy to include in a broader specialty order. The format works well for buyers who value clean organization and straightforward product identification. Still, no review should treat a familiar name as a substitute for careful purchasing.

The best choice depends on what you value most. If you prioritize a compact, ready-to-use microscopy format, a clearly labeled syringe may be the right fit. If archival presentation is more important, a print may deserve a closer look. If you are building out a collection, a mixed bundle can offer variety, but only when every item is identified and the seller’s policies are easy to understand.

Before ordering, confirm that the product is lawful to possess and use where you live, review the seller’s shipping terms, and keep your expectations grounded in what a syringe can actually reveal before microscopy. A thoughtful purchase starts with a simple standard: choose the supplier that makes the details easy to verify, not the one that makes the biggest promises.