Posted on

Best Way to Take Spore Prints Cleanly

Best Way to Take Spore Prints Cleanly

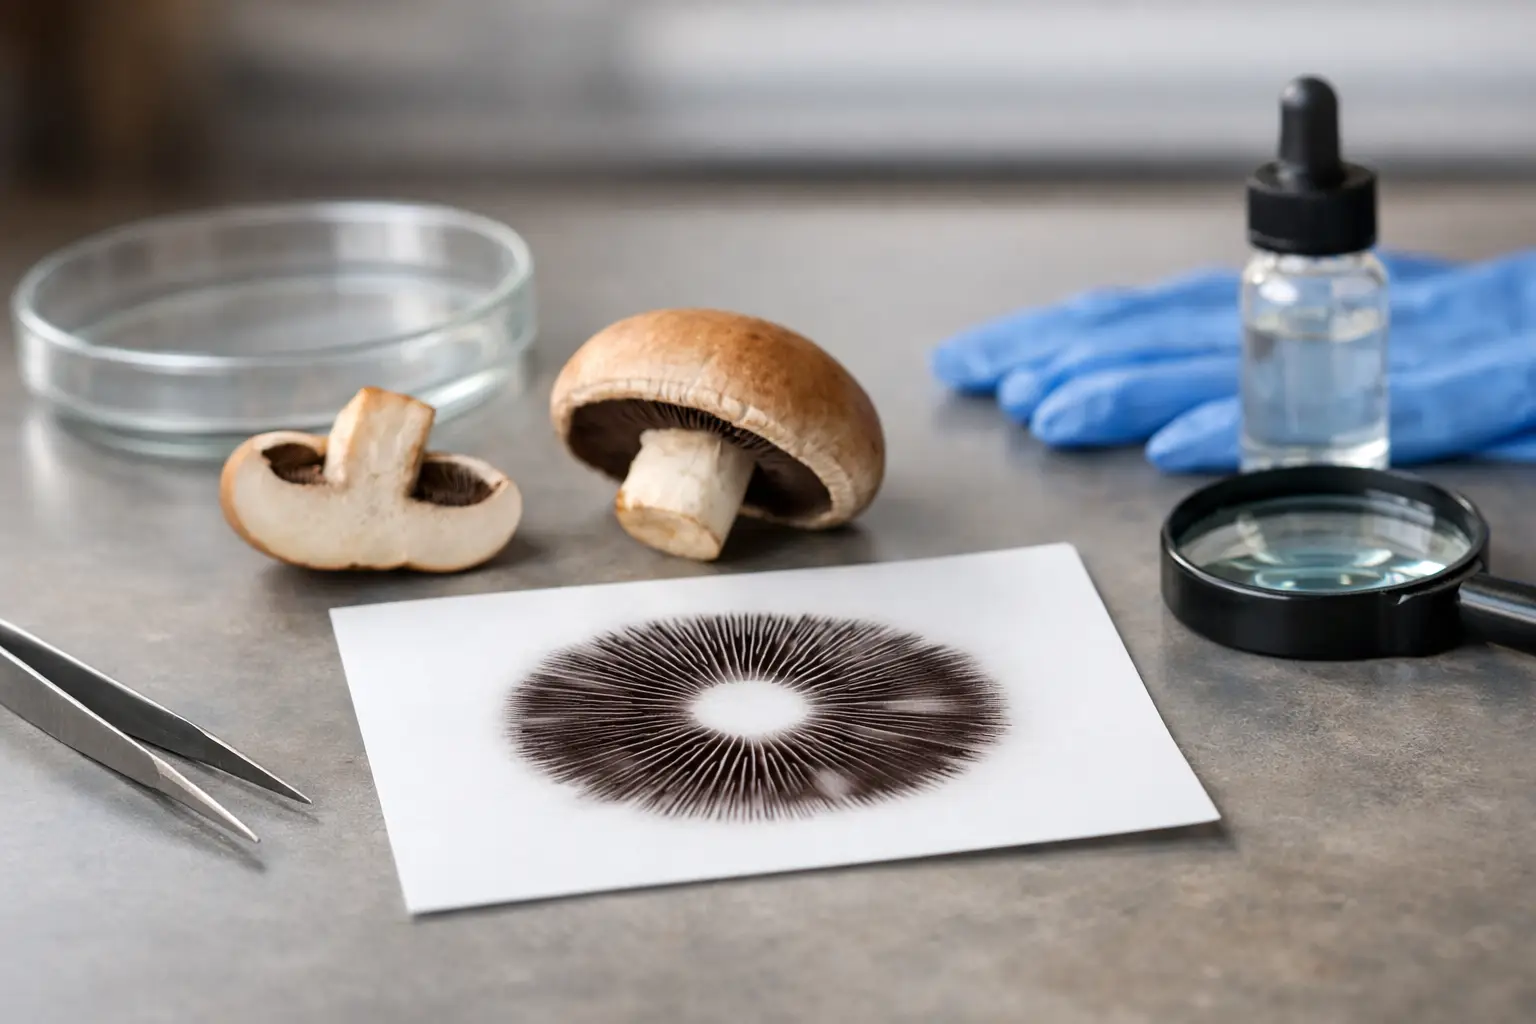
A good spore print tells you a lot before you ever put it under the scope. Color, density, and cleanliness all matter, and the best way to take spore prints is usually not the fastest way. If you rush the cap onto whatever surface is nearby, you often end up with smeared deposits, excess moisture, or a print that is hard to store without contamination.

For collectors and microscopy-focused hobbyists, clean technique matters more than fancy gear. You do not need a lab setup to get a usable print, but you do need a stable surface, a mature cap, and a little patience. Most problems come from one of three places: the mushroom was picked too early, the environment was too damp, or the print surface was poorly chosen.

What is the best way to take spore prints?

The best way to take spore prints is to work with a mature, freshly harvested cap, place it gill-side down on a clean nonporous surface, cover it to reduce airflow, and leave it undisturbed long enough for a visible deposit to form. In practice, that means matching the surface and timing to your goal.

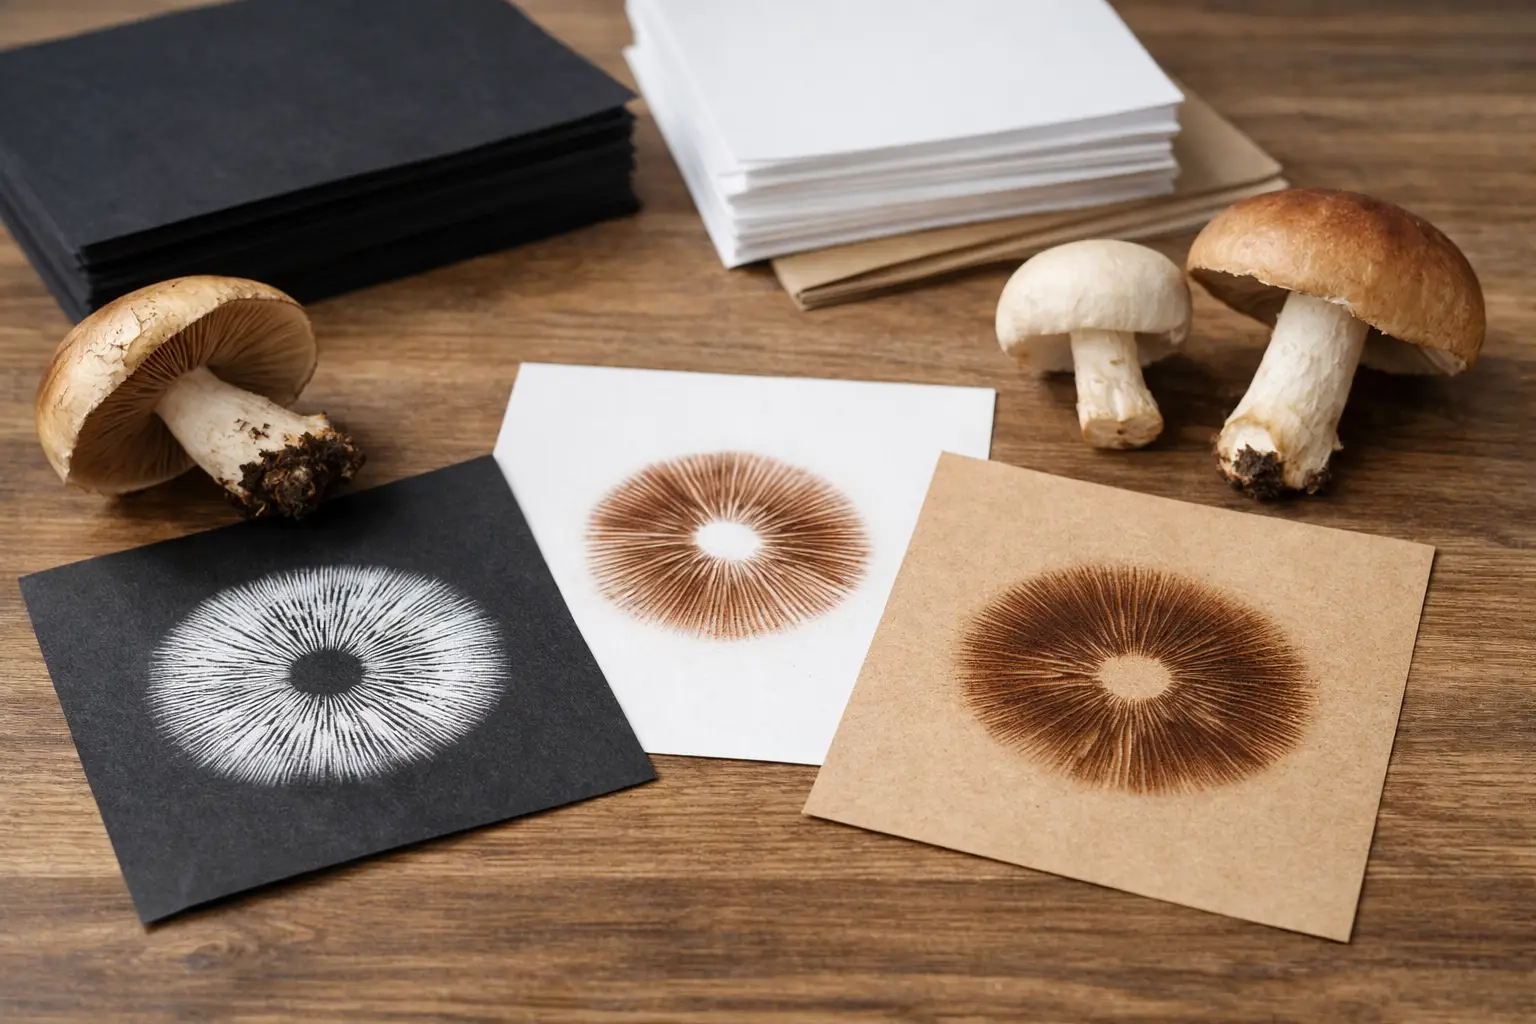
If you want a print for storage, foil is usually the easiest option. It folds cleanly, handles moisture better than paper, and makes transfer easier later. If you want to inspect spore color clearly, white and black paper can be useful, but paper absorbs moisture and is less forgiving when the cap is wet.

Glass also works well when cleanliness is the priority, though it is less convenient for storage. There is no single perfect surface for every situation. The right choice depends on whether you care most about display, microscopy prep, or long-term handling.

Start with the right cap

A perfect surface cannot fix an immature specimen. If the cap has not developed enough, it may drop very few spores or none at all. On the other hand, an overmature cap may release unevenly, hold too much moisture, or begin breaking down before the print is finished.

Look for a cap that is open and visibly mature, with intact gills and no obvious rot or bruised, soggy tissue. Freshly harvested material gives the most reliable results. If the stem is long, trim it close to the cap so the gills can sit flat against the print surface.

This small step makes a big difference. A cap that rocks or tilts tends to produce a partial print, not a full one.

Best surfaces for taking spore prints

Foil for clean handling and storage

For most growers and collectors, foil is the safest bet. It is cheap, easy to keep clean, and easy to fold once the print is dry. That makes it a strong choice if you want to preserve the print or use it later for microscopy-related handling.

Heavy-duty foil is better than the very thin kind because it wrinkles less. Wrinkles can interrupt the print pattern and make later transfer more awkward. If you are choosing one surface to keep on hand, foil is usually it.

Paper for visible contrast

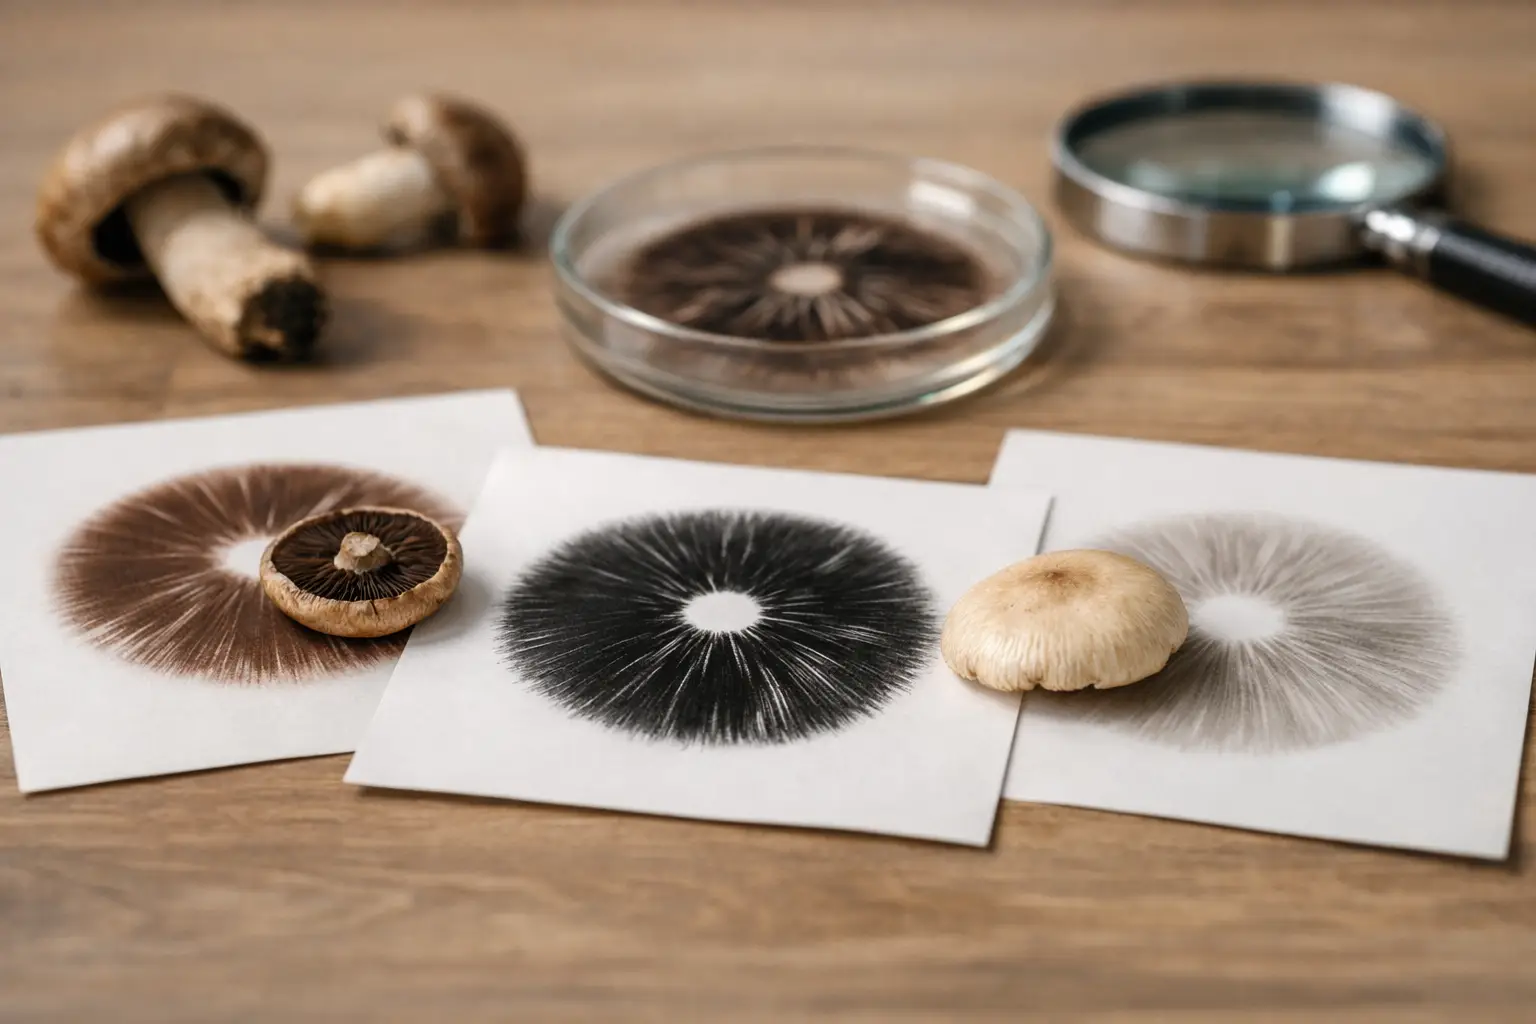
White paper helps with dark spore deposits, while black paper helps with lighter ones. This is useful when your main goal is simply to observe color and pattern. The trade-off is that paper can trap moisture, and a damp cap on paper may create a muddy print instead of a crisp one.

If you use paper, keep the environment dry and avoid overwatering or rinsing the cap beforehand. Paper is better for short-term viewing than for long-term storage.

Glass for precision

Glass slides or clean glass plates can produce very crisp prints. They are easy to sanitize and helpful if you want a very clean deposit. The downside is convenience. Glass is not as easy to package, fold, or store, so it is usually better for immediate use than for building a collection.

How to take a spore print without making a mess

Set up your workspace first. Wipe down the surface, wash your hands, and have your foil, paper, or glass ready before you cut the cap. A rushed setup is where most accidental smears happen.

Place the cap gill-side down on the surface. Then cover it with a clean cup, bowl, or jar. The cover helps in two ways: it protects the cap from drafts and slows moisture loss just enough to encourage deposition. Too much airflow can dry the cap before it drops well, but too much trapped humidity can make the print wet and blurry.

That balance is the real trick. If your environment is already humid, use a larger cover with a little space underneath instead of sealing things tightly. If your room is very dry, a simple glass or bowl usually works well.

Leave the cap undisturbed for several hours. Overnight is common, but the right timing depends on the species, maturity, and moisture level of the cap. Some prints show up quickly within a few hours. Others benefit from a longer wait. The mistake is checking too often. Every time you lift the cover or move the cap, you increase the chance of smearing the deposit.

A cleaner print usually comes from less moisture

People often assume that more humidity means a better print. Not exactly. You want the cap to stay viable long enough to release spores, but if condensation forms under the cover, the spores can clump or streak.

If the cap surface is visibly wet, blot the top gently before placing it down. Do not press the gills. If condensation starts collecting under the cup or bowl, your setup may be too warm or too sealed. In that case, use a drier room, a slightly larger cover, or shorten the printing time.

The best way to take spore prints cleanly is often to lean a little dry rather than a little damp. A slightly lighter print is usually more useful than a heavy smear.

When to remove the cap

Lift the cap straight up once a visible deposit has formed. Avoid sliding it sideways. Even a good print can be ruined at the last second by dragging the cap across the surface.

If the print looks faint, you can set the cap back down carefully and give it more time, but only if the cap is still fresh and the surface is still dry. If the print already looks wet or muddy, more time will rarely improve it.

After removing the cap, let the print air dry fully before covering, folding, or storing it. This part gets skipped more often than it should. A print that looks dry can still hold enough moisture to cause problems later.

How to store a spore print properly

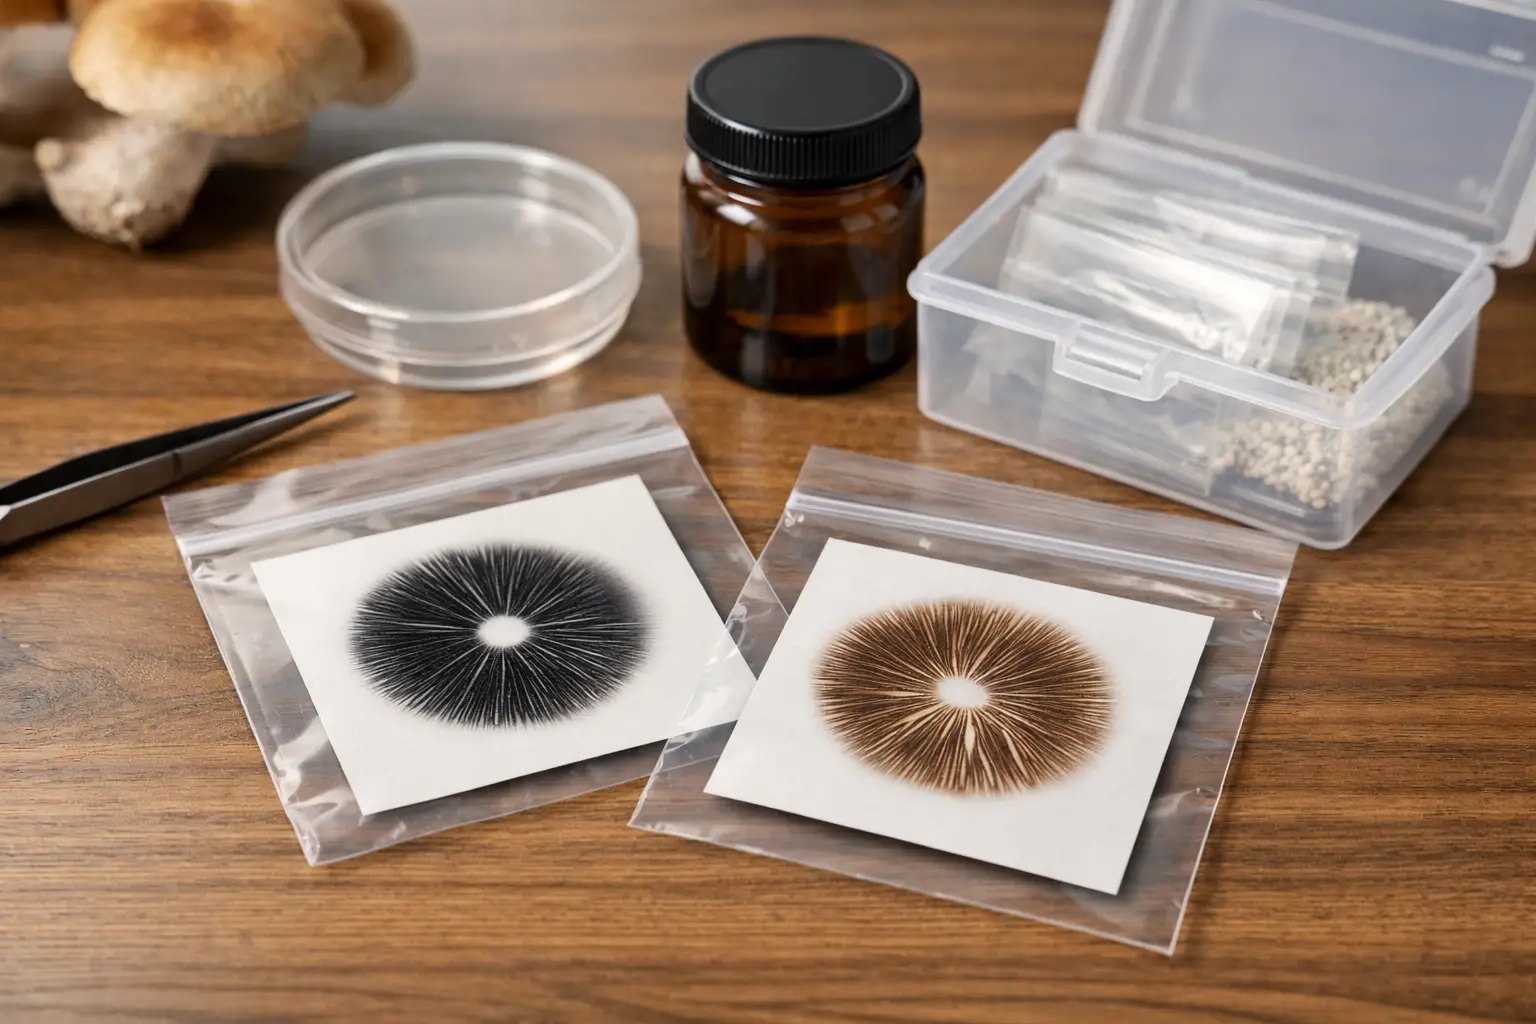
Once dry, fold foil prints inward so the deposit is protected. Paper prints can be placed in a clean envelope, though foil still tends to hold up better over time. Keep prints in a cool, dark, dry place away from direct sunlight and swings in temperature.

Labeling matters more than people think. Include the date, variety, and any notes about the source or print quality. If you handle multiple caps in one session, clear labeling saves confusion later.

For collectors building out a wider catalog, consistent storage makes the whole process easier. That is part of why product format matters too. Many hobbyists prefer ready-made print options because they are simpler to archive and compare across varieties.

Common mistakes that ruin spore prints

The first is using an immature cap. The second is too much moisture. The third is moving the cap before the spores have had time to settle. After that, most issues come from poor surfaces or poor storage.

Another common mistake is chasing the darkest possible print. Dense does not always mean better. If the deposit is so heavy that detail disappears, it can be harder to work with than a lighter, cleaner print.

It also helps to keep expectations realistic. Some caps drop heavily and beautifully. Others produce lighter prints even under good conditions. That does not always mean you did something wrong.

Best way to take spore prints for beginners

If you are just starting out, keep it simple. Use a mature cap, a square of clean foil, and a bowl or cup as a cover. Put the setup in a low-traffic area, leave it overnight, and let the print dry fully before folding it.

That basic method works because it removes the usual points of failure. You do not need specialty equipment. You just need a cleaner process and enough patience to let the cap do the work.

For enthusiasts who like to compare formats, build collections, or restock their microscopy supplies without bouncing between suppliers, having access to clean prints and dependable materials makes the hobby smoother. That is part of the appeal behind communities like Myceli Nation – fewer guesswork purchases, more time focused on the fungi themselves.

A clean spore print is a small thing, but it rewards careful hands. Slow down, choose the right surface, and let the cap finish the job before you touch it again.
Posted on

How to Spore Print Lion’s Mane

How to Spore Print Lion’s Mane

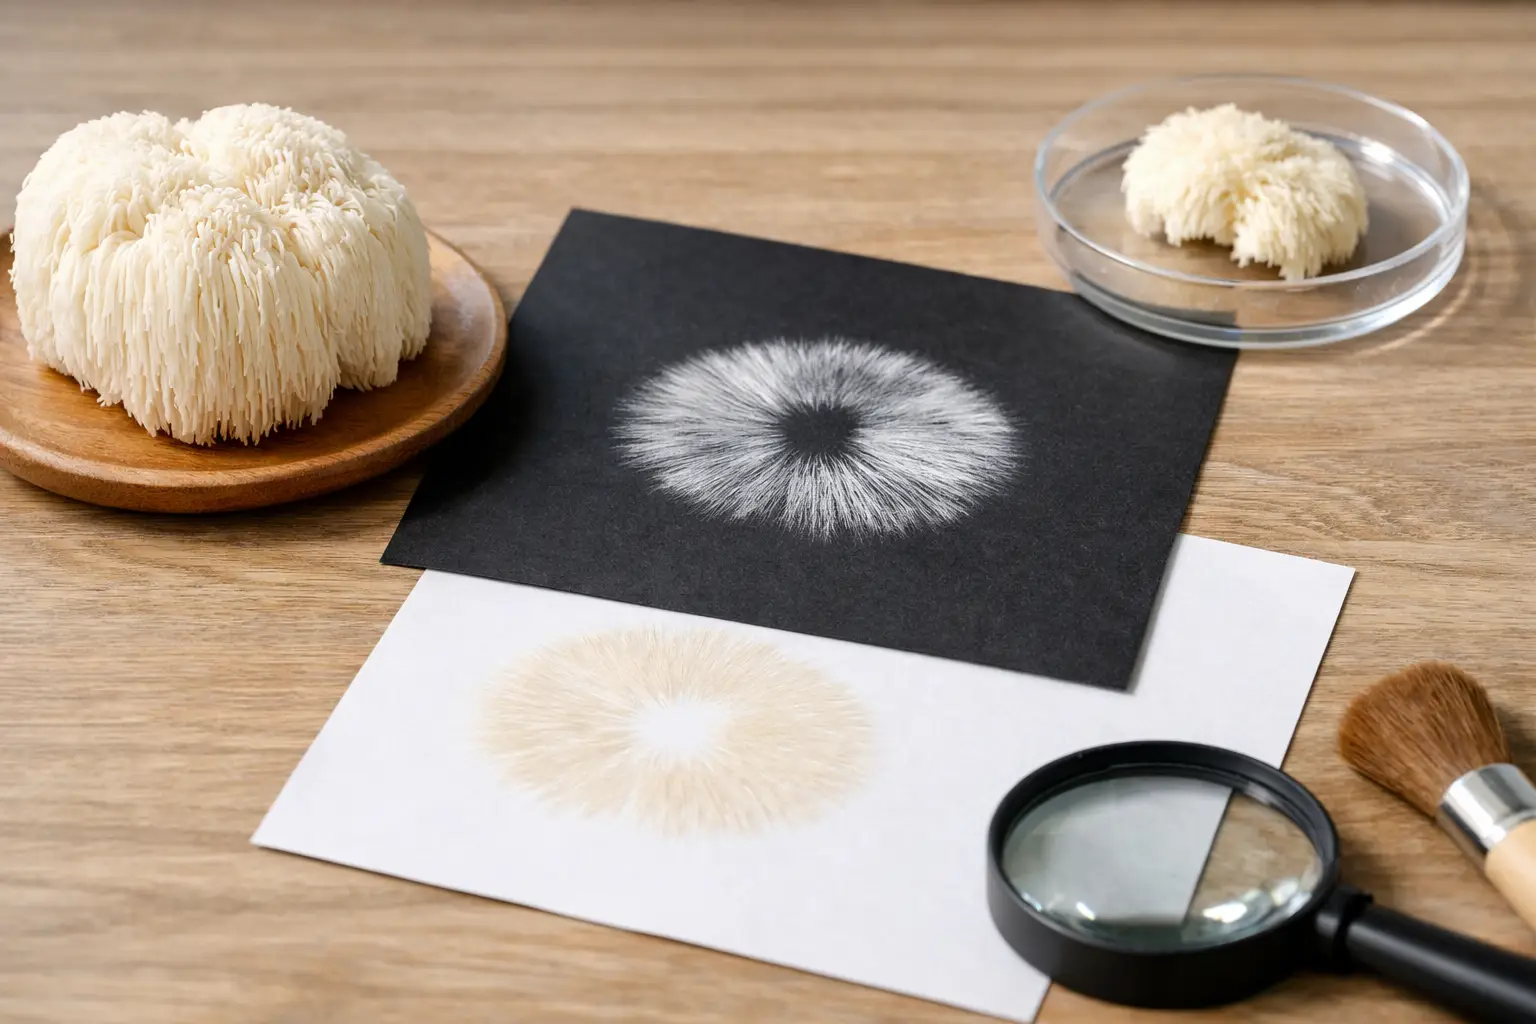
If you’re figuring out how to spore print lion’s mane, the first thing to know is that it does not behave like a gilled mushroom. That single detail is where most failed attempts start. Lion’s mane releases spores from tiny teeth, not caps and gills, so timing, orientation, and patience matter a lot more than people expect.

For growers used to oyster or button mushrooms, lion’s mane can feel a little awkward at spore-print time. The fruiting body is shaggy, dense, and often harvested before it gets truly mature because texture and flavor are best on the younger side. If your goal is getting a visible print, you usually need to let one fruit go past peak kitchen quality. That trade-off is normal.

How to spore print lion’s mane successfully

A lion’s mane spore print starts with a mature fruiting body that is still clean and intact. You want a specimen with long, well-developed teeth and no signs of rot, heavy bruising, or bacterial slime. A very young fruit usually will not drop enough spores to give you much to work with, while an overripe one can turn messy fast.

Unlike broad-capped mushrooms, lion’s mane does not lend itself to the classic cap-on-foil method. The spores fall from the hanging spines, so you need to position the fruit so those teeth are pointed down over a clean surface. In practical terms, that means placing a trimmed chunk or a small whole fruit over foil, black paper, glass, or another smooth collection surface where spores can settle.

White spores on a white plate are a frustrating choice. Since lion’s mane spores are pale, a dark background tends to make the print easier to spot. Black paper can work, but smooth foil or glass is often easier if you plan to scrape and transfer material later.

What you need before you start

Keep the setup simple. You need a mature lion’s mane fruit, a sterile blade or scissors, clean aluminum foil or a sterile glass dish, and a cup, bowl, or container to cover the sample. Some growers lightly mist the surrounding area beforehand to settle dust, but you do not want moisture collecting directly on the print surface.

Clean handling matters here because lion’s mane prints are often faint. Any lint, dust, or fibers can overwhelm what you are trying to collect. Wash your hands, sanitize your tools, and work in a still-air area away from vents or fans.

Choosing the right fruiting stage

This is the part that makes or breaks the process. Lion’s mane should be mature enough that the teeth are elongated and the fruit has begun shifting from tight pom-pom growth into a more open, cascading form. If the spines are still short nubs, wait. If the fruit has started yellowing heavily or softening, you may still get spores, but contamination risk rises and quality drops.

A lot of growers harvest lion’s mane before prime spore release because that is when it looks best and cooks best. So if you are serious about learning how to spore print lion’s mane, plan ahead and designate one fruit for the job. Letting one specimen mature fully is usually more productive than trying to print leftovers from a harvest that was taken early.

Whole fruit or trimmed section?

It depends on the shape. A small whole fruit can be suspended or set over the print surface if the teeth naturally hang downward. A large cluster is often easier to trim into a manageable section. The main goal is simple: exposed fertile surface facing down, close enough to the collection surface for spores to land, but not pressed against it.

If the fruit sits directly on the foil or glass, air circulation around the teeth is reduced and moisture can build up. Leave a little clearance if you can. Even a small support ring made from clean foil can help elevate the sample.

Step-by-step setup for a lion’s mane spore print

Start by preparing your collection surface. Lay down foil shiny side up, or place a clean glass dish in your work area. Then cut a mature section of lion’s mane with minimal handling of the teeth.

Place the fruit so the spines point straight down toward the surface. Cover it with a clean bowl, deli container, or large cup to reduce airflow and contamination. The cover should protect the setup without sealing in heavy condensation.

Leave it undisturbed for 8 to 24 hours. Lion’s mane can be less dramatic than some other species, so don’t expect a bold, dark print. In many cases, what you get is a subtle white dusting rather than a sharply defined pattern.

When time is up, lift the cover carefully and remove the fruit gently. Tilt the surface under good light. A flashlight from the side can help reveal a thin spore layer that looks invisible head-on. If you see a faint powdery deposit, that is often your print.

Why some prints seem to fail

Most failed lion’s mane prints come down to three things: the fruit was too young, the spores were too pale to notice, or excess moisture interfered with collection. There is also the possibility that the specimen simply was not in an active spore-drop window during the time you left it set up.

This is one of those cases where patience beats overhandling. If the first attempt gives you little or nothing, try again with a more mature fruit or extend the collection window. Just keep an eye on humidity inside the cover. Too dry and spore drop may be weak. Too damp and the surface gets messy.

Handling and storing the print

Once you have a visible lion’s mane spore print, let the surface air dry briefly in a clean, still area if there is any trace of moisture. Then fold the foil carefully or transfer the print to a clean storage setup. If you used glass, you can scrape the spores with a sterile blade into a sterile container.

Label everything right away. Include species name and date at minimum. It sounds basic, but once you start collecting more than one sample, unlabeled material becomes guesswork fast.

Storage should be cool, dry, and dark. The cleaner the print when collected, the better it tends to hold up. If your print is mixed with condensation spots, substrate debris, or tissue fragments, it is less reliable as a clean reference sample.

Print quality versus culture quality

There is a practical point worth saying plainly: with lion’s mane, cloning tissue is often more straightforward than chasing a heavy spore print. Spores can absolutely be collected, but many growers prefer tissue work when they want to preserve a fruit they already like. Spore printing is still useful for study, documentation, and collection purposes, but it is not always the most efficient route if your only goal is propagation.

That does not mean printing lion’s mane is a waste of time. It just means expectations should be realistic. Some species throw obvious, satisfying prints. Lion’s mane tends to be more subtle and more dependent on perfect timing.

Common mistakes when learning how to spore print lion’s mane

One common mistake is harvesting too early because the fruit looks ready from a culinary standpoint. Another is using a white plate and assuming no spores dropped when the print is simply hard to see. The third is trapping too much humidity under the cover, which can leave you with moisture instead of a clean powdery deposit.

Rough handling is another issue. The teeth are delicate, and squeezing or flattening them can reduce your chances of getting a good print. Try to move the fruit as little as possible once it is cut and positioned.

It also helps to avoid high-traffic workspaces. A faint white print can be spoiled by a single stray hair, paper fiber, or dust layer. If you are already set up with basic sterile workflow for cultures and supplies, use that same mindset here.

What a good lion’s mane print should look like

Do not expect a classic umbrella-shaped print pattern. Since the fertile surface is made up of hanging spines, the deposit may look diffuse, uneven, or softly dusted rather than sharply outlined. That is normal.

Under angled light, a successful print often appears as a pale white powder on the collection surface. On dark material, it may show up as a soft chalky patch. On foil, it can be more reflective and easier to spot when you tilt it.

If you are building out a personal reference collection or just refining your technique, this is where repetition helps. One clean, mature fruit can teach you more than several rushed attempts.

For growers and collectors in The Mycelium Network, that is really the mindset to bring to lion’s mane – less hurry, more observation. Give the fruit time, keep the setup clean, and let the species show you how it wants to print.

Posted on

How to Spore Print Oyster Mushrooms

How to Spore Print Oyster Mushrooms

Oyster mushrooms can drop spores fast, and if you wait too long, your shelf, grow tent, or fruiting block will wear the evidence. If you want to learn how to spore print oyster mushrooms, timing matters just as much as clean technique. Catch them at the right stage, and you can get a dense, visible print without much fuss.

For growers, collectors, and microscopy-minded enthusiasts, oyster prints are useful because they let you observe spore color, compare phenotypes, and preserve material from a fruit you liked. They are also one of the easier mushrooms to print when the caps are mature and the environment is reasonably still. The catch is that oyster mushrooms are heavy spore producers, so they can go from perfect to over-dumped quickly.

What makes oyster mushrooms a little different

Oyster mushrooms do not behave exactly like the classic button-cap mushroom most people picture when they think about spore printing. Their caps are often shelf-like, the stems can be off-center or nearly absent, and the gills run down the stem. That shape changes how you position the cap and how much surface contact you need.

They also produce white to pale lilac-gray spores depending on species and variety. On plain white paper, a print can look faint even when it is actually dense. That is why dark paper, black foil, or a half-black, half-white background works better than a single light surface. If you have only white paper on hand, the print may still form, but you may have to tilt it under bright light to see it clearly.

How to spore print oyster mushrooms successfully

The best oyster mushroom for printing is mature but not collapsing. Look for a cap that has opened well, with visible gills and a fresh edge that is no longer tightly curled under. If the cap is still young and rolled inward, it may not release enough spores yet. If it is old, waterlogged, or starting to soften, you are more likely to get a messy print or contamination.

Cut the cap cleanly from the cluster with a sterile blade or clean scissors. Try to choose a cap with intact gills and minimal bruising. Oyster fruits often grow in overlapping shelves, so take a moment to separate one that has enough flat area to sit gill-side down.

Place the cap gill-side down on your printing surface. Foil is a favorite because it is easy to keep clean and simple to fold for storage later. Dark paper works too, but foil tends to hold up better if the cap releases a little moisture. If the cap is curved and wants to tip, trim excess stem tissue so it sits more evenly.

Then cover it with a clean glass, bowl, or cup. This does two things. It reduces air movement, which keeps the spores from drifting away, and it protects the print from dust. Set the covered cap somewhere stable at room temperature and leave it alone for several hours.

For many oyster mushrooms, 6 to 12 hours is enough. Some prints come in faster, especially from very mature caps. Overnight is usually safe if the fruit is still firm, but going too long can add moisture and blur the pattern. If your room is humid and the cap is especially fresh, check sooner rather than later.

When you lift the cap, do it gently and straight up if possible. A good print should show the outline of the gill structure as a pale deposit on the surface. It may look subtle at first. Tilt the foil or paper in the light before assuming nothing happened.

Best surfaces and setup for a clear print

If your goal is a print you can actually see and store cleanly, surface choice matters more than people expect. Black foil gives great contrast for light oyster spores and is easy to fold. Standard aluminum foil also works, though the reflectivity can make the print harder to photograph. Matte black paper can look excellent, but it is less forgiving if the mushroom releases moisture.

A split background is practical if you are not sure how visible the spores will be. Put the cap across black and white paper, or use a surface with two contrasting tones. That trick helps with species that print faintly.

Your setup should be clean, but it does not need to be a lab. Wipe the work area, wash your hands, and avoid breezy rooms, fans, and open windows. Oyster spores are light and abundant. Any air movement can scatter them before they settle into a crisp print.

Common reasons oyster mushroom prints fail

Most failed prints come down to one of three things: immature caps, poor contrast, or too much moisture. A cap that looks good for eating is not always mature enough for printing. Oyster mushrooms often need to flatten out more than people expect before they really start dropping.

Poor contrast is another common issue. Because oyster spores are so light, growers sometimes think the cap produced nothing when the spores are there but nearly invisible. Switching from white paper to dark foil often solves the problem immediately.

Moisture is the other problem. If condensation forms under the cup, the spores can clump or smear. In that case, the cap may still be releasing plenty of spores, but the print loses definition. A fresh cap, short print time, and dry room usually give cleaner results.

There is also the matter of species and strain variation. Some oysters are simply more generous than others. Blue, pearl, and phoenix types can all print well, but the density and visibility can vary with maturity, growing conditions, and how recently the mushroom was harvested.

How to store an oyster mushroom spore print

Once the print is complete, let the surface air dry for a short time if there is any visible moisture. Do not leave it exposed longer than needed. After that, fold the foil carefully around the print or place the paper in a clean sleeve or envelope.

Label it right away with the species or variety, date, and any notes you care about, such as substrate, flush number, or notable fruit traits. That sounds basic, but unlabeled prints pile up fast in a serious grower setup.

Store the print somewhere cool, dry, and dark. Humidity is the enemy here. If the print picks up moisture later, contamination risk goes up and the deposit can degrade. A sealed bag with a desiccant pack helps if your storage area runs damp.

Should you print from store-bought oysters or homegrown fruits?

You can do either, but the results depend on freshness. Homegrown fruits usually give you a better shot because you know exactly how mature they are and how they were handled. A cap taken directly from a fresh cluster tends to print more reliably than one that sat in packaging or refrigeration for days.

Store-bought oyster mushrooms can still work if they are fresh, dry, and fully opened. The trade-off is that retail handling may reduce spore release, and condensation in packaging can age them faster than they look.

If you are actively cultivating edible species, printing from your own grow gives you more control. It is also easier to compare fruits from different flushes or culture lines when you are documenting what performs best.

A few small technique upgrades that help

If you want a cleaner print, trim away any excess tissue that keeps the cap from lying stable. If the cap is especially thick or shell-shaped, you can support one side very gently so the gills face down more evenly. Just do not press the cap into the surface.

If you are printing multiple caps, give each one space. Oyster mushrooms can dump enough spores that overlapping deposits become hard to read. Separate prints are easier to label, store, and compare.

And if you are building out your mycology shelf with prints, cultures, and grow supplies, staying organized pays off. The Mycelium Network approach works here too – clear categories, clean handling, and labeled inventory save headaches later.

What a good oyster print should look like

A strong oyster print usually appears as a pale, powdery deposit that mirrors the cap and gill pattern. It may be bright white, creamy white, or slightly gray-lilac depending on the variety and the light. It should not look muddy or wet.

Do not expect every print to be dramatic on the first try. Oyster mushrooms are generous, but they still respond to timing, cap condition, and environment. Once you dial in those variables, the process becomes simple enough to repeat whenever you have a mature flush ready.

The nice thing about oyster mushrooms is that they reward attention. Watch the caps closely, print them at the right stage, and they will usually show you exactly what they are carrying.

Posted on

Best Paper for Spore Prints Explained

Best Paper for Spore Prints Explained

A clean print can look perfect at first glance, then fail later because the paper held moisture, shed fibers, or picked up contamination during storage. That is why choosing the best paper for spore prints is less about looks and more about how the material behaves once the cap comes off and the print starts drying.

For most growers, collectors, and microscopy-focused buyers, the short answer is simple: plain white, non-coated cardstock is usually the safest all-around choice if you want a paper product. It gives you contrast, holds its shape, and does not wrinkle as easily as standard printer paper. But there is a catch. In some cases, foil still outperforms paper altogether, especially when you want the easiest transfer and the least absorbency.

What actually makes the best paper for spore prints?

The best material needs to do three things well. It has to show the print clearly, stay stable while moisture evaporates, and avoid adding fibers, coatings, or residue that can interfere with collection or storage.

That is why thin office paper is rarely the top pick. It bends fast, absorbs moisture unevenly, and can stick to a damp cap. If you have ever peeled a cap away and found a fuzzy paper texture embedded where you wanted a clean print, you already know the problem.

Cardstock works better because it is thicker and more dimensionally stable. A plain white sheet also makes dark deposits easy to see, which matters if you are checking print density or trying to separate a strong print from a weak one. White paper is not the only option, but it remains the most practical for visibility.

The part many people overlook is surface treatment. Glossy paper, photo paper, waxed paper, and heavily coated craft stock can all create avoidable issues. Some coatings trap moisture longer than expected. Others make the spores smear instead of settle cleanly. If the goal is a reliable print, fancy paper usually adds more risk than value.

Best paper for spore prints by material type

Plain white cardstock

If you want one recommendation that covers most situations, plain white cardstock is it. It is thick enough to stay flat, light enough in color to show detail, and simple to cut into clean squares for printing and storage. It also folds better than brittle specialty papers if you plan to package prints neatly.

This is the option that feels closest to a dependable middle ground. It is easy to source, inexpensive, and beginner-friendly without being low quality. For many hobbyists, this is the best paper for spore prints because it balances readability and handling.

Standard printer paper

Printer paper can work in a pinch, but it is usually not the best choice for anything you want to keep. It absorbs moisture quickly and can wrinkle or curl as the cap sits on it. That movement alone can distort the print.

There is also the fiber issue. Thin paper sheds more easily, and that is not ideal when you want a clean deposit. If standard copy paper is all you have, use it for a quick temporary print, not your best sample.

Construction paper or colored paper

Colored paper is mostly a visibility problem. Some prints simply do not stand out well against darker backgrounds, and that makes inspection harder than it needs to be. Dyes and rougher surfaces can also be inconsistent.

If you want paper for presentation, maybe. If you want paper for clarity and easy handling, white wins almost every time.

Glossy or coated paper

Glossy paper sounds appealing because it seems smooth and clean, but in practice it is a poor fit. Coated surfaces can cause moisture to bead or dry unevenly, and prints may smear more easily when touched.

It is also harder to predict how that coating will behave over time in storage. For a process that benefits from fewer variables, coated stock is just extra noise.

When foil is better than paper

A lot of experienced cultivators skip paper entirely and go straight to foil. That is not because paper is useless. It is because foil is non-absorbent, easy to keep sterile, and often easier for collecting spores afterward.

So if the question is strictly the best paper for spore prints, cardstock is a strong answer. But if the real question is the best surface overall, foil deserves a serious look. It does not shed fibers, and it can be cut, wrapped, and stored with minimal fuss.

There is a trade-off, though. Foil tears more easily, and some people prefer the visual contrast of white cardstock when checking print quality. Paper also feels more organized for labeling and archiving, especially if you keep a larger collection.

That is why many enthusiasts use both. Cardstock for clarity and record-keeping, foil for easy transfer and lower absorbency.

How to choose the right paper for your setup

The right material depends on what you care about most after the print is made. If you want easy viewing and straightforward labeling, plain white cardstock makes the process clean and familiar. If you want the least absorbent surface possible, paper may not be the winner at all.

Humidity matters too. In a drier environment, cardstock behaves predictably and dries well. In a more humid room, thin paper becomes even less forgiving, and foil starts to look better. The wetter the conditions, the more absorbency becomes a liability.

Storage plans also matter. If you are making a print for short-term observation, material choice is more flexible. If you are planning long-term storage, consistency matters more. Thick, plain, uncoated material gives you fewer surprises later.

Common mistakes that ruin a good print

Most bad prints are not caused by the cap alone. They are caused by handling shortcuts. Using textured paper, touching the print too soon, or storing it before it is fully dry will undo even a strong deposit.

One common mistake is assuming any white paper is good paper. Bright white photo stock, resume paper, and coated stationery are not the same as plain cardstock. Surface chemistry matters.

Another is overpacking the print while it still holds moisture. Paper can look dry on the edges and still trap dampness underneath the center. If you seal it too early, you create the kind of environment that invites contamination and degradation.

Labeling is another small thing that becomes a big thing later. Write on the paper before use if possible, or in an area far from the print zone. Pressing down with a pen after the print is made can disturb the deposit.

A simple standard that works

If you want a repeatable system, cut plain white uncoated cardstock into small squares, keep them clean and dry, and pair them with a cover during printing so airborne debris stays off the surface. After the print forms, let it dry fully before packaging.

That basic method works because it reduces variables. You are not fighting paper curl, glossy coatings, or weak contrast. You are using a surface that behaves in a predictable way and stores neatly.

For sellers, collectors, and hobbyists who want a practical default, this is usually the best paper for spore prints without turning the process into a materials experiment. It is affordable, easy to replace, and simple to organize in batches.

Paper quality matters more than brand name

You do not need luxury stationery for a better print. What matters is the paper specification, not the marketing on the package. Look for plain, uncoated, white cardstock with a smooth but not slick finish.

Avoid scented paper, recycled stock with heavy flecking, glossy finishes, and anything labeled weatherproof or photo-grade. Those features may be useful in other contexts, but they do not help here.

This is one of those areas where simple wins. A clean surface, solid handling, and proper drying will outperform expensive paper with the wrong finish every time.

At Myceli Nation, we see the same pattern again and again: growers get better results when they standardize the small details. Pick a material that stays flat, stays clean, and stays predictable, and the rest of your workflow gets easier from there.

If you have to choose just one paper product, go with plain white cardstock and keep a few foil sheets on hand for comparison. The best setup is the one that gives you clean prints you can trust, not the one that looks the most polished on day one.

Posted on

How Long Do Spore Prints Last?

How Long Do Spore Prints Last?

A fresh print can look almost unchanged months later, which is why so many collectors ask the same thing: how long do spore prints last? The short answer is that a well-made, well-stored print can remain usable for years. The less satisfying but more accurate answer is that storage conditions, handling, moisture, and contamination matter just as much as age.

If you are building out a personal collection or deciding between formats, shelf life is one of the main reasons prints stay popular. They are compact, easy to store, and reliable when treated correctly. But they are not indestructible, and assuming every old print is still in top condition is where people get disappointed.

How long do spore prints last in real conditions?

In practical terms, many spore prints can last 1 to 3 years without major issues when stored in a cool, dark, dry place. Some remain viable beyond that, sometimes much longer, but that is where the phrase it depends really starts doing heavy lifting.

A print stored carefully in foil or sterile paper, sealed against moisture, and left undisturbed in stable temperatures has a much better chance of aging well than one kept in a humid drawer, handled often, or exposed to heat. Viability tends to decline gradually, not all at once. That means an older print might still contain viable spores, just fewer of them or less predictable performance compared with a newer sample.

For microscopy-focused buyers and hobbyists who want dependable material on hand, age alone is not the best measure. Condition is. A two-year-old print that stayed dry and sealed can easily be in better shape than a six-month-old print that picked up condensation or contamination.

What actually affects spore print shelf life?

The biggest factor is moisture. Spores hate swings between dry storage and accidental humidity exposure. If a print absorbs moisture during storage, contamination risk goes up fast, and viability can drop just as quickly. This is one reason foil prints and properly sealed packaging are so common in the mycology space.

Temperature is next. Room temperature is usually fine for shorter-term storage, but cooler and more stable is generally better for long-term preservation. Heat accelerates degradation. A print left in a hot car, near a sunny window, or in a warm grow area is going to age much faster than one stored in a dark cabinet or refrigerated properly.

Light matters too, though usually less than moisture and heat. Direct sunlight is the real issue. UV exposure can damage spores over time, and clear storage without protection is not ideal.

Then there is handling. Every time a print is opened, touched, moved around loosely, or exposed to open air, the chance of contamination rises. Even if the spores themselves remain viable, a contaminated print becomes less useful and less trustworthy. The more a print is treated like a collectible that needs protection rather than a scrap of paper to be checked constantly, the longer it tends to hold up.

Best storage practices if you want prints to last

If your goal is to maximize lifespan, the basic rule is simple: keep prints dry, cool, dark, and sealed. That sounds obvious, but most shelf-life problems come from ignoring one of those four.

Foil is a common favorite because it helps protect the print surface and keeps handling to a minimum. If the print is already in foil, there is usually no reason to repackage it unless the original packaging has been compromised. From there, placing it in a sealed bag or container with minimal air exposure helps create a more stable storage environment.

For longer-term storage, refrigeration can help, but only if done carefully. The refrigerator itself is not magic. In fact, a poorly sealed print in a fridge can pick up condensation, which creates the exact problem you were trying to avoid. If you refrigerate, the print should be well sealed and allowed to return to room temperature before opening the container. That reduces the chance of moisture forming on the surface.

Freezing is more controversial. Some growers avoid it because ice crystal formation and moisture issues can damage material if packaging is not perfect. For most hobbyists, a cool, dry refrigerator setup is safer and more practical than trying to deep-store prints in a freezer.

Signs a spore print may be too old or poorly stored

Age by itself is not a red flag. What you want to look for is evidence that the print has been compromised.

If the print shows visible moisture damage, smearing beyond normal handling marks, odd discoloration, or anything fuzzy or suspicious on the surface or packaging, that is a sign the sample may not be in great condition. A musty smell or any obvious contamination is another warning. Prints should not look wet, moldy, or heavily disturbed.

Sometimes there are no dramatic visual clues, and the only issue is reduced viability from age. That is harder to spot. An older print can appear perfectly fine while still performing less reliably than a fresh one. That is one reason serious collectors and enthusiasts often rotate stock rather than treating prints as permanent inventory.

Are spore prints longer lasting than syringes?

Often, yes. Spore prints are widely valued for storage life because they are a relatively simple, low-moisture format. Syringes can be extremely convenient, but they contain water, and that changes the shelf-life equation.

A properly stored print often has the edge in long-term storage because dry material generally keeps better than liquid-based material. That does not mean prints are always the better choice. It depends on what you need. If convenience and ready-to-use format matter more, syringes may still be the right fit. If you are thinking about building a collection or storing material for longer periods, prints are often the more durable option.

For buyers comparing formats, this is one of those practical trade-offs that matters more than hype. Prints usually win on compact storage and longevity. Syringes often win on ease and speed. Neither format is automatically better in every situation.

How to make older prints more worth keeping

If you already have prints that have been sitting for a while, the first step is to stop introducing new risk. Do not repeatedly open and inspect them unless you have a reason. Keep them sealed, protected from humidity, and organized by date so you know what you are working with.

Labeling matters more than people think. A print with no date, no strain identification, and no record of storage conditions becomes guesswork fast. If you collect multiple varieties, good labeling helps you rotate older stock first and avoid letting useful material disappear into the back of a drawer.

It also helps to store prints in a dedicated container rather than mixed in with miscellaneous supplies. Grow areas, kitchens, garages, and bathrooms are all bad long-term homes because they tend to have temperature swings, moisture, or both. A stable closet, cabinet, or sealed refrigeration setup is usually a better move.

So, how long do spore prints last if you do everything right?

If you keep them dry, sealed, and cool, spore prints can remain viable for several years, and sometimes longer. The realistic answer for most enthusiasts is that peak reliability is usually in the earlier part of that window, while older prints become more variable rather than instantly useless.

That is why storage discipline matters so much. Shelf life is not just about the calendar. It is about whether the print stayed protected from the three biggest enemies: moisture, heat, and contamination.

For anyone shopping formats, comparing inventory, or planning ahead, prints remain one of the most practical options in the mycology world. They store small, travel through your collection easily, and reward careful handling better than almost any other format. Treat them like long-term inventory, not an afterthought, and they will usually return the favor.

If you want your collection to stay dependable, the best time to protect a print is the day you get it, not the day you realize it has been sitting in a humid drawer for a year.

Posted on

How to Store Spore Prints the Right Way

How to Store Spore Prints the Right Way

A spore print can stay viable far longer than most beginners expect, but only if you treat it like a delicate dry sample instead of just another piece of paper or foil. If you’re figuring out how to store spore prints, the real goal is simple: keep them dry, clean, dark, and undisturbed so the spores are protected from moisture, heat, and contamination.

That sounds straightforward, but storage mistakes usually happen in the details. A print gets handled with bare fingers, tucked into a humid drawer, sealed before it’s fully dry, or moved in and out of the fridge until condensation forms. None of those issues look dramatic in the moment, yet they can shorten shelf life fast.

How to Store Spore Prints Without Damaging Them

The best storage setup depends on how long you plan to keep the print and how often you expect to access it. A print you plan to use soon can be stored more simply than one you’re holding for long-term collection. Either way, the basic rules do not change.

First, make sure the print is completely dry before it goes into any final packaging. Even a small amount of trapped moisture can create problems later. Dry prints are more stable, less likely to smear, and far less likely to develop contamination issues during storage.

Second, minimize handling. Every time a print is opened, repositioned, or touched, you increase the chance of introducing moisture, oils, dust, or stray particles. That does not mean you need a lab-style setup, but it does mean a little discipline goes a long way.

Third, protect the print from temperature swings and direct light. Consistent conditions matter more than fancy storage gear. A basic, well-organized storage method in a stable environment will usually outperform a more complicated setup that gets opened constantly or kept somewhere warm.

The Best Materials for Storing Spore Prints

Most prints are stored on foil, paper, or another flat sterile surface, then placed into a protective sleeve or envelope. If you are organizing your own collection, the safest approach is usually to keep the original print material intact and place it inside a clean secondary barrier.

Foil is popular because it is easy to fold, easy to label, and does a good job shielding the print. Paper can work too, though it is generally a little less protective against accidental moisture exposure. For the outer layer, many growers and collectors use small zip bags, specimen envelopes, or sealed sleeves. The outer packaging is there to reduce exposure, not to press on the print itself.

A rigid container can help if you are storing multiple prints together. Think of it as protection against bending, crushing, and drawer chaos. A small storage box with labeled sections is often enough. You do not need an elaborate system, but you do want something more secure than loose prints stacked under miscellaneous supplies.

If you’re planning to store prints for months rather than days, adding a small desiccant pack nearby can help maintain a dry environment. The key word is nearby. You want dry storage conditions, not direct contact that could shift or damage the print.

Room Temperature or Refrigeration?

This is where a lot of people overcomplicate things. For short- to medium-term storage, a cool, dark, dry place at room temperature is often perfectly adequate. A drawer, cabinet, or dedicated storage box away from heat sources can work very well, especially in a climate-controlled home.

Refrigeration can make sense for longer-term storage, but it comes with trade-offs. A fridge offers lower temperatures, which can help preserve viability, yet it also introduces one of the biggest risks: condensation. If prints are repeatedly moved from cold storage into warmer room air, moisture can form inside or around the packaging. That defeats the whole point.

If you choose refrigeration, keep the prints sealed in moisture-resistant packaging and avoid frequent temperature changes. Store them in a stable part of the refrigerator, not in the door where conditions fluctuate the most. Then, before opening the package, let it return to room temperature first. That small step helps prevent condensation from landing on the print.

Freezing is usually not the first choice for spore prints. It can create unnecessary moisture and temperature stress if the print is not packaged extremely well. For most hobbyists and collectors, cool and dry beats overly aggressive cold storage.

A Simple Storage Process That Works

If you want a reliable routine, keep it simple. Start by confirming the print is fully dry. Fold or protect the print surface so the spores are shielded. Place it in a clean labeled envelope, sleeve, or bag, then store that inside a secondary container in a dark, dry location.

Labeling matters more than people think. Include the variety, date, and any other detail that helps you identify the print later without reopening everything. Once you have more than a few samples, organization stops being optional. It is much easier to preserve prints when you are not constantly sorting through them by hand.

For collectors with a growing inventory, category-based organization helps. You might sort by species, variety, acquisition date, or intended use. The point is not to build a museum archive. The point is to reduce handling and confusion.

Common Storage Mistakes

The most common mistake is sealing a print before it has dried enough. The second is assuming any sealed bag is automatically safe. If moisture gets trapped inside, the packaging becomes part of the problem.

Another frequent issue is excessive handling. People often open prints just to check them, compare them, or move them into a new storage format. Unless there is a clear reason to reopen one, leave it alone. Stable storage is better than constant tinkering.

Heat is another silent problem. Storing prints near a sunny window, electronics, heaters, or a warm grow area can reduce longevity. Even if the print looks fine, warmer conditions generally work against long-term preservation.

Poor labeling also causes avoidable damage. When prints are unlabeled or loosely grouped, people end up opening multiple packages to identify one sample. That creates repeated exposure that could have been avoided with a pen and thirty seconds of effort.

How Long Can Spore Prints Last?

There is no single shelf-life guarantee because storage conditions, print quality, and handling all matter. Some prints remain usable for quite a long time when stored well, while others lose viability faster because of heat, humidity, or contamination introduced early on.

That uncertainty is why storage should be viewed as risk reduction, not perfection. You are not controlling every variable forever. You are giving the print the best possible conditions from the start. Dryness, darkness, and stable temperatures consistently matter more than gimmicks.

If a print is especially valuable to your collection, it makes sense to store it with more care and open it less often. High-turnover samples can be kept in a more accessible system, while long-term keepsakes deserve extra protection.

How to Store Spore Prints in a Growing Collection

Once your collection expands beyond a couple of prints, storage becomes part preservation and part inventory management. This is where many enthusiasts level up their setup. A clean box, labeled sleeves, and a simple tracking method can save time and prevent accidental damage.

A dedicated storage area is worth it. Do not mix prints in with random tools, substrate supplies, or humid cultivation gear. Keep them in their own dry zone. If you shop across different formats, this is also a good way to separate prints from syringes, cultures, and other mycology supplies that have different storage needs.

That organized approach fits the way many collectors already shop and build out their setups. At Myceli Nation, the appeal of a broad catalog is having options in one place, but once those items arrive, storage should stay format-specific. What works for one product type is not always the right call for another.

When to Replace or Retire a Print

Sometimes the best storage decision is recognizing when a print has been compromised. If the packaging shows clear moisture exposure, if the print has been handled excessively, or if the sample was stored in poor conditions for a long stretch, it may no longer be worth treating as a dependable part of your collection.

That does not mean every older print is unusable. It means you should be realistic. Age alone is not always the problem. Sloppy storage usually is. A well-kept older print can be in better shape than a newer one that spent a month in a warm, humid room.

Good storage is less about expensive accessories and more about consistency. Keep prints dry, label them clearly, protect them from heat and light, and resist the urge to fuss with them once they are packed away. Your future self will appreciate having a clean, organized collection that still reflects the care you put into it from day one.

Posted on

How to Move Spore Prints to Agar

How to Move Spore Prints to Agar

A clean plate tells you the truth fast. When you transfer spore prints to agar, you get a direct look at what is actually growing, which is why many cultivators prefer agar work over blind inoculation methods when they want better selection and cleaner results.

For anyone building a more reliable workflow, agar is where random potential starts turning into visible growth patterns. You can separate healthy mycelium from weak sectors, spot contamination early, and make smarter decisions before moving into grain or liquid culture. That extra step takes a little more patience, but it usually saves time, materials, and frustration later.

Why move spore prints to agar?

A spore print carries a lot of possibility, but it also carries uncertainty. Spores are not a pure culture, and they do not germinate into a uniform colony. When they land on agar, you are usually looking at multiple genetics competing across the same surface, along with the chance of hitchhiking contaminants from collection, storage, or handling.

That is exactly why agar is useful. Instead of guessing, you can observe. Germination shows up on the plate, contamination often reveals itself early, and promising growth can be transferred away from problem areas. If your goal is cleaner expansion and more control, agar gives you a working view of the culture rather than a mystery inside a jar.

For hobbyists shopping by format, this is also the practical difference between owning a print and actually working it into a usable culture. A print is compact, collectible, and easy to store. Agar is the stage where that print becomes actionable.

What you need before transferring spore prints to agar

This step does not require a full lab, but it does reward good habits. You want pre-poured agar plates or freshly poured plates that have cooled and set properly, a sterile scalpel or inoculation loop, gloves, alcohol for surface prep, and a still-air box or another controlled workspace. Many growers also keep parafilm or plate tape nearby to seal dishes after inoculation.

The condition of the print matters too. A clean, well-stored print is easier to work with than one that has seen humidity swings or repeated handling. If the print is dense, you only need a very small amount of spore material. More is not better here. Heavy inoculation can create crowded germination and make it harder to isolate clean growth.

Plate choice matters a bit more than beginners sometimes expect. A standard nutrient-rich agar recipe works well for germination, but if you already know a print may be messy, a lower-nutrient plate can slow aggressive contaminants enough to make transfers easier. It depends on your comfort level and how much cleanup work you expect.

The actual transfer: spore prints to agar step by step

Start with the cleanest workspace you can manage. Wipe down your work surface, prepare your tools, and organize everything before opening the print or plates. The more you fumble mid-transfer, the more chances you give airborne junk to land where it should not.

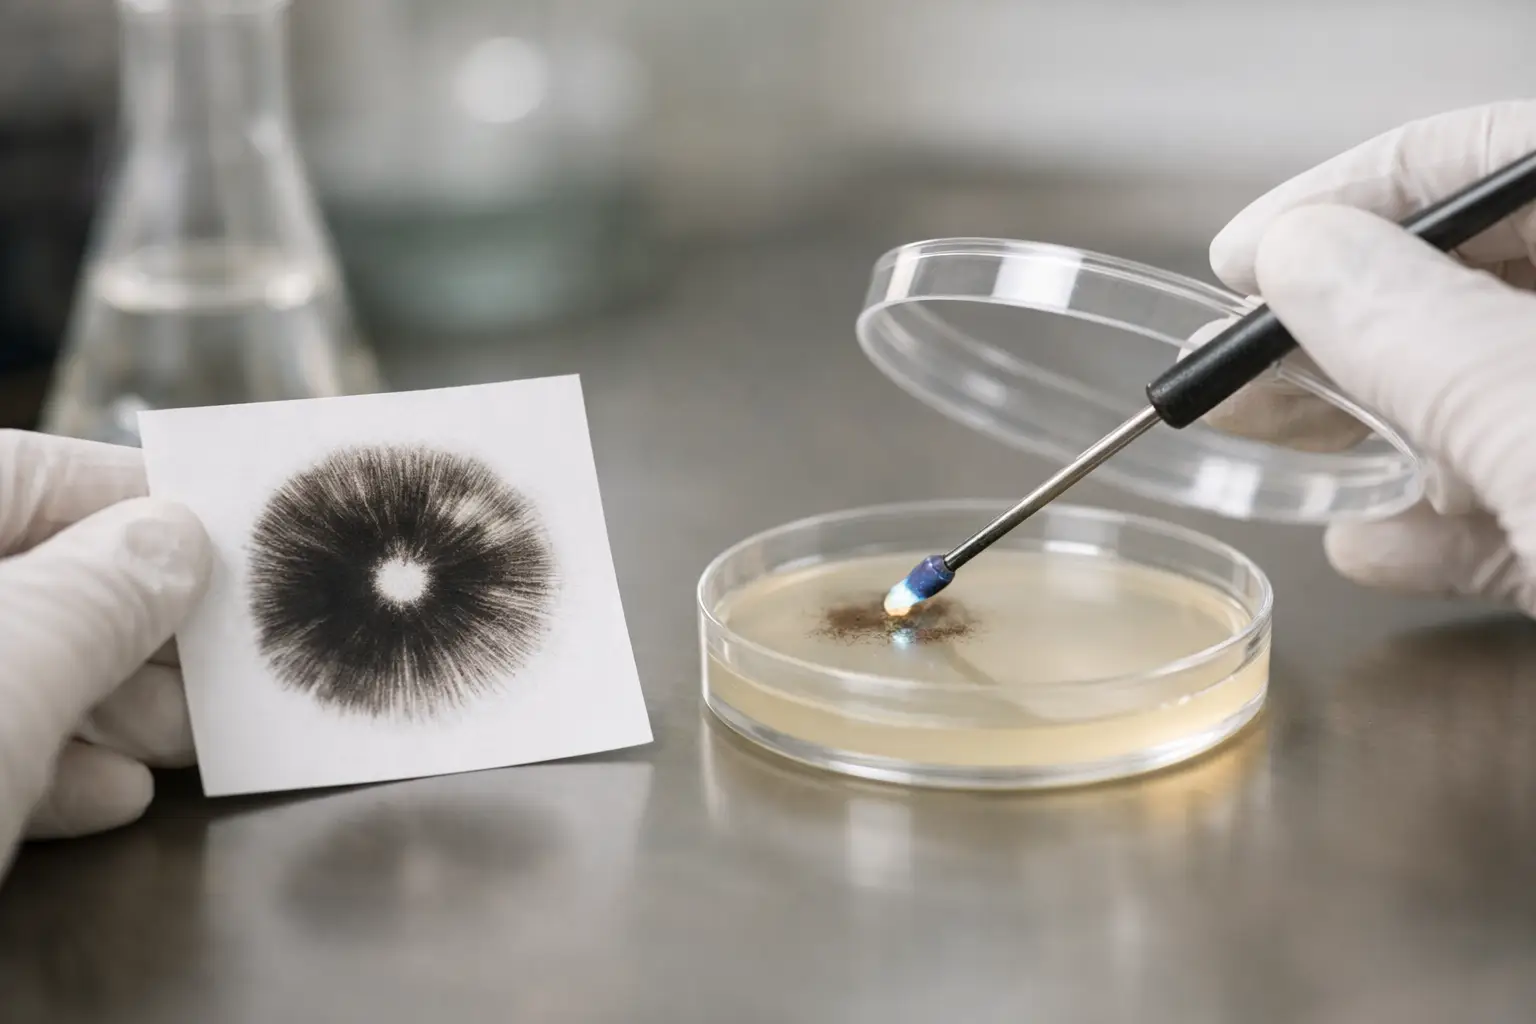
If you are using a scalpel, sterilize the blade first and let it cool. Then open the print just enough to access a small section. Lightly scrape a tiny amount of spores from the print. You are not trying to carve out a visible pile. A faint dusting is enough.

Crack the agar plate lid just enough to work, then touch the blade to the agar surface in a few spots or make a gentle zigzag across one area. Some cultivators prefer placing spores in one small section so they can track germination more easily. Others spread them lightly across the plate for multiple starting points. Both can work. If you are newer to agar, keeping the inoculation area compact usually makes observation simpler.

Close the plate quickly and seal it. Label it with the variety, date, and any notes about the print source. Then incubate it in a stable environment at a reasonable room temperature. Avoid overheating. Warm does not automatically mean faster, and excess heat can favor contamination just as easily as growth.

What germination looks like on agar

This is where patience starts doing real work. Spores do not always germinate on the same timeline, and different prints can behave very differently. Some show life fairly quickly. Others take longer than expected even under good conditions.

Early germination often appears as very fine, faint growth – almost wispy at first. As it develops, you may see multiple points of growth expanding outward and eventually intersecting. Since spores represent mixed genetics, this stage rarely looks perfectly uniform.

Contamination can show up before or after germination. Bacterial issues may look wet, shiny, or irregular. Mold contaminants often present as fast-growing growth with unusual texture or colors. The value of agar is not that it magically prevents these issues. The value is that you can see them while there is still room to respond.

When and how to make your first transfer

The first plate from a print is usually just the beginning. If your germination plate shows healthy-looking mycelium and areas that appear clean, the next move is to transfer a small wedge from the leading edge of promising growth onto a fresh plate.

Take that wedge from the outer edge, not the crowded center. The center is where spores first landed and where contaminants, competing sectors, or messy growth are most likely to be concentrated. The cleaner edge gives you a better chance of carrying forward the strongest visible growth while leaving junk behind.

This is also where restraint matters. A tiny transfer is better than a bulky chunk. Small cuts are easier to place, recover faster, and reduce the chance of bringing over contamination you did not notice.

You may need multiple rounds of transfers before a plate looks consistently clean and uniform enough for further work. That is normal. Agar work rewards repetition more than speed.

Common mistakes with spore prints to agar

The most common mistake is using too many spores. A thick streak can turn the plate into a traffic jam of germination points, making it harder to identify clean sectors and easier for contamination to hide.

The second is opening plates too wide or too long. Even a good agar recipe cannot save sloppy sterile technique. Controlled movement matters more than fancy gear.

Another mistake is transferring too early or too late. If you move growth before it is clearly established, you may not get a strong recovery. If you wait too long, fast growth can overrun the plate and make clean isolation harder. There is a sweet spot where the edge is active, visible, and still separated enough to work with.

People also misread normal variation as a bad plate. Spore germination often creates uneven sectors at first. That does not automatically mean the culture is unusable. It means you may need another transfer or two before the plate settles into something cleaner.

Choosing between prints, syringes, and cultures

For shoppers comparing formats, spore prints to agar can be one of the most flexible starting points if you like hands-on culture work. Prints store well, ship compactly, and give you the chance to begin from a broad genetic pool. That is appealing if your interest is in observation, selection, and building a culture library step by step.

Spore syringes can feel more immediate, but they still carry many of the same uncertainties as prints because they begin with spores rather than a clean isolate. Established cultures offer more predictability, though they trade some of that early-stage selection for convenience.

So the right format depends on what kind of cultivator you are. If you want maximum control at the plate level, prints and agar make sense. If you want a faster on-ramp, another format may fit better. A solid shop should make all of those options easy to compare, whether you are browsing fan favorites, trying a new variety, or stocking up on plate-ready materials.

Building a better agar workflow over time

Once you have done a few transfers, patterns start becoming obvious. You learn how little spore material you really need, how different plates behave, and how much cleaner your downstream work becomes when you start with a better agar culture.

That is the real advantage here. Moving from spore prints to agar is not just a technique. It is a filter. It helps you screen, select, and organize your work with more confidence, whether you are testing a new print or refining a repeatable process inside your own setup.

If you are building out your bench one piece at a time, start simple and get consistent before adding complexity. Clean hands, clean plates, careful transfers, and good notes will take you further than chasing shortcuts ever will.

Agar has a way of rewarding the growers who slow down just enough to see what the culture is telling them.

Posted on

Spore Prints for Sale: What Smart Buyers Check

Spore Prints for Sale: What Smart Buyers Check

When buyers search for spore prints for sale, they usually are not looking for hype. They want clean options, recognizable strain names, clear format choices, and a storefront that makes comparison easy. In a niche category, the difference between a quick, confident order and a frustrating one often comes down to product clarity.

Why spore prints still matter

Spore prints have held their place in mycology for a reason. They are compact, straightforward, and familiar to buyers who like having a classic format in their collection. For many enthusiasts, prints offer a practical way to browse by strain, compare availability, and choose exactly what fits their preferences without sorting through unrelated products.

They also appeal to shoppers who already know the names they want. If you are searching for fan favorites like Golden Teacher, B+, Blue Meanie, or Lizard King, a well-organized print selection makes the process faster. You are not decoding vague listings or trying to guess whether a seller actually specializes in mycology. You are simply shopping within a category that makes sense.

That matters more than it sounds. In specialty ecommerce, convenience is part of product quality. A broad catalog is useful only if it is easy to navigate.

What to look for in spore prints for sale

The first thing smart buyers check is strain selection. A strong store does not rely on one or two popular names and call it variety. It offers enough depth for both first-time buyers and experienced enthusiasts who want to compare standard choices with harder-to-find options. Breadth gives you flexibility, especially if your first pick is out of stock or if you are building a larger order.

The second thing is how the catalog is organized. Good category structure saves time. You should be able to shop by product type, browse featured items, spot best sellers, and move into related formats without hunting through clutter. A clean storefront signals that the seller understands how mycology buyers actually shop.

The third is product presentation. Clear naming, straightforward descriptions, and visible bundle options all help. If a listing feels vague, the buying experience usually will too. Strong ecommerce pages remove hesitation. They tell you what the product is, how it fits within the wider catalog, and whether there are adjacent options worth comparing.

Strain variety is more than a nice extra

In this market, variety is not just about showing off a long menu. It serves different buying styles. Some customers know exactly what they want and head straight for a familiar strain. Others like to compare multiple options side by side before deciding. A deep catalog supports both.

It also helps when you want to place one consolidated order instead of piecing products together from different shops. That is a major advantage of buying from a mycology-focused retailer rather than a general novelty seller. You can browse prints, spores, ready-to-inoculate products, edible cultures, and related supplies in one place.

For a lot of enthusiasts, that one-stop setup is the real value. It cuts down on guesswork and makes it easier to stay inside a store that already understands the category.

How prints compare with other spore formats

A buyer looking at spore prints for sale is usually comparing them against other formats, even if only mentally. That comparison matters because the best choice depends on shopping preference, not just availability.

Prints have a classic appeal and a compact footprint. They are easy to add to a larger order and easy to browse when you are focused on strain names first. If your main goal is selecting from a broad lineup, prints often make that process feel more direct.

Other formats may suit shoppers who prefer different handling or who are building a more specific cart around cultivation supplies. That does not make one format universally better than another. It just means product choice is situational. A well-built store should support that comparison instead of forcing every customer into the same path.

This is where category design really earns its keep. When the shop makes it simple to move between prints, syringes, bundles, and related items, buyers can choose based on preference instead of settling for whatever they found first.

What makes an online store worth buying from

A niche product deserves a niche-savvy storefront. That does not mean overcomplicated language or endless technical detail. It means the business clearly understands mycology, stocks products accordingly, and presents them in a way that respects the buyer’s time.

A strong seller usually gets a few basics right. Inventory feels intentional rather than random. Popular strains are easy to find. Categories are distinct. Promotions and bundles are visible without overwhelming the page. Shipping information is easy to locate. The overall impression is that the store was built for this audience, not retrofitted for it.

Community also matters. In a category like this, buyers tend to return to brands that feel plugged into the culture. Educational content, newsletter engagement, affiliate programs, and broader ecosystem features can reinforce trust because they show the business is active, specialized, and invested in serving enthusiasts beyond a single transaction.

That is one reason a destination-style shop stands out. It becomes more than a product page. It becomes part of The Mycelium Network, where browsing, learning, and ordering all happen under one roof.

Buying with bundles in mind

Bundles are easy to overlook when you are focused on a single print, but they can be one of the smartest ways to shop. If you already know you want more than one strain or if you are planning a broader order, bundles can simplify the process and make the cart feel more intentional.

They also help newer buyers compare options without overthinking every individual listing. Instead of building from scratch, you start with a grouped selection and refine from there. That can be especially useful in a large catalog where decision fatigue is real.

Still, bundles are not always the right call. If you are after one specific strain and nothing else, an individual listing may be the cleaner choice. The best ecommerce setup gives you both paths.

Worldwide access changes the buying equation

For international buyers, availability and shipping reach are often just as important as product range. A store can have an impressive catalog, but if ordering across borders is unclear or inconsistent, that catalog loses value fast.

This is why worldwide shipping is not just a logistics feature. It expands access to a broader community of enthusiasts who want a reliable source without bouncing between regional suppliers. For specialty products, reach matters. It can be the difference between bookmarking a store and actually becoming a repeat customer.

For US shoppers, the same principle applies in a different way. Fast category access, direct online ordering, and broad inventory all reduce friction. The easier it is to find what you want and check out with confidence, the more likely you are to come back.

The best buying experience feels simple

There is a pattern behind strong specialty stores. They make complex inventories feel easy to shop. You can move from fan favorites to exotics, from single items to bundles, and from browsing to checkout without feeling lost.

That simplicity is not accidental. It comes from understanding the audience. Mycology enthusiasts do not need watered-down language, but they also do not want a store that hides products behind clutter or assumes every visitor shops the same way. The sweet spot is clear, direct, and informed.

If you are comparing spore prints for sale, start with the basics that actually affect the purchase: strain depth, category structure, product clarity, bundle flexibility, and shipping reach. Those are the details that separate a forgettable listing from a store you will actually want to use again.

A good shop does more than stock products. It makes choosing them feel easy, and that is usually the clearest sign you are in the right place.

Posted on

How Long Do Mushroom Spore Syringes Last?

How Long Do Mushroom Spore Syringes Last?

If you have ever pulled a spore syringe from the fridge and wondered whether it is still good, you are asking the right question. How long do mushroom spore syringes last depends less on the calendar alone and more on storage, handling, and how stable the syringe has stayed since the day it arrived.

For most buyers, a well-made mushroom spore syringe can remain usable for several months and often up to a year when stored correctly. Some last longer, some lose performance sooner. That range is not a cop-out – it reflects real-world variables like temperature swings, contamination risk, and how often the syringe has been handled.

How long do mushroom spore syringes last in real conditions?

In practical terms, most mushroom spore syringes hold up best when they are kept refrigerated, protected from light, and left sealed until use. Under those conditions, many growers and collectors treat 6 to 12 months as a reasonable working window. If storage has been especially consistent, viability may extend beyond that, but reliability usually becomes less predictable as time passes.

At room temperature, the timeline usually shortens. A syringe that sits in a warm closet, on a sunny shelf, or in a mailbox for too long may still contain viable spores, but you are increasing the odds of weaker performance or contamination issues. Short exposures during shipping or setup are one thing. Long-term warm storage is another.

That distinction matters because spores are durable, but the syringe itself is still a moisture-rich environment. Over time, even a good syringe can degrade if it is exposed to heat or handled carelessly.

What affects spore syringe shelf life?

The biggest factor is temperature. Cool, stable refrigeration generally gives a syringe its best chance of staying viable for the long haul. What hurts shelf life is repeated warming and cooling, especially if the syringe moves in and out of storage every few days. Constant fluctuation creates stress and increases the chance of condensation and handling errors.

Cleanliness at the time of preparation also matters. A professionally prepared syringe starts with a better foundation than one made in inconsistent conditions. If the solution was clean, the syringe was packed properly, and the cap stayed secure, it has a stronger chance of aging well.

Light exposure is another piece of the puzzle. Direct sunlight and prolonged bright light are not doing your syringe any favors. Dark, cool storage is the safer play.

Then there is handling. Every time a syringe is unbagged, examined closely, shaken aggressively, or opened before use, you create another opportunity for trouble. Even if no obvious contamination appears, unnecessary handling can shorten the useful life of the product.

Best way to store a mushroom spore syringe

A refrigerator is usually the safest spot, provided it stays within a normal cool range and does not freeze. Store the syringe in a clean bag or container so it is protected from spills, food contact, and temperature swings from frequent door openings. A back shelf is often better than the fridge door because the temperature tends to stay more stable.

Freezing is usually not recommended. While spores themselves can survive harsh conditions better than many people assume, a syringe solution is not something you want cycling through freezing and thawing. That can affect the liquid environment and reduce consistency.

If refrigeration is not available for a short period, keep the syringe in a cool, dark place and avoid heat. That is a short-term backup, not a best practice. A dresser drawer in an air-conditioned room is better than a garage, windowsill, or car.

Before use, let the syringe come closer to room temperature naturally for a bit rather than rushing it. That small step can make handling easier and reduce condensation around the exterior.

Signs a spore syringe may be too old or compromised

Age alone does not always tell the story. A six-month-old syringe stored well may be in better shape than a one-month-old syringe that sat in the heat. The better question is whether the syringe still looks and behaves like a clean product.

Cloudiness that seems unusual, odd discoloration, foul odor, leaking around the cap, or visible foreign growth are all warning signs. Some spore syringes naturally show dark clumps or suspended matter because spores gather together in the solution. That is normal. Strange colors, slimy appearance, or anything that looks actively off is not.

If the plunger sticks badly, the seal looks damaged, or the packaging appears tampered with, that is also reason to be cautious. Product integrity matters just as much as spore age.

One tricky part for newer buyers is telling normal spore clustering from contamination. Spore clumps often break apart with gentle shaking and still look like dark particulate matter suspended in otherwise normal liquid. Contamination tends to look more irregular, murky, or suspiciously alive. When in doubt, it is smarter to trust your instincts than gamble on a questionable syringe.

Do different strains or varieties last longer?

Buyers often assume shelf life changes dramatically from one variety to another, but storage conditions usually matter more than the label. A properly prepared syringe from one fan favorite variety and a properly prepared syringe from another will often have a similar storage window if both are kept under the same conditions.

That said, individual batches can behave differently. Spore density, preparation quality, and how long the syringe spent in transit can all influence how fresh it feels when it reaches your hands. This is one reason experienced shoppers tend to buy from dedicated suppliers that understand packaging, product turnover, and inventory handling.

Can an old spore syringe still work?

Yes, sometimes surprisingly well. A syringe that is older than the ideal window may still contain viable spores, especially if it has been refrigerated and left undisturbed. The trade-off is consistency. Older syringes may perform more slowly, less evenly, or with a lower success rate than fresher stock.

That is why shelf life should be viewed as a reliability curve, not an expiration switch. There is no universal day when every syringe suddenly stops being useful. Instead, your odds gradually change over time.

For buyers who like to keep options on hand, it makes sense to rotate inventory. Use older syringes first, label purchase dates, and avoid buying more than you can reasonably store well. A broad catalog is great, but only if your storage habits keep pace with your collection.

Buying habits that help you get the most from shelf life

The best storage strategy starts before the package even arrives. Ordering from a seller that moves inventory consistently and ships with care gives you a better starting point than buying unknown stock that may have been sitting around too long. Freshness is not just about what happens in your fridge. It begins with sourcing.

It also helps to buy with a plan. If you know you want to compare varieties, a smaller, more manageable order can be smarter than overstocking and letting syringes sit for too long. Enthusiasts love options, but shelf life is one of those areas where discipline pays off.

For shoppers building out a personal lineup of microscopy supplies, keeping products organized matters more than people think. Label by arrival date, store them consistently, and avoid tossing them loosely into crowded storage. A simple system prevents waste.

FAQ: how long do mushroom spore syringes last?

Should I refrigerate mushroom spore syringes right away?

Yes, if you are not using them immediately. Refrigeration usually gives you the best shot at preserving viability and product quality.

How long do mushroom spore syringes last at room temperature?

Usually less time than refrigerated syringes. A brief period at room temperature is often fine, but long-term warm storage can shorten usable life significantly.

Is it normal to see black clumps in a spore syringe?

Yes. Spores often clump together, and gentle shaking can redistribute them. Clumping by itself is not usually a problem.

Can I use a syringe after one year?

Possibly. If it was stored well and still looks clean, it may remain viable. Just expect less predictability than you would get from a fresher syringe.

A good spore syringe is not just about what you buy – it is about how you store it from day one. Keep it cool, keep it clean, and keep your expectations realistic, and you will give yourself the best chance of getting solid use out of every syringe in your lineup.

Posted on

How to Store Mushroom Spore Syringes Right

How to Store Mushroom Spore Syringes Right

A spore syringe can look perfectly fine on the outside and still lose quality fast if it sits in the wrong spot for a week. If you’re wondering how to store mushroom spore syringes, the answer is less about complicated equipment and more about controlling a few basics well – temperature, light, cleanliness, and patience.

For most buyers, storage mistakes happen after checkout, not before. A syringe gets left in a hot mailbox, tossed into a bright room, or moved in and out of the fridge every other day. None of that feels dramatic in the moment, but it adds up. Good storage is what keeps your collection in better condition and gives you more confidence when you’re ready to use it.

How to store mushroom spore syringes without shortening shelf life

The best environment is cool, dark, and stable. That usually means refrigeration, but not freezing. A standard refrigerator is the safest choice for most hobbyists because it keeps temperatures low enough to slow degradation without pushing the syringe into harsher conditions.

A practical target is around 35 to 46 F. You do not need lab-grade precision, but you do want consistency. The back of a refrigerator shelf usually works better than the door because the door gets frequent temperature swings every time it’s opened.

Light matters too. Spore syringes should stay out of direct sunlight and away from bright indoor light for long-term storage. Even if the syringe is in clear plastic packaging, a darker location is still the better move.

Humidity is less of a direct issue when the syringe is properly sealed, but condensation and repeated temperature changes can create problems around the packaging and handling process. That is one reason stable cold storage beats moving syringes from room temperature to fridge and back again.

The best place to keep them at home

If you only have one or two syringes, it’s easy to treat them casually. If you have a few fan favorites in rotation or like to shop by category and keep different strains on hand, organization starts to matter.

A dedicated container inside the refrigerator helps more than people think. It protects the syringes from being bumped, keeps them away from food spills, and reduces unnecessary handling. A clean plastic container or small storage box works well as long as it stays dry and is not airtight enough to trap excess moisture from condensation.

Label visibility also matters. You do not want to pull out five syringes just to find one. Keeping labels facing up saves handling and helps you leave the rest undisturbed.

If refrigeration is not available, a cool interior closet or cabinet can work for short-term storage, but it is not the preferred setup for longer periods. Room-temperature storage is always more vulnerable to seasonal heat, AC fluctuations, and accidental light exposure. It depends on how long you plan to hold the syringe and how controlled your indoor environment really is.

What to avoid when storing spore syringes

Most storage damage comes from a short list of preventable issues. Heat is the biggest one. Leaving syringes in a vehicle, near a window, on top of electronics, or close to kitchen appliances can shorten viability quickly.

Freezing is another common mistake. Colder is not always better. A home freezer can expose the liquid inside the syringe to conditions that are too harsh, and that can compromise the spores. If you’re aiming for preservation, refrigeration is the safer lane.

Repeated handling is also underrated as a problem. Every time a syringe is moved, unwrapped, warmed up, or inspected under bright light, you’re adding wear to something that benefits from being left alone. Spore syringes are not fragile in the dramatic sense, but they do store better when they are not constantly disturbed.

You also want to avoid storing them near kids, pets, or anywhere the cap could be loosened accidentally. Secure storage is basic common sense, especially in a shared household.

Should you keep spore syringes in the fridge?

In most cases, yes. If someone asks how to store mushroom spore syringes for the best shot at long-term quality, refrigeration is the standard answer. It offers a more stable environment than most rooms in the average home.

That said, not every fridge setup is equal. A refrigerator that freezes items in the back, runs warm, or gets opened constantly may not be ideal. Mini fridges can work, but some cycle temperatures aggressively. If you’re using one, it helps to check that it stays in a safe range.

It also makes sense to keep syringes away from the coldest points inside the fridge. You want cool storage, not partial freezing. A middle or upper shelf inside a container is often safer than pressing the syringe directly against the back wall.

How long can they stay in storage?

Shelf life depends on storage conditions, the age of the syringe when received, and how often it has been exposed to temperature swings. There is no honest one-size-fits-all number because viability naturally declines over time, even with proper care.

What you can say with confidence is that cooler, darker, cleaner storage tends to support better longevity than a room-temperature drawer or sunny shelf. If you buy multiple syringes at once, it is smart to plan around realistic use rather than stockpiling more than you can reasonably store well.

For active collectors and microscopy-focused buyers, rotation helps. Use older stock first, label purchase dates if needed, and avoid mixing fresh arrivals with syringes you have already handled repeatedly. That kind of simple system is more useful than guessing based on appearance alone.

Handling before and after storage

Storage is not just where the syringe sits. It is also how you move it in and out of that environment. If a refrigerated syringe is about to be used, let it come closer to room temperature gradually before handling it heavily. That reduces condensation and makes the contents easier to work with.

Shaking is another area where people overdo it. If spores have settled, a gentle mix is usually enough. You do not need aggressive force. The goal is even distribution, not turning routine handling into avoidable stress.

After use, if the syringe is still properly capped and clean, return it to storage promptly. Do not leave it sitting under lights on a work surface longer than necessary. The less time it spends bouncing between conditions, the better.

A simple storage routine that actually works

The most reliable approach is uncomplicated. When your syringe arrives, inspect the packaging, confirm the label, and place it in a clean container in the refrigerator. Keep it out of direct light, avoid the fridge door, and leave it alone until needed.

If you order more than one, separate them in a way that makes sense for how you shop and use them. Some growers organize by strain, some by arrival date, and some by project timeline. Whatever system you choose, consistency matters more than perfection.

This is where a specialized shop experience helps. If you’re buying across multiple formats or picking up a few fan favorites at once, treating storage as part of your routine keeps your collection in better shape. At Myceli Nation, that mindset fits the whole point of The Mycelium Network – access is great, but smart handling after delivery is what protects that value.

Signs your storage setup needs improvement

If you’re constantly moving syringes around to make room, if your fridge runs unpredictably, or if you cannot remember how long something has been sitting there, your setup probably needs tightening up. Storage should feel boring. That is usually a good sign.

A reliable setup is one you do not have to rethink every few days. The fewer variables, the better. Cool temperature, low light, clean storage, and minimal handling will outperform complicated routines almost every time.

For hobbyists and collectors alike, the best answer to how to store mushroom spore syringes is to keep things controlled and simple. Give them a stable place, resist the urge to fuss with them, and future-you will be glad you did.