
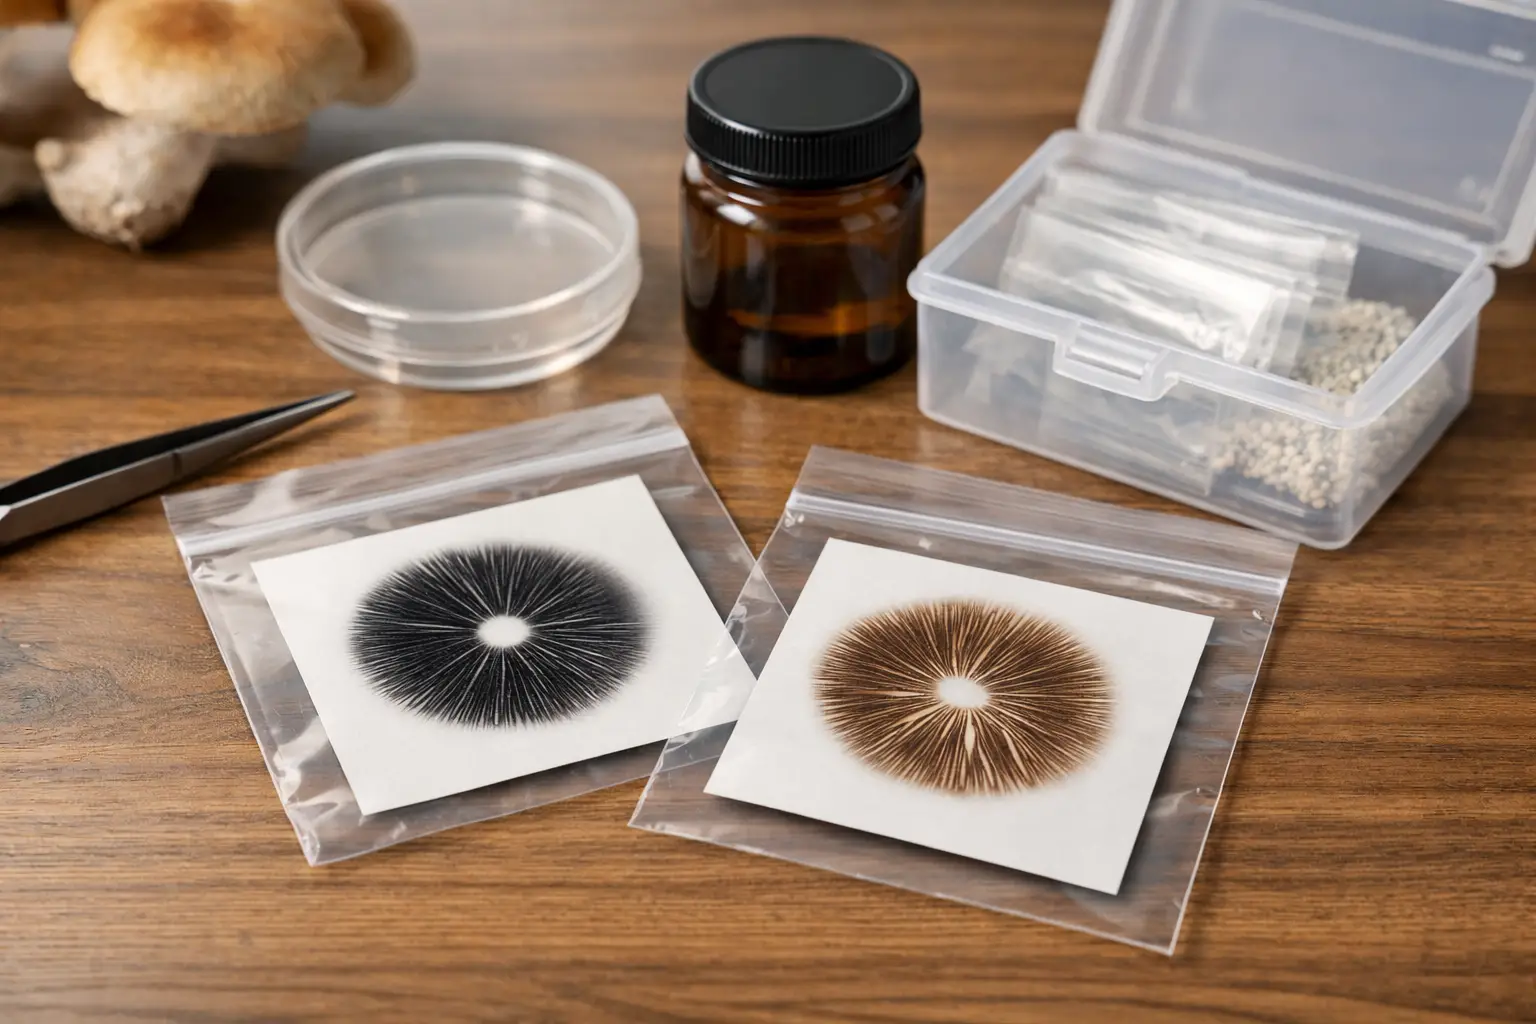
A spore print can stay viable far longer than most beginners expect, but only if you treat it like a delicate dry sample instead of just another piece of paper or foil. If you’re figuring out how to store spore prints, the real goal is simple: keep them dry, clean, dark, and undisturbed so the spores are protected from moisture, heat, and contamination.
That sounds straightforward, but storage mistakes usually happen in the details. A print gets handled with bare fingers, tucked into a humid drawer, sealed before it’s fully dry, or moved in and out of the fridge until condensation forms. None of those issues look dramatic in the moment, yet they can shorten shelf life fast.
How to Store Spore Prints Without Damaging Them
The best storage setup depends on how long you plan to keep the print and how often you expect to access it. A print you plan to use soon can be stored more simply than one you’re holding for long-term collection. Either way, the basic rules do not change.
First, make sure the print is completely dry before it goes into any final packaging. Even a small amount of trapped moisture can create problems later. Dry prints are more stable, less likely to smear, and far less likely to develop contamination issues during storage.
Second, minimize handling. Every time a print is opened, repositioned, or touched, you increase the chance of introducing moisture, oils, dust, or stray particles. That does not mean you need a lab-style setup, but it does mean a little discipline goes a long way.
Third, protect the print from temperature swings and direct light. Consistent conditions matter more than fancy storage gear. A basic, well-organized storage method in a stable environment will usually outperform a more complicated setup that gets opened constantly or kept somewhere warm.
The Best Materials for Storing Spore Prints
Most prints are stored on foil, paper, or another flat sterile surface, then placed into a protective sleeve or envelope. If you are organizing your own collection, the safest approach is usually to keep the original print material intact and place it inside a clean secondary barrier.
Foil is popular because it is easy to fold, easy to label, and does a good job shielding the print. Paper can work too, though it is generally a little less protective against accidental moisture exposure. For the outer layer, many growers and collectors use small zip bags, specimen envelopes, or sealed sleeves. The outer packaging is there to reduce exposure, not to press on the print itself.
A rigid container can help if you are storing multiple prints together. Think of it as protection against bending, crushing, and drawer chaos. A small storage box with labeled sections is often enough. You do not need an elaborate system, but you do want something more secure than loose prints stacked under miscellaneous supplies.
If you’re planning to store prints for months rather than days, adding a small desiccant pack nearby can help maintain a dry environment. The key word is nearby. You want dry storage conditions, not direct contact that could shift or damage the print.
Room Temperature or Refrigeration?
This is where a lot of people overcomplicate things. For short- to medium-term storage, a cool, dark, dry place at room temperature is often perfectly adequate. A drawer, cabinet, or dedicated storage box away from heat sources can work very well, especially in a climate-controlled home.
Refrigeration can make sense for longer-term storage, but it comes with trade-offs. A fridge offers lower temperatures, which can help preserve viability, yet it also introduces one of the biggest risks: condensation. If prints are repeatedly moved from cold storage into warmer room air, moisture can form inside or around the packaging. That defeats the whole point.
If you choose refrigeration, keep the prints sealed in moisture-resistant packaging and avoid frequent temperature changes. Store them in a stable part of the refrigerator, not in the door where conditions fluctuate the most. Then, before opening the package, let it return to room temperature first. That small step helps prevent condensation from landing on the print.
Freezing is usually not the first choice for spore prints. It can create unnecessary moisture and temperature stress if the print is not packaged extremely well. For most hobbyists and collectors, cool and dry beats overly aggressive cold storage.
A Simple Storage Process That Works
If you want a reliable routine, keep it simple. Start by confirming the print is fully dry. Fold or protect the print surface so the spores are shielded. Place it in a clean labeled envelope, sleeve, or bag, then store that inside a secondary container in a dark, dry location.
Labeling matters more than people think. Include the variety, date, and any other detail that helps you identify the print later without reopening everything. Once you have more than a few samples, organization stops being optional. It is much easier to preserve prints when you are not constantly sorting through them by hand.
For collectors with a growing inventory, category-based organization helps. You might sort by species, variety, acquisition date, or intended use. The point is not to build a museum archive. The point is to reduce handling and confusion.
Common Storage Mistakes
The most common mistake is sealing a print before it has dried enough. The second is assuming any sealed bag is automatically safe. If moisture gets trapped inside, the packaging becomes part of the problem.
Another frequent issue is excessive handling. People often open prints just to check them, compare them, or move them into a new storage format. Unless there is a clear reason to reopen one, leave it alone. Stable storage is better than constant tinkering.
Heat is another silent problem. Storing prints near a sunny window, electronics, heaters, or a warm grow area can reduce longevity. Even if the print looks fine, warmer conditions generally work against long-term preservation.
Poor labeling also causes avoidable damage. When prints are unlabeled or loosely grouped, people end up opening multiple packages to identify one sample. That creates repeated exposure that could have been avoided with a pen and thirty seconds of effort.
How Long Can Spore Prints Last?
There is no single shelf-life guarantee because storage conditions, print quality, and handling all matter. Some prints remain usable for quite a long time when stored well, while others lose viability faster because of heat, humidity, or contamination introduced early on.
That uncertainty is why storage should be viewed as risk reduction, not perfection. You are not controlling every variable forever. You are giving the print the best possible conditions from the start. Dryness, darkness, and stable temperatures consistently matter more than gimmicks.
If a print is especially valuable to your collection, it makes sense to store it with more care and open it less often. High-turnover samples can be kept in a more accessible system, while long-term keepsakes deserve extra protection.
How to Store Spore Prints in a Growing Collection
Once your collection expands beyond a couple of prints, storage becomes part preservation and part inventory management. This is where many enthusiasts level up their setup. A clean box, labeled sleeves, and a simple tracking method can save time and prevent accidental damage.
A dedicated storage area is worth it. Do not mix prints in with random tools, substrate supplies, or humid cultivation gear. Keep them in their own dry zone. If you shop across different formats, this is also a good way to separate prints from syringes, cultures, and other mycology supplies that have different storage needs.
That organized approach fits the way many collectors already shop and build out their setups. At Myceli Nation, the appeal of a broad catalog is having options in one place, but once those items arrive, storage should stay format-specific. What works for one product type is not always the right call for another.
When to Replace or Retire a Print
Sometimes the best storage decision is recognizing when a print has been compromised. If the packaging shows clear moisture exposure, if the print has been handled excessively, or if the sample was stored in poor conditions for a long stretch, it may no longer be worth treating as a dependable part of your collection.
That does not mean every older print is unusable. It means you should be realistic. Age alone is not always the problem. Sloppy storage usually is. A well-kept older print can be in better shape than a newer one that spent a month in a warm, humid room.
Good storage is less about expensive accessories and more about consistency. Keep prints dry, label them clearly, protect them from heat and light, and resist the urge to fuss with them once they are packed away. Your future self will appreciate having a clean, organized collection that still reflects the care you put into it from day one.