Posted on

Spore Print or Syringe? Pick the Right Format

Spore Print or Syringe? Pick the Right Format

A spore print or syringe can represent the same species, but they deliver a very different experience at the bench, in storage, and in a collection. One puts the spores on display in their original deposit pattern. The other suspends them in a prepared liquid format for convenient handling. Neither is automatically better – the right pick depends on what you want to observe, preserve, compare, or add to your mycology lineup.

For collectors and microscopy-focused buyers, format matters almost as much as species. A clean, well-presented print has archival appeal and gives you a visible record of spore color and density. A syringe is compact, familiar, and built around easy, measured access. Understanding the trade-offs makes shopping by category much simpler.

Spore Print or Syringe: The Core Difference

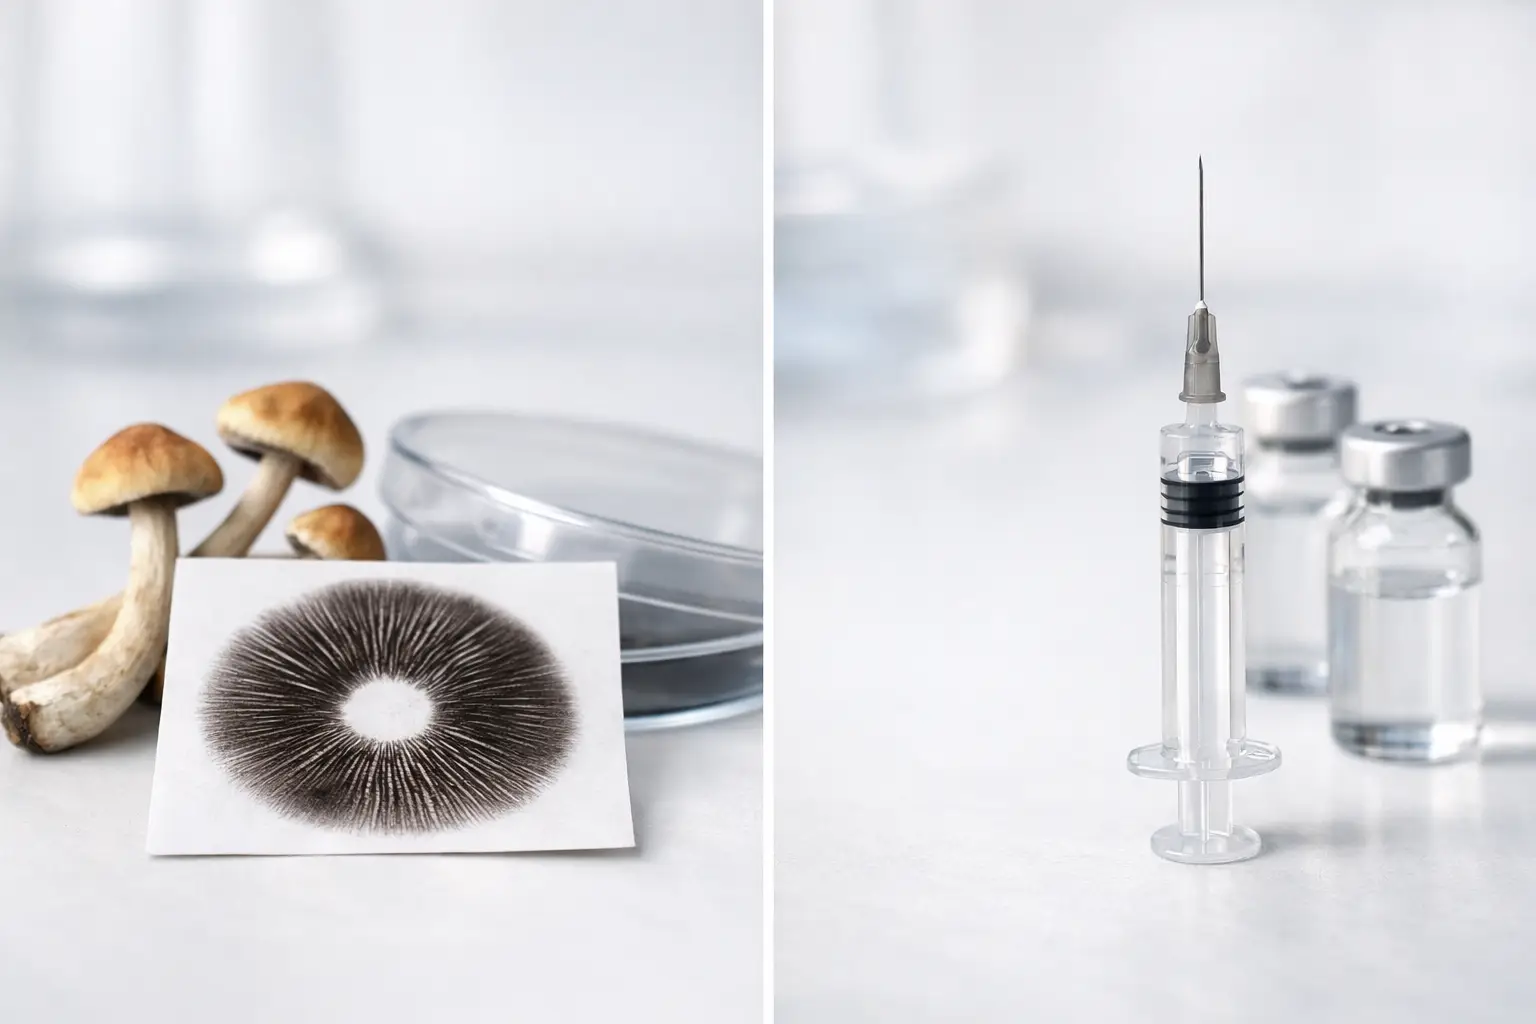
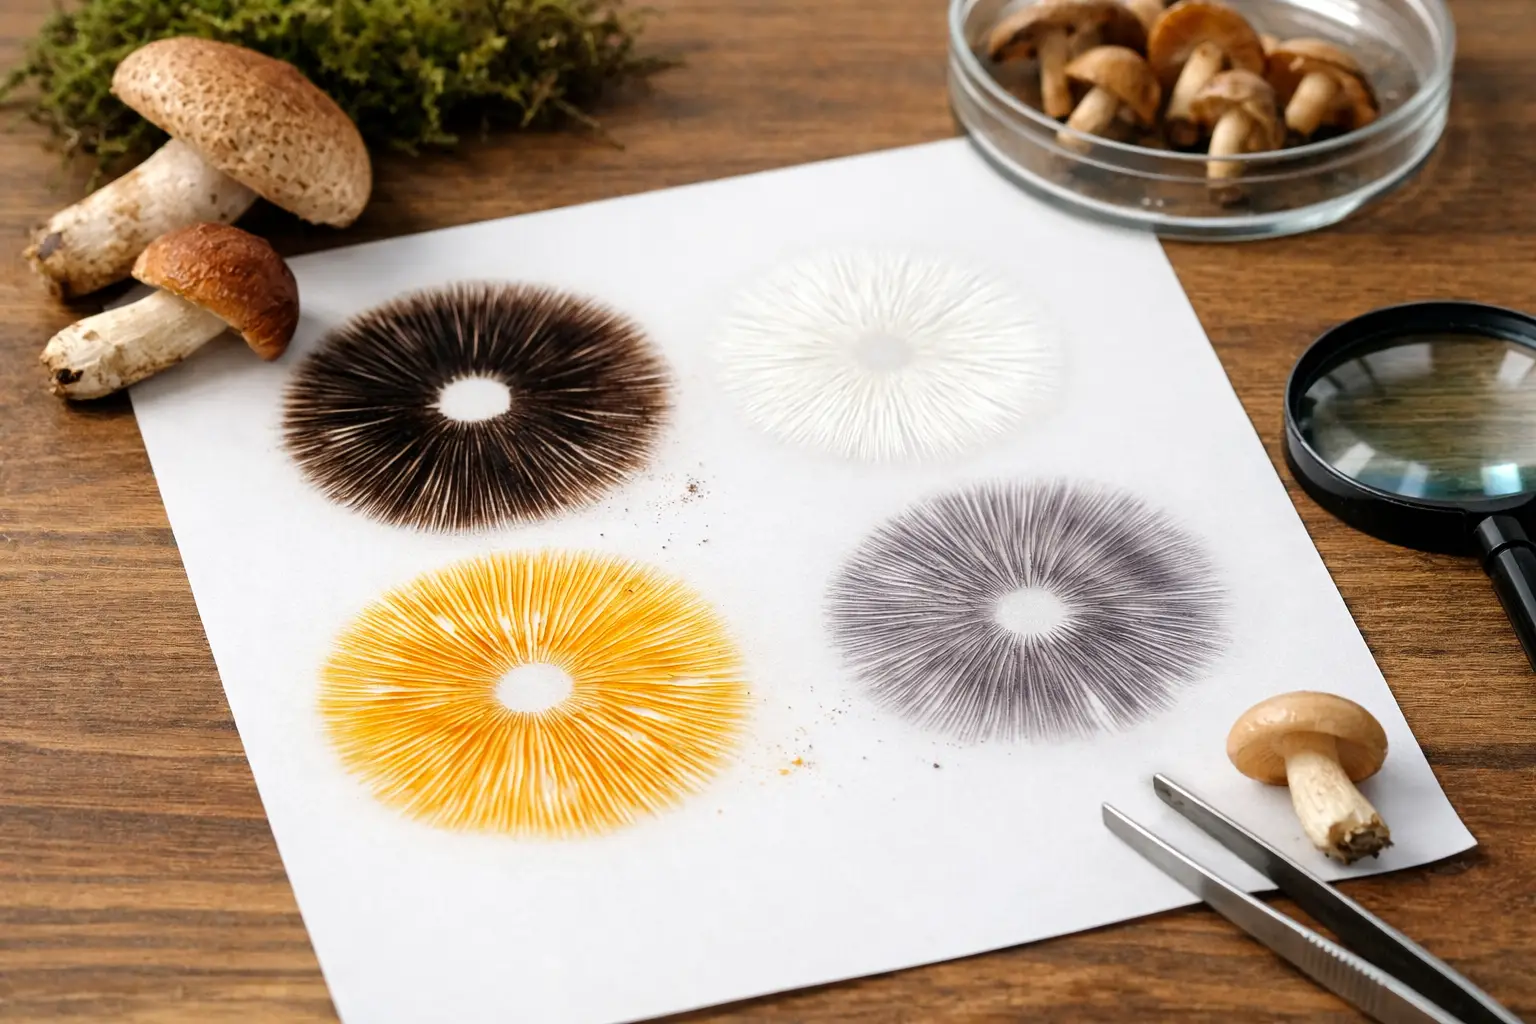
A spore print is a deposit of spores left on a sterile surface, commonly foil or another nonporous material. It is a physical snapshot of a mushroom’s reproductive material. The deposit may appear dark purple-brown, black, rusty brown, or another shade depending on the species. For microscopy work, the visual character of the print can be part of the appeal before a sample is ever prepared for observation.

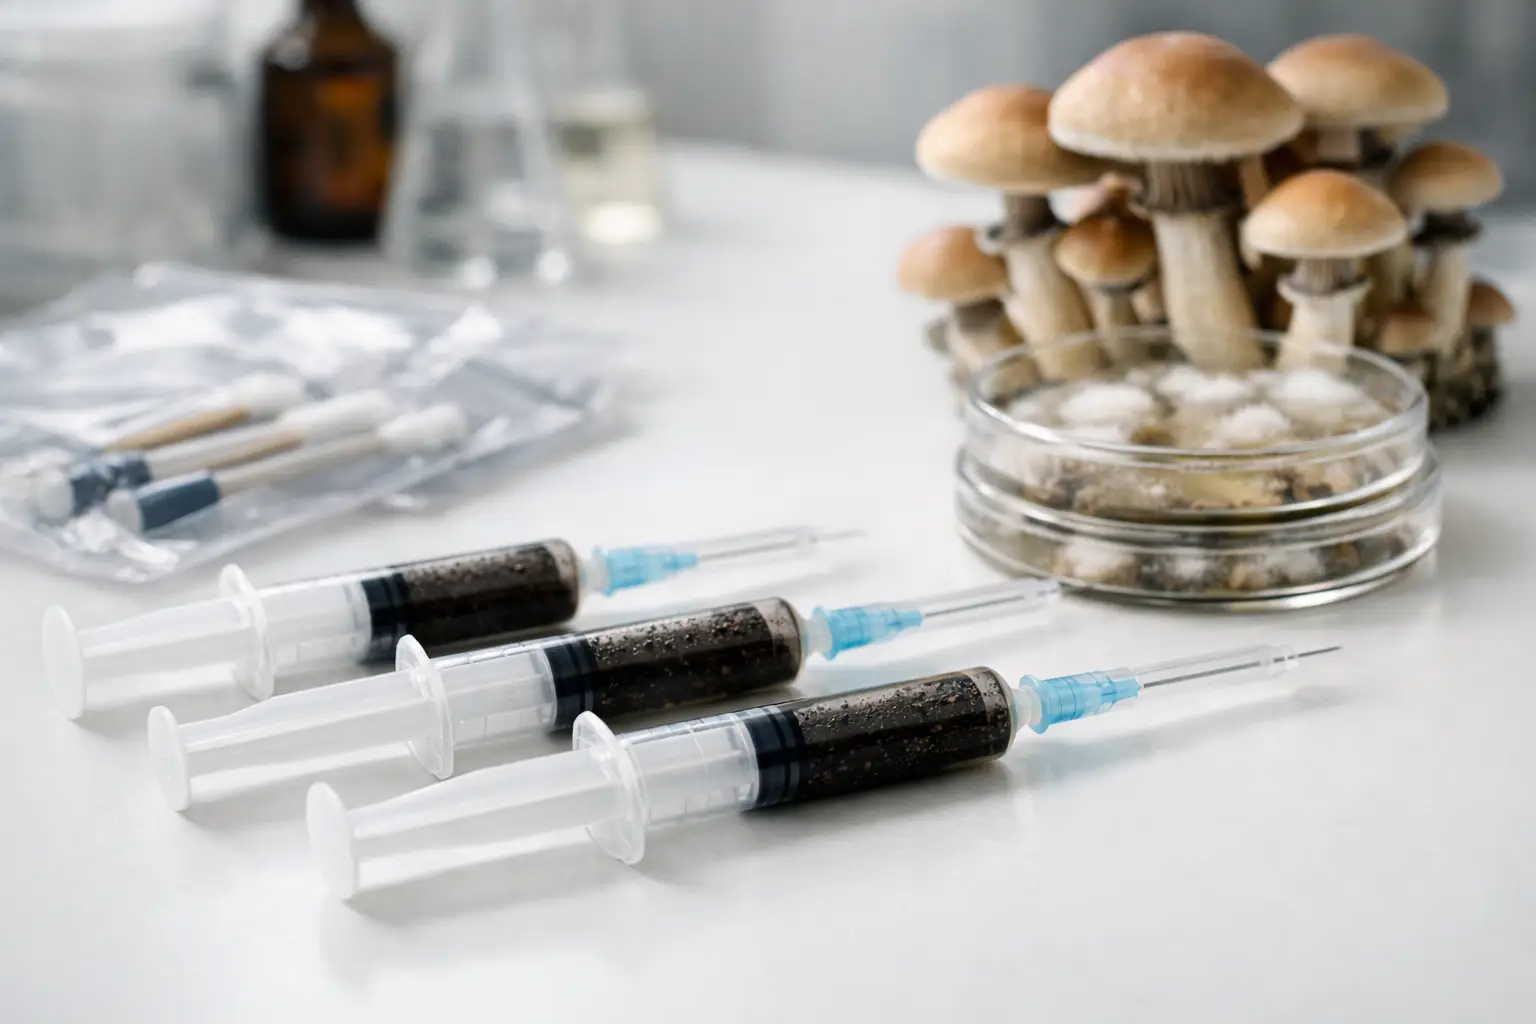
A spore syringe contains spores suspended in sterile water. The format is typically sealed in a syringe with a capped needle attachment or dispensing tip, depending on the product. It offers a more contained presentation and a format many hobbyists find easier to store, label, and handle in small quantities.

The most useful distinction is simple: a print is a visible specimen-like format, while a syringe is a liquid delivery format. That difference affects how each product travels, how it is stored, and what kind of buyer tends to prefer it.

Why Collectors Choose Spore Prints

Spore prints have a tangible quality that syringes cannot quite replicate. Each one shows a natural deposit pattern, which can range from a dense, bold impression to a lighter radial spread. For enthusiasts building a diverse archive of species and varieties, that visual identity is part of the value.

Prints are also straightforward to inspect upon arrival. You can see the substrate, the general density of the deposit, and the way the product has been packaged. A properly packaged print is flat, easy to file away, and convenient for buyers who organize their collection by species, date, source, or region.

There is a practical reason to choose prints, too. They generally take up very little space and do not require the rigid shape of a syringe for storage. If your goal is a well-labeled mycology archive rather than a ready-to-handle liquid format, prints make excellent sense.

That said, a print requires more hands-on care if you need to remove a small sample for microscopy. The working surface, tools, and sample handling all matter. Buyers who prefer a contained, portion-friendly format may find a syringe more comfortable.

Best fit for a print

Choose a print when you value visible spore characteristics, flat archival storage, traditional collecting, or the ability to keep an organized physical reference library. They are especially appealing to buyers who enjoy comparing specimens side by side.

Why Buyers Choose Spore Syringes

A syringe is designed around convenience. The spores are already dispersed in liquid, so the format is compact and ready for controlled dispensing when used for lawful microscopy and study purposes. For buyers who do not need the visual presentation of a print, that simplicity is often the deciding factor.

Syringes are also easy to identify at a glance when they are clearly labeled. A neatly organized storage box can hold several varieties without the need to keep individual foil packets flat and separate. This makes them popular with shoppers building variety packs or adding several fan favorites to a single order.

The main trade-off is visibility. Spore density in a syringe is not always obvious to the naked eye. Some spores may settle over time, and the liquid itself does not provide the same immediate visual information as a deposited print. That is normal for the format, but it means a syringe is less satisfying for someone who wants a display-worthy specimen.

Best fit for a syringe

Choose a syringe when you prioritize compact storage, controlled liquid handling, and a familiar ready-to-use format for permitted research or microscopy applications. It is a practical choice for buyers who know they prefer liquid products and want to compare several varieties without overcomplicating their setup.

Storage, Shelf Life, and Handling Considerations

Both formats benefit from careful storage. Keep products clearly labeled, protected from unnecessary heat and direct light, and stored according to the seller’s product guidance. A cool, clean, stable environment is generally preferable to a car, windowsill, garage, or any location with frequent temperature swings.

Prints should stay dry and protected from crushing, bending, or contamination. Keeping each print in its original packaging until you are ready to examine it helps preserve its condition. If you maintain a collection, adding the purchase date and a simple inventory note can make future comparisons much easier.

Syringes should remain capped, sealed, and protected from damage. Avoid forcing or altering components, and do not treat a syringe as a display item. Its strength is contained storage and measured handling, not visual presentation.

Shelf life is not a single fixed number because storage conditions, packaging quality, age, and the product itself all play a role. Instead of relying on a universal timeline, buy from a source that provides clear product information, inspect your order promptly, and store it responsibly from day one.

How to Shop by Your Actual Goal

The fastest way to choose is to start with the experience you want, not the product name. If you want a physical specimen that looks at home in a labeled reference collection, begin with prints. If you want a contained liquid format that is easy to organize with other supplies, start with syringes.

Buyers interested in comparing spore color, deposit structure, or the visual differences among varieties will often get more satisfaction from prints. Buyers who prefer straightforward product handling and compact organization may lean toward syringes. There is no rule saying a serious enthusiast has to choose only one. Many collections include both because each format serves a different purpose.

Species selection should come after format, not before it. Once you know whether you prefer a print or syringe, comparing available varieties becomes more useful. Look for accurate labeling, careful packaging, clear category organization, and product details that help you match the format to your intended lawful use.

For culinary mushroom projects, it may also be worth considering whether an edible culture or another ready-to-inoculate product better matches your goals. Spores, cultures, and prepared products are not interchangeable categories. Shopping with the end use in mind prevents unnecessary guesswork and helps you build a more useful supply shelf.

Quality Signals Worth Looking For

Good shopping decisions come down to more than picking a popular name. Look for clean presentation, clear identification, secure packaging, and a seller that treats product categories seriously. A well-organized catalog makes it easier to compare individual items with bundles, starter options, and collector-friendly selections.

For prints, packaging should protect the sample and make the label easy to read. For syringes, look for intact packaging, secure caps, legible labels, and sensible shipping practices. If you are ordering multiple formats, keep them separated and logged when they arrive so you can maintain clean records.

Myceli Nation is built for buyers who do not want to hunt across scattered suppliers for every format. Whether you are adding a single specimen to your archive or comparing several options in one order, a category-first approach keeps the process direct.

Choose the Format You Will Actually Enjoy Using

A print rewards curiosity, observation, and careful collecting. A syringe rewards convenience, containment, and efficient organization. The better option is the one that fits how you engage with mycology, not the one that happens to be most common in someone else’s supply box.

Start with one format that matches your immediate interest, label it well, and give yourself room to compare the other format later. A thoughtful collection grows best when every item has a clear reason to be there.

Posted on

Culture Contamination Prevention Guide for Growers

Culture Contamination Prevention Guide for Growers

A clean-looking plate can still carry trouble. Bacteria may hide beneath healthy-looking mycelium, while mold spores can settle during one rushed transfer and show up days later. This culture contamination prevention guide is built for growers who want cleaner agar work, more dependable liquid culture, and fewer mystery losses between inoculation and fruiting.

Contamination is not always a sign that your skills are bad or your genetics are weak. It usually means one link in the chain needs attention: the culture source, the sterile media, the work area, the tools, or the incubation conditions. The goal is not to create a laboratory-grade cleanroom at home. The goal is to build a repeatable workflow that gives unwanted organisms fewer chances to win.

Start With Clean Culture, Not Hope

The easiest contamination to prevent is the contamination you never transfer. Before expanding a culture, inspect it under good light and give it time to reveal its behavior. Healthy mycelium should grow in a consistent pattern for that species and medium. It may be wispy, dense, rhizomorphic, or tomentose, but it should not suddenly produce wet patches, dull gray spreading zones, or colors that deepen over time.

Agar is your best checkpoint. Even when a liquid culture looks clear, a small amount transferred to agar can reveal bacteria or competing mold that would otherwise travel into every jar or bag. For growers building a library of edible cultures, testing first may feel slower, but it saves far more time than inoculating a large batch with a questionable master.

When selecting tissue from a plate, take the leading edge of vigorous growth rather than the oldest, most crowded center. The outer edge is where clean mycelium is actively expanding away from anything left behind near the original transfer. If a plate has a suspicious sector, do not rationalize it because the rest looks good. Transfer away from the issue only if there is clearly clean, separated growth. Otherwise, discard it and protect the rest of the workspace.

Build a Clean Transfer Routine

Good sterile technique is less about dramatic gestures and more about doing small things in the same order every time. Set out only what you need before beginning: sealed plates or jars, labels, a scalpel or inoculation loop, a flame source if your workflow uses one, alcohol for surface sanitation, gloves, and a waste container. Searching for a marker halfway through a transfer creates unnecessary movement and exposure.

A still-air box and a properly used flow hood solve different problems. A still-air box reduces air movement around open containers. A flow hood provides filtered, directional air and is generally better suited to frequent culture work, but only when its filter, airflow, and setup are maintained correctly. Neither tool compensates for dirty hands, unsterilized tools, or opening containers too wide for too long.

Before each session, clean the work surface, let it dry, and wash your hands thoroughly. Keep sleeves, hair, loose packaging, and fans away from the work zone. If using gloves, remember that gloves are not automatically sterile. Treat them as another surface that needs to stay clean. Avoid touching phones, door handles, or product packaging once transfers begin.

Work deliberately. Open one plate or vessel at a time, keep lids close to the opening, and make the transfer with minimal hovering. Sterilize the tool between cultures, not just between sessions. A tool that touched one plate can carry invisible cells, spores, or residue into the next one.

Flame, alcohol, and heat: use each for the right job

Alcohol is excellent for cleaning surfaces and glove exteriors, but it does not replace heat sterilization for a scalpel blade or loop. If you flame sterilize a tool, let it cool without waving it around or touching it to an unclean surface. A hot blade can damage a small agar wedge, and a cooled but contaminated blade defeats the point.

Pressure sterilization is the standard for nutrient media, grain, and many reusable items. Follow the timing and operating guidance for your equipment, account for load size, and allow pressure to return to normal naturally. Cutting a cycle short may save minutes while creating a much larger loss later.

Keep Media and Containers From Becoming Weak Links

A clean transfer into poorly prepared media is still a contamination event waiting to happen. Agar plates should be poured into clean containers, allowed to set, and stored in a way that limits condensation. Excess moisture can let bacteria spread quickly across the surface and make clean growth harder to read.

With liquid culture, clarity alone is not proof of cleanliness. Some bacterial contamination remains subtle, especially in nutrient-rich broth. Use a tested master culture, sterilize the media thoroughly, and keep the injection port and lid assembly clean. If a jar develops unexpected cloudiness, sediment, a sour odor, or unusually sluggish growth, test it on agar before trusting it.

Grain deserves equal attention because it is forgiving only until it is not. Overhydrated grain creates wet pockets where bacteria thrive; underhydrated grain can stall colonization and invite uneven results. Proper hydration, complete sterilization, and filters that allow gas exchange without exposing the contents are all part of the same system.

Do not overlook container handling. The outside of a jar, plate sleeve, or culture bag can carry dust from storage shelves, shipping boxes, or old grow areas. Keep culture supplies organized in a clean, dry zone away from fruiting chambers, houseplants, compost, and high-traffic areas. Separating clean culture work from messy substrate work is one of the highest-value changes a home grower can make.

Control the Room, Not Just the Tools

Contamination prevention begins before the first container opens. Choose a room with low traffic and few fabric surfaces. A spare room with the HVAC temporarily off during transfers is often more workable than a busy kitchen, even if the kitchen looks cleaner at first glance. Pets, open windows, laundry, and ceiling fans all increase the number of airborne variables.

Temperature matters, but warmer is not always better. Incubating cultures above the preferred range can stress mycelium while giving bacteria and molds a faster path. The right range depends on the species, so follow the guidance for your culture rather than using a single temperature for every jar and plate.

Humidity should also stay out of your culture-storage equation. Plates and culture jars do not need the same conditions as a fruiting area. Store them cleanly, away from direct sunlight, and with enough organization that you can inspect dates, labels, and growth without repeatedly handling every item.

How to Read the Early Warning Signs

Fast action prevents one bad culture from becoming a bad batch. Mold often announces itself with sudden, fluffy growth that looks different from the intended mycelium and may later develop green, black, pink, or other pigmentation. Bacteria may appear as glossy wet spots, cream-colored slime, cloudy liquid, or a sharp sour smell. Yeast can create creamy, pasty growth and fermentation-like odors.

Visual diagnosis has limits. Some healthy cultures look unusual depending on species, media, temperature, and age. When uncertain, isolate the item, label it clearly, and observe it separately rather than opening it near clean work. A questionable plate on the shelf is manageable. Opening it in the middle of transfer work is not.

Photographing plates on the day they are poured, inoculated, and inspected gives you a useful reference. Over a few runs, patterns become obvious: a recurring issue tied to one batch of agar, one jar style, one supplier lot, or one step in the workflow.

Make Your Culture Work Traceable

The best growers do not rely on memory. Label every plate, jar, and bag with the culture name, transfer generation, date, and a simple identifier for the media or batch. If contamination appears, those details help you trace where it entered.

Keep a short log of what changed between sessions. Maybe the problem started after moving workspaces, switching grain preparation, using older plates, or rushing transfers after a long break. You do not need a complicated lab notebook. A consistent record turns random frustration into useful data.

For many hobbyists, maintaining a small number of clean master cultures is more practical than constantly expanding everything at once. Smaller culture libraries are easier to inspect, test, and refresh. Once a culture proves clean and vigorous, expand it in stages rather than putting every available jar on the line.

A Culture Contamination Prevention Guide That Stays Useful

There is no single disinfectant, container, or technique that guarantees a clean run. Reliable results come from layers: clean starting material, sterile media, controlled air, disciplined transfers, and the willingness to discard suspect cultures early. If one layer slips, the others still reduce the odds of a total loss.

Myceli Nation growers often build better results by treating culture work as a repeatable craft, not a race to inoculate more containers. Slow down at the transfer point, trust agar as a quality check, and let your notes show you where the next improvement belongs.

Posted on

Spore Print Identification Guide for Color Clues

Spore Print Identification Guide for Color Clues

A mushroom cap can look convincing from the top and still tell you very little about its identity. The underside often carries better clues, and a well-made print reveals one of the most useful: the true color of the spores. This spore print identification guide explains how to collect, read, and use that clue without treating it as a shortcut to certainty.

Spore prints are simple, low-tech, and worth the time. They help hobbyists sort look-alike mushrooms, give microscopy-focused collectors material to examine, and make field observations more complete. But they are one piece of a larger identification process, not a green light for consumption. Never rely on a spore print alone to identify a wild mushroom or determine whether it is safe to eat.

What a Spore Print Actually Shows

A mature mushroom releases spores from its fertile surface. On gilled mushrooms, spores drop from the gills. On boletes and other pore-bearing mushrooms, they fall from the pores. When enough spores collect on a clean surface, their combined pigment becomes visible as a print.

That combined color can be much easier to judge than individual spores under a basic microscope. A print described as white, cream, pink, brown, purple-brown, black, or rusty orange can immediately narrow the possibilities. The key word is narrow. Several unrelated groups can share a print color, while one group may show small shifts in shade depending on age, moisture, lighting, and how thickly the spores landed.

Think of a print as a filter. It can rule out candidates that do not fit, but it rarely provides a final name by itself. A rusty orange print, for example, points your research in a very different direction than a pure white print. It does not settle the question without checking the rest of the specimen.

How to Make a Clean, Readable Print

Start with a mature cap that is fresh enough to still release spores. A cap that is overly dried, waterlogged, immature, or decomposing may leave a weak or misleading result. Choose a specimen with exposed gills or pores and avoid washing it before printing.

Cut the stem close to the cap. Place the fertile side down on a smooth surface, then cover it with a bowl, cup, or glass. The cover reduces air movement and helps retain humidity. Leave it undisturbed for several hours or overnight.

White paper works for darker prints, but it can hide a white or pale cream deposit. Black paper solves the opposite problem. The most practical setup is a sheet divided into black and white halves, with the cap centered across both colors. Glass slides, foil, or a clean nonporous card can also work, though the background contrast still matters.

Humidity is a trade-off. A dry cap may benefit from a tiny drop of water on top of the cap, not on the printing surface. Too much moisture can cause the cap to soften, smear pigment, or leave a muddy mark that is harder to interpret. If the specimen is already damp from rain, use a dry, covered setup and check it sooner.

When you lift the cap, look for more than color. Notice whether the print is dense or faint, whether it mirrors the gill pattern, and whether the deposit has an obvious central patch from the cap. Photograph it under neutral light before handling it. Warm indoor bulbs can make a cream print appear yellow or a brown print look more orange than it is.

Keep Samples Separate and Labeled

If you are printing more than one specimen, label the surface before placing each cap. Add the collection date, habitat, host tree or substrate, and a specimen number. A print with no field notes quickly loses much of its value.

For educational collections and microscopy work, let the print dry fully before storing it in a clean folded paper packet or protected sleeve. Avoid sealing a damp print in plastic. Trapped moisture invites mold and can blur the evidence you wanted to preserve.

Reading Spore Print Colors Without Overcalling Them

Color names sound straightforward until you compare a dozen real prints. “Brown” can mean tobacco brown, chocolate brown, cinnamon brown, or a nearly black purple-brown. The goal is not to force a perfect color label. It is to observe the best broad category first, then record the nuance.

White to cream prints occur across many common mushroom groups. They are useful, but they demand extra care because a thin white deposit can be invisible on white paper. Check the dark half of the surface, tilt it under side lighting, and look for a powdery pattern rather than assuming no print means a white print.

Pink to salmon-pink prints are often distinctive when they are truly present. Brownish-pink, however, can be difficult to separate from pale brown under poor lighting. Compare the print against a neutral white background and note whether the color has a cool rosy cast or a warmer tan cast.

Brown, purple-brown, and black prints need the most precise wording. A very dark brown print may appear black until you view its thinner edges. Purple-brown deposits can show a wine-toned or plum-like cast in daylight. Rather than writing “dark,” record what you actually see: “very dark purple-brown, darkest at center” is a much stronger field note.

Rusty orange to cinnamon prints are another meaningful category, especially when the color is unmistakably warm and iron-like rather than simply tan. These prints can stain light paper boldly, but a wet cap may cause pigment to spread. If the print is smeared, repeat the process with another mature cap before making a call.

Pair the Print With the Traits That Matter

A useful identification record combines the print with the mushroom’s full context. Start with the fertile surface. Are there true gills, pores, teeth, folds, or a smooth surface? Are gills attached to the stem, free from it, or running down it? These structural details often eliminate possibilities faster than cap color.

Next, document bruising, staining, odor, stem texture, veil remnants, ring presence, and the base of the stem. Carefully excavating the entire base can reveal a bulb, sheath, rooting stem, or other feature that would be missed by cutting the mushroom at ground level. Photograph the cap, underside, stem, and base before changing the specimen.

Habitat is equally important. Record whether the mushroom grew from soil, wood, buried roots, mulch, dung, grass, a living tree, or a dead log. Note nearby tree species when relevant. A mushroom growing in a lawn may be associated with buried wood, while one appearing from a stump has a much clearer substrate clue. Season and region can further refine the picture.

For a more confident result, use the print color alongside a reliable regional field guide, a local mycological group, or microscopic examination. Spore shape, size, ornamentation, germ pores, and reactions in appropriate reagents can separate species that look identical in a print. This is where a collected print becomes more than a color sample.

Common Spore Print Mistakes

The most common error is printing an immature mushroom. If the cap has not begun releasing spores, the blank surface tells you nothing. Collect mature specimens when possible, and make prints from more than one cap when the identification matters.

Another mistake is judging a print against the wrong background. A pale print on white paper may disappear, while a nearly black print on black paper can look thinner than it is. Split-color paper prevents much of this confusion.

People also confuse deposited spores with moisture stains, gill debris, or cap pigment. A real print usually follows the pattern of the gills or pores and has a dry, dusty appearance once fully dry. A wet, flat blotch with no visible structure deserves skepticism.

Finally, do not let a familiar-looking cap override contradictory evidence. If the print color, gill attachment, habitat, or stem base does not match your expected species, pause. Look-alikes are common, and confidence built on one attractive feature is exactly where field identification goes wrong.

Build a Better Collection Habit

A spore print is most valuable when it becomes part of a repeatable observation routine. Carry paper, a marker, a small container for covering caps, and a notebook or phone for habitat photos. This small kit turns an interesting find into a documented specimen.

For collectors building a reference set, keep each print tied to its notes and images. Over time, you will develop a sharper eye for the difference between white and cream, cinnamon and rusty orange, or dark brown and purple-brown. That pattern recognition is useful, but it should make you more curious, not more careless.

Myceli Nation is built for enthusiasts who appreciate that kind of hands-on mycology. Whether your interest is microscopy, edible culture work, or learning the language of mushroom traits, careful records make every specimen more informative.

The next time a mushroom catches your eye, let the cap be the invitation, not the answer. Make the print, study the surrounding clues, and leave room for the possibility that the specimen still has more to teach you.

Posted on

Mushroom Spore Syringes for Sale Online

Mushroom Spore Syringes for Sale Online

If you have ever bounced between sketchy listings, limited strain menus, and sellers that make basic product info hard to find, you already know the real value behind mushroom spore syringes for sale online. It is not just about finding a syringe in stock. It is about finding the right strain, the right format, and a storefront that actually feels built for mycology buyers instead of generic ecommerce traffic.

For experienced shoppers, the difference shows up fast. A strong spore catalog makes it easy to compare classics like Golden Teacher and B+ alongside more niche picks, see what is available now, and decide whether a single syringe or a bundle makes more sense. That kind of clarity matters when you are buying with a specific microscopy interest, building out a collection, or simply trying to avoid piecing together an order across multiple suppliers.

What makes mushroom spore syringes worth shopping by category

Spore syringes remain one of the most convenient formats in the mushroom space because they are familiar, accessible, and easy to browse by strain. For buyers who already know what they want, the format is direct. For buyers comparing options, it offers a practical middle ground between individual prints, larger bundles, and other specialty products.

That convenience is also why category design matters. When a shop treats spore syringes like a core product line instead of an afterthought, the experience gets better immediately. You can sort through fan favorites, compare recognizable names, and move from product discovery to checkout without digging through unrelated inventory.

A focused category also helps buyers shop with purpose. Some shoppers are looking for staple strains with broad recognition. Others want to branch into exotics or pick up several options in one order. A well-built storefront supports both, which is exactly what serious mycology customers expect.

How to judge mushroom spore syringes for sale

Not every listing deserves your trust, even when the strain name is familiar. The better question is not whether a syringe exists for sale, but whether the offer makes sense for the kind of buyer you are.

Start with strain variety. A quality retailer should carry more than a handful of recycled names. A broad catalog signals that the store understands the market and serves enthusiasts who want more than the basics. Classics matter, but depth matters too. If a shop can offer staple strains alongside harder-to-find selections and organized product categories, that usually points to a stronger buying experience.

Next, look at how the products are presented. Clean product organization, clear naming, and straightforward category paths reduce friction. You should be able to move from syringes to prints, edible cultures, or bundled options without feeling lost. In a niche market, usability says a lot about how seriously a business takes its inventory and customer base.

Packaging and product handling also matter, even when the shopping decision starts with strain selection. Buyers want confidence that products are prepared for shipment with care and listed in a way that matches what will actually arrive. When a store feels organized on the front end, it usually inspires more confidence on the fulfillment side too.

Strain selection is where the buying experience really starts

In this space, strain names are not just labels. They are how buyers navigate the catalog. Recognizable options like Golden Teacher, B+, Blue Meanie, and Lizard King keep showing up for a reason. They are familiar, easy to compare, and often the first names shoppers search when they want a dependable starting point or a known addition to a broader collection.

That said, a good catalog should not stop at the usual names. Enthusiast buyers often want room to explore. They may start with best sellers, then branch into lesser-known varieties or add a bundle that gives them more range for the same order. This is where specialty retailers separate themselves from thin catalogs. Breadth is not just impressive on paper. It makes shopping easier because you can compare, discover, and buy in one place.

The format of the offer matters here too. Single syringes work well when you know the exact strain you want. Bundles make more sense when you are testing multiple interests or trying to maximize value per order. A store that supports both lets the customer decide based on goals, not inventory limitations.

Why bundles and related products can be a smarter buy

A lot of shoppers search for one syringe and end up realizing they would rather build a more complete order. That is not upsell fluff. It is often the more practical move.

Bundled spore syringe packs simplify the process for buyers who want variety without repeating the same checkout cycle over and over. They also make sense for hobbyists who prefer to compare several strains side by side in a single purchase. When bundle pricing is clear and the strain lineup is strong, the value is easy to see.

Related categories can also improve the shopping experience. Some buyers prefer prints. Others may want to browse edible cultures, ready-to-inoculate products, or cultivation supplies while they are already placing an order. A retailer built around mycology should make those category transitions feel natural. That is one of the advantages of shopping with a dedicated mushroom storefront instead of a scattered marketplace seller.

Worldwide shipping and catalog access matter more than most shops admit

For niche products, availability is part of the product. A great catalog does not help much if it is difficult to order from your location or if the store treats international customers like an afterthought.

That is why worldwide shipping stands out in this market. It expands access for buyers who do not want to rely on inconsistent local options, and it supports the broader mycology community by making specialized inventory easier to reach. For many customers, that access is a deciding factor, especially when they are trying to avoid splitting an order across several vendors.

Availability also ties back to trust. A shop that consistently stocks multiple product types, updates categories, and presents itself as more than a one-page listing tends to feel more reliable. Myceli Nation leans into that role by operating as The Mycelium Network, which fits what many buyers actually want – not just a single item, but a home base for spores, cultures, supplies, and ongoing product discovery.

What experienced buyers usually want from a storefront

Most repeat buyers are not looking for hype. They want efficiency, range, and a catalog that respects their time. That means product categories that make sense, best sellers that are easy to spot, and enough depth that they do not have to keep opening new tabs to finish one order.

They also want a store that understands the culture of the niche. Using real strain names, organizing products around how enthusiasts actually shop, and keeping the language direct all help. Overexplaining basic terms can feel clumsy for an informed audience. On the other hand, being too vague makes the store look careless. The right balance is simple: speak the language of mycology clearly and keep the path to purchase obvious.

This is also where community matters. A good mycology brand is not just moving inventory. It creates a place where enthusiasts can keep browsing, discover new products, and return when they want more than a one-off purchase. Newsletters, blog content, affiliate programs, and drop shipping options all reinforce that ecosystem when they are built around the same audience.

The best mushroom spore syringes for sale are easy to find

That sounds obvious, but in a niche market it is surprisingly rare. The best mushroom spore syringes for sale are usually attached to a storefront that does a few simple things well. It organizes by category, offers recognizable and niche strains, supports bundles, and makes ordering feel straightforward from the first click.

There is always a trade-off between a giant generic marketplace and a specialty shop. Marketplaces may look broad at first glance, but they often create more noise than value. Specialty stores tend to be narrower in overall scope, yet much stronger where it counts – strain selection, product organization, and a buying experience designed for enthusiasts instead of casual browsers.

If you are shopping this category seriously, the best move is to buy from a store that treats spores as part of a larger mycology network, not a random standalone listing. That gives you more room to compare products, more confidence in what you are ordering, and a better chance of finding exactly what you want the next time you come back. When the catalog is built for real mushroom enthusiasts, shopping stops feeling like a search and starts feeling like progress.

Posted on

Mushroom Growing Kits

Mushroom grow kits

Mushroom Growing Kits

Mushroom grow kits are experiencing a surge in popularity, fueled in part by the growing interest in “magic mushroom spores” and the accessibility of mushroom growing kits. This guide delves into the captivating world of mushroom cultivation, exploring the fundamentals, examining the allure of psilocybin spores, and demystifying the magic mushroom kit phenomenon.

The Basics of Mushroom Cultivation

At the heart of any mushroom cultivation endeavor lies the understanding of mushroom spores. These microscopic seeds are essential for mushroom growth, representing the reproductive unit of the fungal kingdom. Spores come in a wide variety, from those that produce delicious edible mushrooms to those that yield psychedelic varieties. Understanding these differences, and the various strains within each category, is crucial for selecting the right spores for your desired purpose.

Overview of Mushroom Kits

Mushroom growing kits offer a convenient and accessible entry point into the world of mycology. But what exactly is a mushroom growing kit?

Simply put, it’s a pre-packaged system designed to simplify the mushroom cultivation process. These kits come in various forms, often containing a substrate (the growing medium), sterilized materials, and, of course, mushroom spores.

The convenience of these kits lies in their pre-prepared nature,eliminating the need for extensive knowledge and specialized equipment, making them perfect for beginners.

Psilocybin Mushroom Growing Kits: Growing your own shrooms.

The growing interest in mushroom kits is particularly pronounced when it comes to those designed for cultivating psilocybin mushrooms, often referred to as “magic mushrooms.”

The Allure of Psilocybin Spores:

Psilocybin spores are unique due to the psychoactive compounds they contain, primarily psilocybin and psilocin. These compounds are responsible for the altered states of consciousness experienced when consuming these mushrooms. While the allure of psilocybin is undeniable, it’s crucial to approach cultivation with utmost responsibility, emphasizing safety and adherence to local laws and regulations.

Selecting a Psilocybin Mushroom Grow Kit:

Choosing the right psilocybin mushroom grow kit requires careful consideration. Factors to consider include the kit’s complexity, the reputation of the supplier, and the specific strain of psilocybin mushroom you wish to cultivate. Many reputable brands and suppliers offer detailed information and support to guide beginners through the process. The benefits of using a psilocybin mushroom grow kit are numerous, including increased success rates, minimized contamination risks, and simplified cultivation procedures.

Magic Mushroom Kits:

Magic mushroom kits are specifically designed for growing psilocybin mushrooms. They typically include easy-to-follow instructions and often come with the necessary tools for beginners.

Choosing the Right Magic Mushroom Spores:

Selecting the right magic mushroom spores is crucial for a successful grow. Consider factors like the desired potency, growth conditions, and the specific effects associated with different strains. Some strains like Golden Teacher are known for their ease of cultivation, while others are prized for their unique visual or introspective experiences. Always prioritize ensuring the viability of your spores to maximize your chances of a successful harvest.

The Future of Psychedelic Mushroom Kits

The future of psychedelic mushroom kits looks promising, driven by several key trends. There’s increasing interest in psychedelics for their potential therapeutic applications, particularly in treating mental health conditions like depression and anxiety. Research is ongoing, further solidifying their potential benefits. Additionally, the legal landscape surrounding psilocybin is evolving, with legalization efforts gaining momentum in various regions.

How to Get Started with a Psychedelic Mushroom Kit

Embarking on a psychedelic mushroom cultivation journey involves several key steps:

  • Setup: Carefully prepare your growing environment, ensuring proper hygiene and ventilation.
  • Inoculation: Introduce the psilocybin spores to the sterilized substrate, following the kit’s instructions meticulously. you get get your Cubensis spores right here.
  • Incubation: Allow the spores to colonize the substrate in a dark, temperature-controlled environment.
  • Fruiting: Introduce light and humidity to trigger the formation of mushrooms.
  • Care and Maintenance: Monitor the kit regularly, providing adequate moisture and ventilation.

Finally, remember to harvest and process your mushrooms carefully, allowing them to dry completely before storage.Finally

Mushroom growing kits, particularly those designed for psilocybin mushrooms, offer an exciting journey into  fungal cultivation.By gaining knowledge of magic mushroom spores, selecting the right kit, and following proper procedures, anyone can embark on a mycological adventure.Remember to always research and adhere to local laws and regulations. This burgeoning field is ripe with potential, promising not only personal exploration but also a deeper understanding of the natural world.

Posted on

MHUT payment email

*Important*

Our payment processor is currently down. However we can accept cards through our Mushroom Hut site.  Just add products of equal value to the shopping cart at this page of Our Mushroom Hut site.

Then checkout as normal.

For example, if you ordered 1 spore syringe ($18.99) and 1 Spore print (34.99)

You would add one edible culture syringe at 18.99 and another for 34.99 and checkout as normal to achieve to same amount. For spore packs add the 59.99 edible culture syringe.


Checkout with the same name and address as your spore order. The shipping will calculate the same at the checkout.

You can pay with a card there and we will ship your spore order and not the edible cultures once payment is received.  Let us know if you have any questions.

Cheers!

-B

www.Myceli-Nation.com

Welcome to the Myceli-Nation