
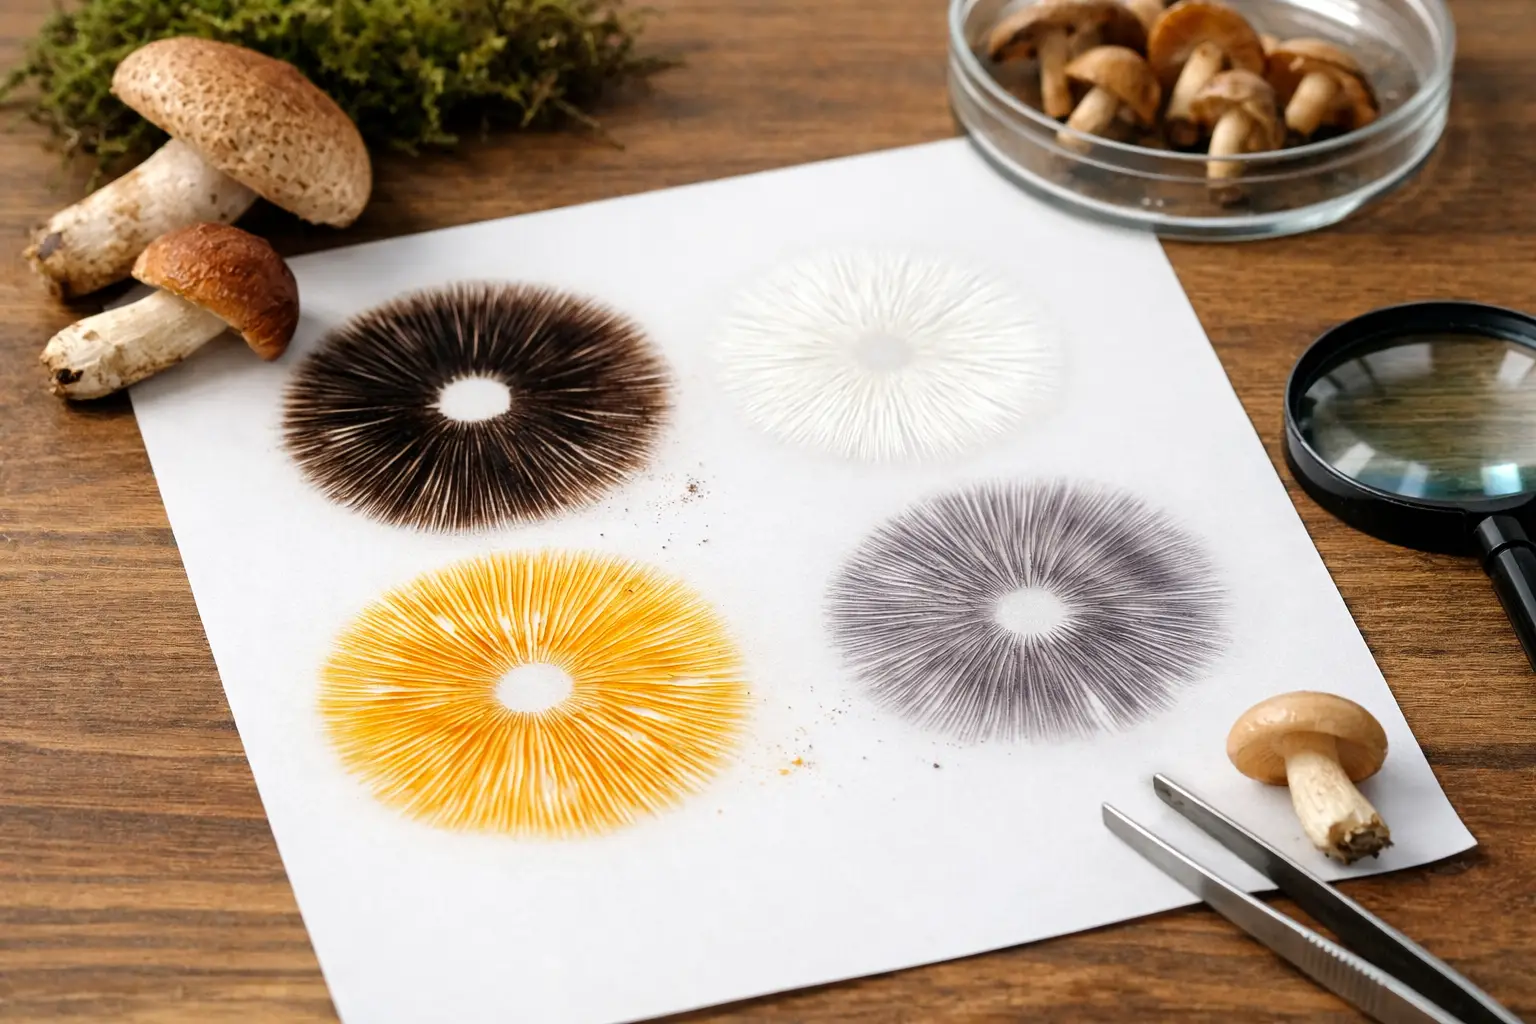
A mushroom cap can look convincing from the top and still tell you very little about its identity. The underside often carries better clues, and a well-made print reveals one of the most useful: the true color of the spores. This spore print identification guide explains how to collect, read, and use that clue without treating it as a shortcut to certainty.
Spore prints are simple, low-tech, and worth the time. They help hobbyists sort look-alike mushrooms, give microscopy-focused collectors material to examine, and make field observations more complete. But they are one piece of a larger identification process, not a green light for consumption. Never rely on a spore print alone to identify a wild mushroom or determine whether it is safe to eat.
What a Spore Print Actually Shows
A mature mushroom releases spores from its fertile surface. On gilled mushrooms, spores drop from the gills. On boletes and other pore-bearing mushrooms, they fall from the pores. When enough spores collect on a clean surface, their combined pigment becomes visible as a print.
That combined color can be much easier to judge than individual spores under a basic microscope. A print described as white, cream, pink, brown, purple-brown, black, or rusty orange can immediately narrow the possibilities. The key word is narrow. Several unrelated groups can share a print color, while one group may show small shifts in shade depending on age, moisture, lighting, and how thickly the spores landed.
Think of a print as a filter. It can rule out candidates that do not fit, but it rarely provides a final name by itself. A rusty orange print, for example, points your research in a very different direction than a pure white print. It does not settle the question without checking the rest of the specimen.
How to Make a Clean, Readable Print
Start with a mature cap that is fresh enough to still release spores. A cap that is overly dried, waterlogged, immature, or decomposing may leave a weak or misleading result. Choose a specimen with exposed gills or pores and avoid washing it before printing.
Cut the stem close to the cap. Place the fertile side down on a smooth surface, then cover it with a bowl, cup, or glass. The cover reduces air movement and helps retain humidity. Leave it undisturbed for several hours or overnight.
White paper works for darker prints, but it can hide a white or pale cream deposit. Black paper solves the opposite problem. The most practical setup is a sheet divided into black and white halves, with the cap centered across both colors. Glass slides, foil, or a clean nonporous card can also work, though the background contrast still matters.
Humidity is a trade-off. A dry cap may benefit from a tiny drop of water on top of the cap, not on the printing surface. Too much moisture can cause the cap to soften, smear pigment, or leave a muddy mark that is harder to interpret. If the specimen is already damp from rain, use a dry, covered setup and check it sooner.
When you lift the cap, look for more than color. Notice whether the print is dense or faint, whether it mirrors the gill pattern, and whether the deposit has an obvious central patch from the cap. Photograph it under neutral light before handling it. Warm indoor bulbs can make a cream print appear yellow or a brown print look more orange than it is.
Keep Samples Separate and Labeled
If you are printing more than one specimen, label the surface before placing each cap. Add the collection date, habitat, host tree or substrate, and a specimen number. A print with no field notes quickly loses much of its value.
For educational collections and microscopy work, let the print dry fully before storing it in a clean folded paper packet or protected sleeve. Avoid sealing a damp print in plastic. Trapped moisture invites mold and can blur the evidence you wanted to preserve.
Reading Spore Print Colors Without Overcalling Them
Color names sound straightforward until you compare a dozen real prints. “Brown” can mean tobacco brown, chocolate brown, cinnamon brown, or a nearly black purple-brown. The goal is not to force a perfect color label. It is to observe the best broad category first, then record the nuance.
White to cream prints occur across many common mushroom groups. They are useful, but they demand extra care because a thin white deposit can be invisible on white paper. Check the dark half of the surface, tilt it under side lighting, and look for a powdery pattern rather than assuming no print means a white print.
Pink to salmon-pink prints are often distinctive when they are truly present. Brownish-pink, however, can be difficult to separate from pale brown under poor lighting. Compare the print against a neutral white background and note whether the color has a cool rosy cast or a warmer tan cast.
Brown, purple-brown, and black prints need the most precise wording. A very dark brown print may appear black until you view its thinner edges. Purple-brown deposits can show a wine-toned or plum-like cast in daylight. Rather than writing “dark,” record what you actually see: “very dark purple-brown, darkest at center” is a much stronger field note.
Rusty orange to cinnamon prints are another meaningful category, especially when the color is unmistakably warm and iron-like rather than simply tan. These prints can stain light paper boldly, but a wet cap may cause pigment to spread. If the print is smeared, repeat the process with another mature cap before making a call.
Pair the Print With the Traits That Matter
A useful identification record combines the print with the mushroom’s full context. Start with the fertile surface. Are there true gills, pores, teeth, folds, or a smooth surface? Are gills attached to the stem, free from it, or running down it? These structural details often eliminate possibilities faster than cap color.
Next, document bruising, staining, odor, stem texture, veil remnants, ring presence, and the base of the stem. Carefully excavating the entire base can reveal a bulb, sheath, rooting stem, or other feature that would be missed by cutting the mushroom at ground level. Photograph the cap, underside, stem, and base before changing the specimen.
Habitat is equally important. Record whether the mushroom grew from soil, wood, buried roots, mulch, dung, grass, a living tree, or a dead log. Note nearby tree species when relevant. A mushroom growing in a lawn may be associated with buried wood, while one appearing from a stump has a much clearer substrate clue. Season and region can further refine the picture.
For a more confident result, use the print color alongside a reliable regional field guide, a local mycological group, or microscopic examination. Spore shape, size, ornamentation, germ pores, and reactions in appropriate reagents can separate species that look identical in a print. This is where a collected print becomes more than a color sample.
Common Spore Print Mistakes
The most common error is printing an immature mushroom. If the cap has not begun releasing spores, the blank surface tells you nothing. Collect mature specimens when possible, and make prints from more than one cap when the identification matters.
Another mistake is judging a print against the wrong background. A pale print on white paper may disappear, while a nearly black print on black paper can look thinner than it is. Split-color paper prevents much of this confusion.
People also confuse deposited spores with moisture stains, gill debris, or cap pigment. A real print usually follows the pattern of the gills or pores and has a dry, dusty appearance once fully dry. A wet, flat blotch with no visible structure deserves skepticism.
Finally, do not let a familiar-looking cap override contradictory evidence. If the print color, gill attachment, habitat, or stem base does not match your expected species, pause. Look-alikes are common, and confidence built on one attractive feature is exactly where field identification goes wrong.
Build a Better Collection Habit
A spore print is most valuable when it becomes part of a repeatable observation routine. Carry paper, a marker, a small container for covering caps, and a notebook or phone for habitat photos. This small kit turns an interesting find into a documented specimen.
For collectors building a reference set, keep each print tied to its notes and images. Over time, you will develop a sharper eye for the difference between white and cream, cinnamon and rusty orange, or dark brown and purple-brown. That pattern recognition is useful, but it should make you more curious, not more careless.
Myceli Nation is built for enthusiasts who appreciate that kind of hands-on mycology. Whether your interest is microscopy, edible culture work, or learning the language of mushroom traits, careful records make every specimen more informative.
The next time a mushroom catches your eye, let the cap be the invitation, not the answer. Make the print, study the surrounding clues, and leave room for the possibility that the specimen still has more to teach you.