
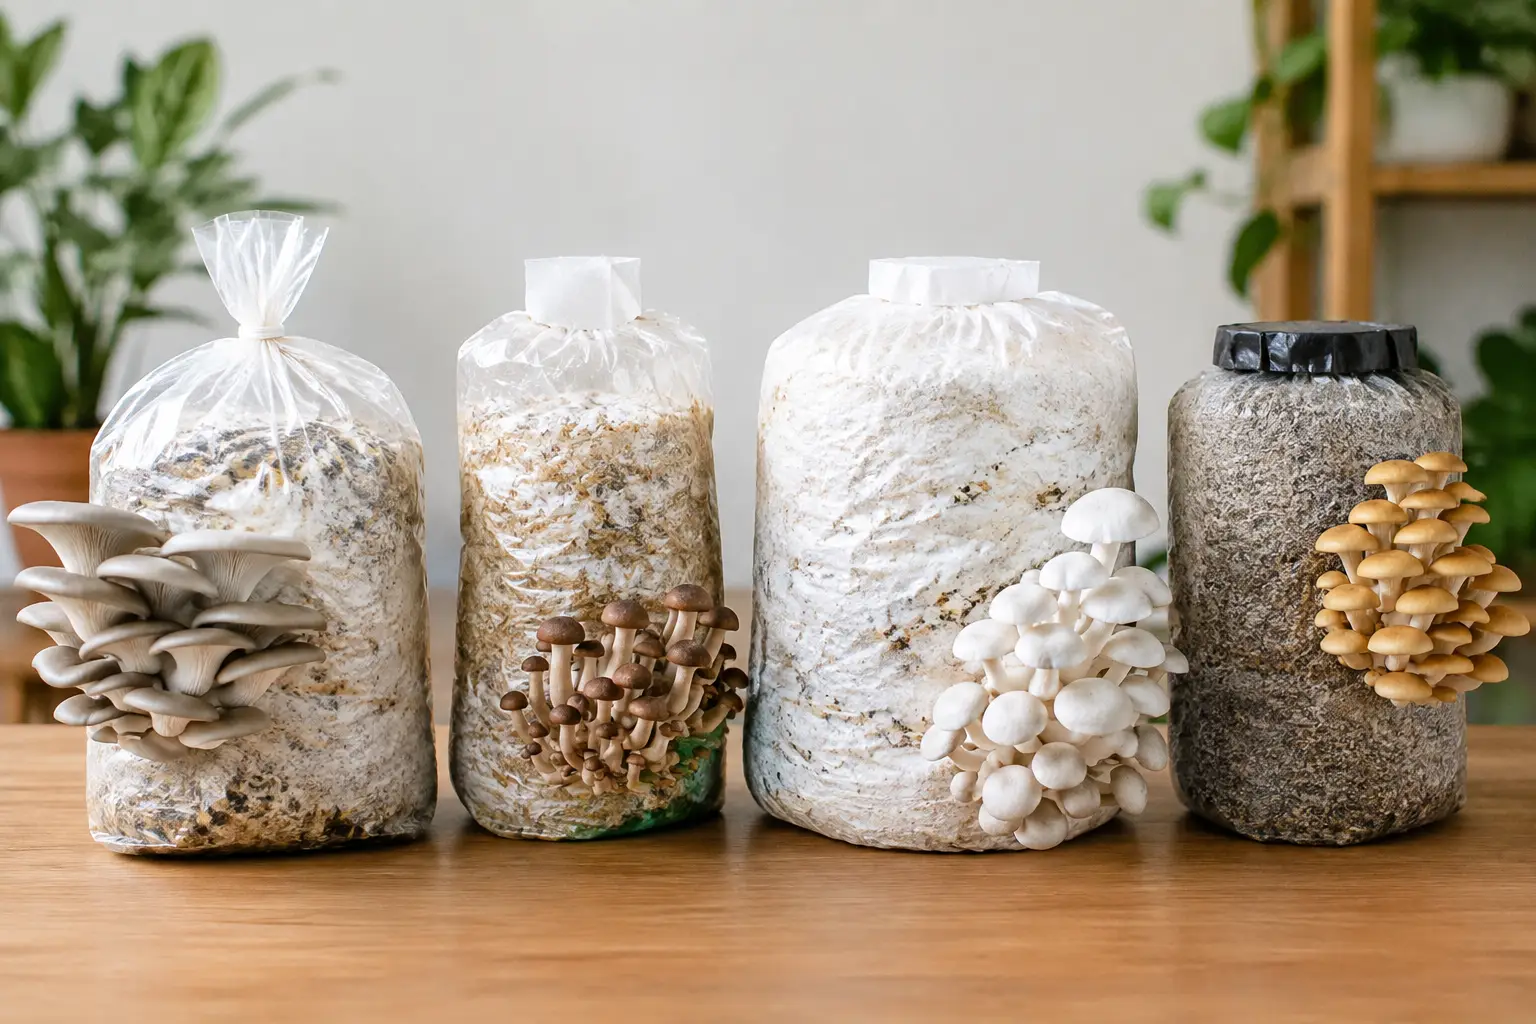
A grow bag can look like a simple piece of plastic until a stalled block, a wet filter, or an awkwardly oversized substrate load reminds you otherwise. This mushroom grow bags comparison focuses on the details that affect real home cultivation: material, filter patch, bag size, gusset shape, and whether a bag matches the workflow you actually use.
For edible culture growers, the best bag is rarely the biggest or cheapest option. It is the one that holds up through sterilization, allows appropriate gas exchange, colonizes evenly, and makes fruiting or transfer work less frustrating. Start with your species, substrate volume, and equipment, then choose the bag around those decisions.
Mushroom Grow Bags Comparison: What Changes Performance
Most mushroom grow bags are made from polypropylene, usually labeled PP. This material is popular because it tolerates the high heat of pressure sterilization far better than ordinary storage bags. A good cultivation bag stays flexible enough to fold and seal, yet strong enough to resist punctures when you mix grain or hydrated substrate.
The first split in any mushroom grow bags comparison is between filter patch bags and unfiltered bags. Filter patch bags are the everyday choice for supplemented sawdust blocks, straw-based blends, and many grain applications. The patch lets gases move while reducing the chance that airborne contaminants enter during colonization. Unfiltered bags can work for certain sealed or short-term uses, but they are less forgiving for bulk substrate work.
Bag thickness matters as much as the material itself. Thin bags are economical and can be perfectly useful for small grain runs, but they are more vulnerable around sharp hulls, dense spawn, or hard substrate edges. Heavier bags offer more confidence when handling larger blocks, especially if you load, mix, and move them often. The trade-off is simple: more material usually means a higher cost and slightly more bulk in the pressure cooker.
Filter Patch Ratings: 0.2 Micron vs. 0.5 Micron
The filter patch is not a decorative square. It is part of the bag’s gas-exchange system, and its rating should fit the stage and substrate you are running.
A 0.2-micron filter patch is the tighter option. It is commonly preferred for grain spawn, where cleanliness is the main priority and the contents do not require aggressive gas exchange. If you are working with millet, rye, sorghum, or mixed grain, a 0.2-micron patch is often a sensible match.
A 0.5-micron filter patch allows more airflow and is often used for fruiting blocks and supplemented sawdust substrates. Species that produce dense, active mycelium in larger blocks tend to benefit from the increased exchange. For many gourmet growers, this is the default filter type for hardwood fuel pellet and soy hull blends.
Neither rating is automatically better. A 0.5-micron patch on a grain bag may provide more exchange than needed, while a 0.2-micron patch on a large, highly active fruiting block can be more restrictive than ideal. Match the patch to the job rather than treating one rating as a universal upgrade.
Choose Bag Size by Finished Substrate Weight
Bag size is where many home growers overbuy. Large bags look efficient, but a large block needs more substrate, more sterilizer space, longer processing time, and more room to colonize evenly. If your pressure cooker is compact or you are testing a new culture, smaller runs are usually easier to manage.
For grain spawn, bags holding roughly 2 to 4 pounds of hydrated grain are practical for many small-scale setups. They fit more easily in common pressure cookers and are easier to break apart during colonization. Grain bags also benefit from having enough empty space to shake without stressing the seal or filter patch.
For supplemented hardwood blocks, 5-pound bags are a widely useful middle ground. They produce a substantial block without becoming unwieldy, and they work well for many oyster, lion’s mane, chestnut, and other edible culture projects. Larger 10-pound blocks can be productive, but they demand consistent sterilization and a culture that can colonize the substrate without dragging its feet.
A bag that is too full has several problems. It can be hard to seal properly, hard to mix, and slow to cool after sterilization. It may also press against the filter patch, which is not ideal if condensation develops. Leave enough headspace to fold the top cleanly and heat-seal it without fighting the bag.
Gusseted Bags Make Better Blocks
Gusseted bags have folded sides that expand into a broader base. Once filled, they form a stable rectangular block rather than a rounded, lopsided bundle. That shape is useful for efficient shelf space, more even colonization, and clean fruiting cuts later on.
A nongusseted bag can still work, particularly for grain or smaller substrate amounts. But for fruiting blocks, gusseted formats are generally easier to stack, label, and handle. The block holds its form instead of rolling around your workspace.
Look at the dimensions, not just the claimed capacity. Two bags may both be sold as 5-pound bags but differ in width, height, or gusset depth. A wider bag creates a flatter block, while a narrower bag creates a taller one. Flat blocks can be easier to arrange on shelves, but overly shallow blocks may dry faster after opening. Taller blocks save horizontal space, although they can be harder to fit into a low-clearance sterilizer.
Pre-Sealed, Open-Top, and Injection Port Bags
Open-top filter patch bags are the most flexible format. You load substrate, fold the top, and seal it after sterilization or once the contents have cooled, depending on your workflow. They suit growers who make their own grain spawn, supplemented blocks, or custom substrate recipes.
Pre-sealed bags save a step and can be convenient for specific prepared products, but they offer less flexibility if you need to adjust fill height or transfer material. They are best when the bag’s intended volume closely matches your project.
Injection port bags include a self-healing port designed for syringe inoculation. They are convenient for low-disturbance inoculation and are especially useful for growers who want to avoid opening a bag after sterilization. The port does add cost, and it does not replace clean technique. A compromised seal, poor sterile process, or contaminated culture can still derail the bag.
For many growers, injection ports are most useful on grain bags. Once colonized, the grain can be transferred into larger substrate bags in a clean workspace. For hardwood fruiting blocks, a standard filter bag is often the more versatile choice.
Match the Bag to Your Cultivation Setup
Your equipment should guide the purchase. If you use a 23-quart pressure cooker, check both the bag dimensions and the number of filled bags it can safely hold. A bag that technically fits before loading may become too tall once filled, folded, and sealed.
If you sterilize in larger equipment, heavier bags and larger blocks become more practical. That does not mean every project needs to scale up. Smaller bags are excellent for testing a new edible culture, dialing in hydration, or producing several blocks with staggered fruiting schedules.
Humidity and workspace habits matter too. Filter patches should stay dry and protected from direct drips. Avoid packing bags so tightly that patches press against wet surfaces or the walls of a condensation-heavy tub. After inoculation, give each bag enough air space that the filter can do its job.
A clean heat seal is another overlooked detail. Seal above the substrate line, keep the sealing area dry, and avoid wrinkles. If using an impulse sealer, test the setting on an empty bag first. Too little heat leaves a weak seal; too much can thin or burn the polypropylene.
A Practical Buying Checklist
Before adding cultivation bags to your supply run, check these five points:
- Choose polypropylene bags rated for pressure sterilization, not ordinary food-storage plastic.
- Use 0.2-micron patches primarily for grain and 0.5-micron patches for larger fruiting substrates when appropriate.
- Select capacity based on your pressure cooker, shelving, and desired finished block weight.
- Favor gusseted bags for stable, stackable fruiting blocks.
- Buy a small test pack first if you are changing substrate recipes, cultures, or sterilization equipment.
At Myceli Nation, the strongest cultivation setups usually start with matching components rather than chasing a single “best” bag. A dependable edible culture, an appropriate substrate, and a bag that fits your process will take you further than oversized blocks and bargain plastic ever will.
Treat your first bag choice as a controlled trial. Run a few blocks, watch how they colonize and hold moisture, then adjust size or filter rating with a clear reason. That small bit of observation turns supply shopping into a repeatable grow plan.